… or it wasn’t that extreme after all
Intro
Today I came up with another #short, slightly extreme. It wasn’t as extreme as previous examples, but it was still quite fun to fix.
If you are a long-time reader of my blog then you probably know about my previous posts covering extreme repairs.
I made a list of those posts for the fresh blog readers:
- Extreme refurbishing: Episode 1 – Commodore 64
- Extreme refurbishing: Episode 2 – Atari 800 XL – Part one
- Extreme refurbishing: Episode 2 – Atari 800 XL – Part two
- Extreme deYellowing – Atari 1040 STF
- Extreme refurbishing: Episode 3 – Commodore 116
- Extreme refurbishing: Episode 4 – Vampiric Amiga 500
- Extreme refurbishing: Episode 5 – Wasabi C64 – Part One
- Extreme refurbishing: Episode 5 – Wasabi C64 – Part Two
- Extreme refurbishing: Episode 5 – Wasabi C64 – Part Three
- Amiga 2000 – semi-extreme refurb – Part one
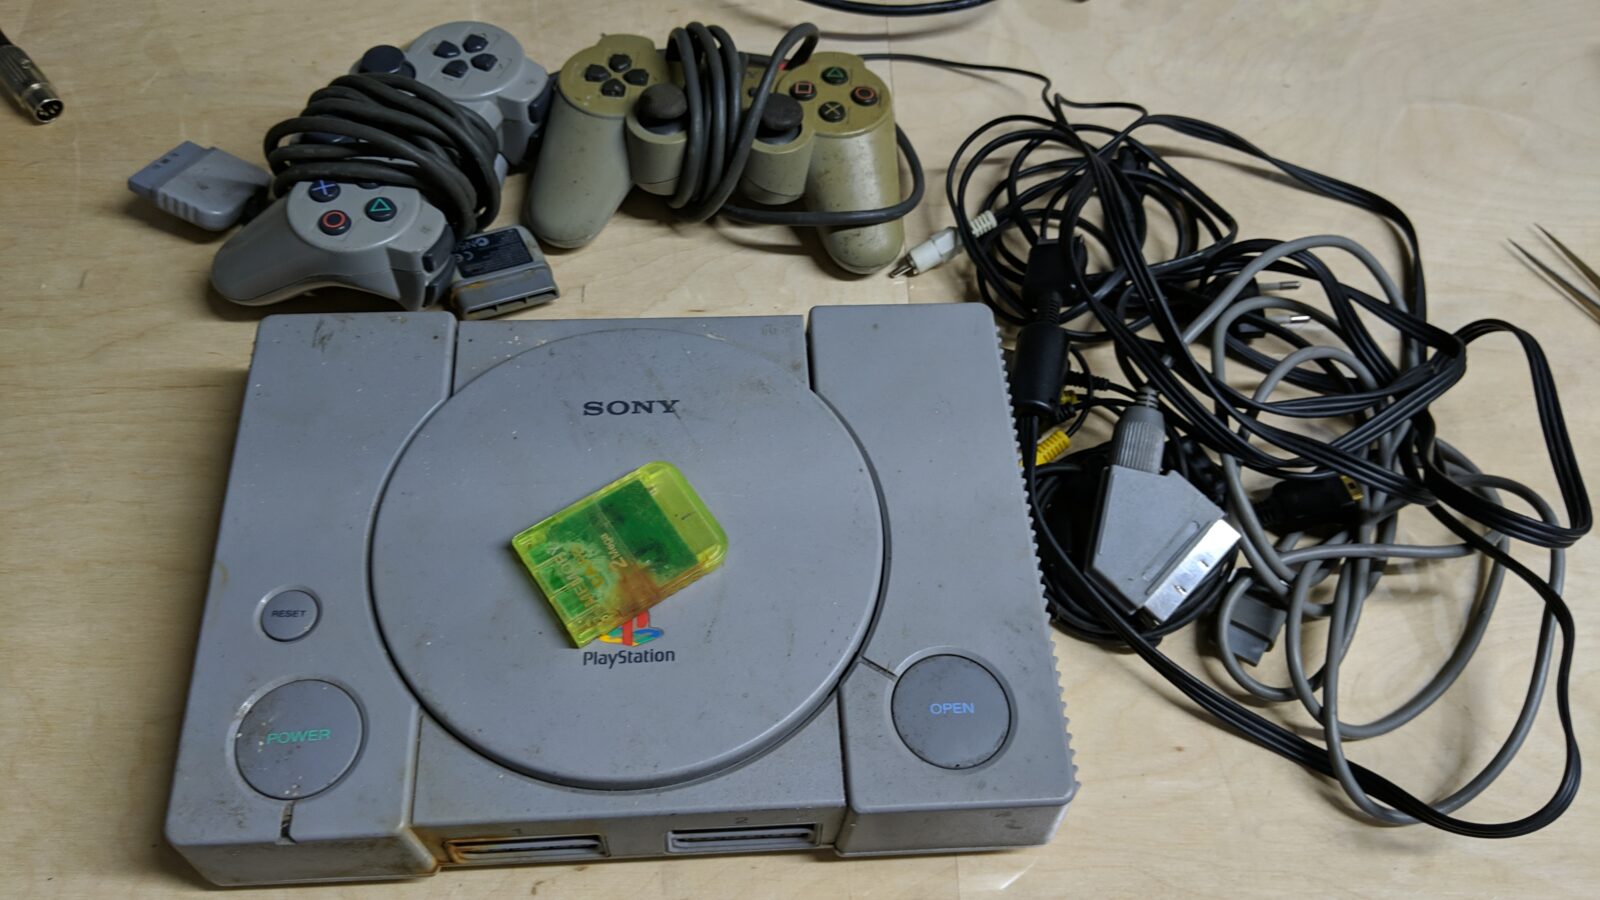
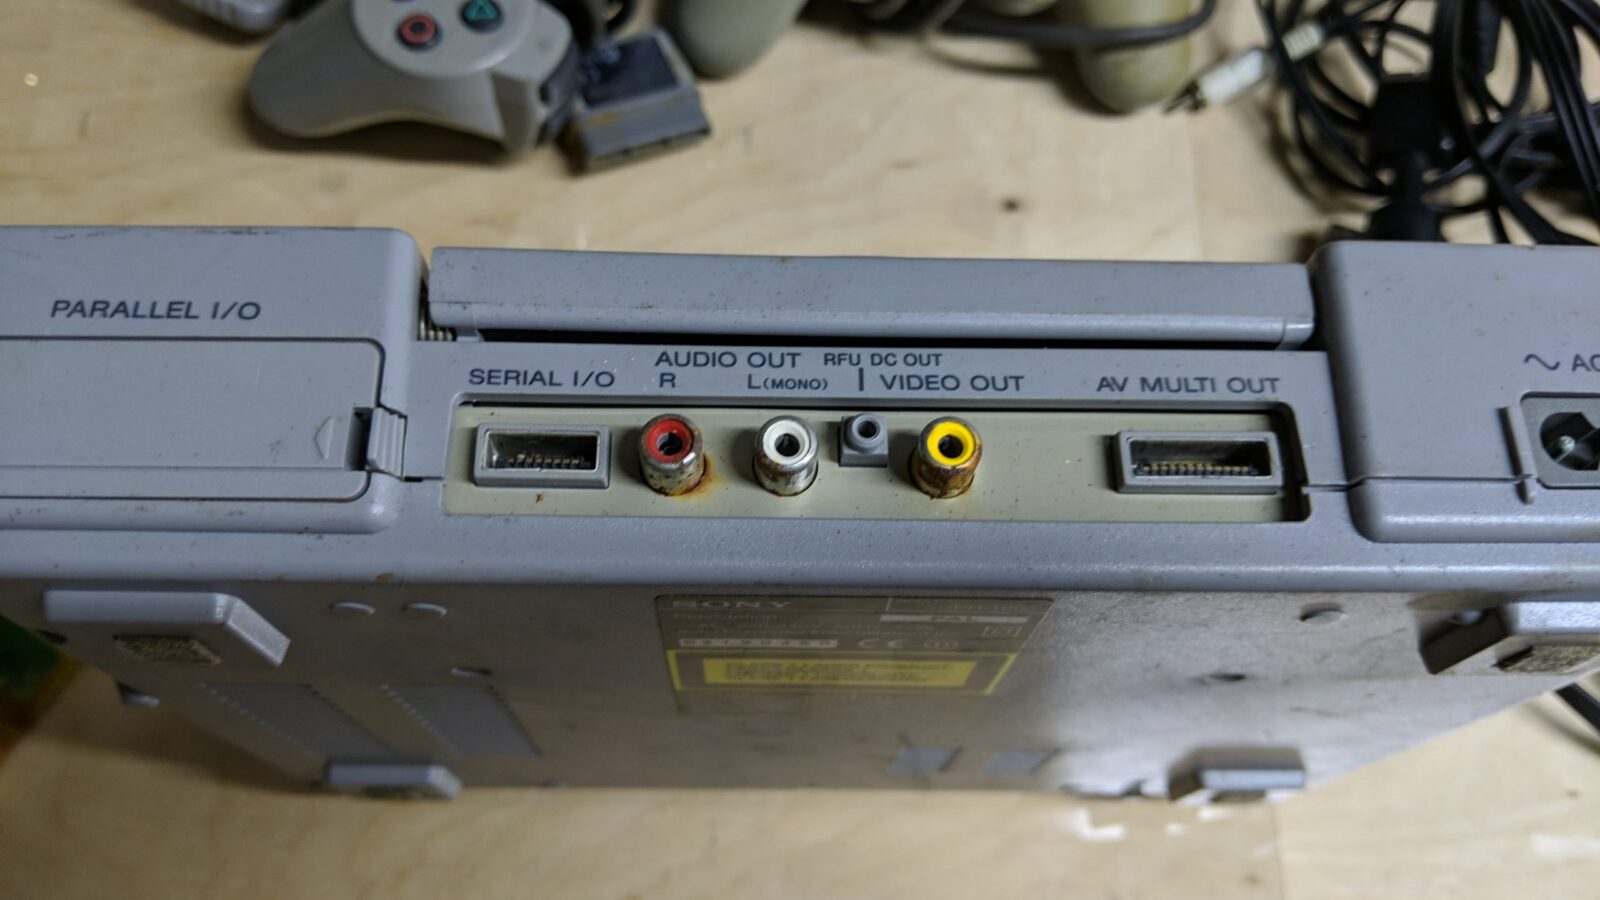
The Sony PlayStation 1
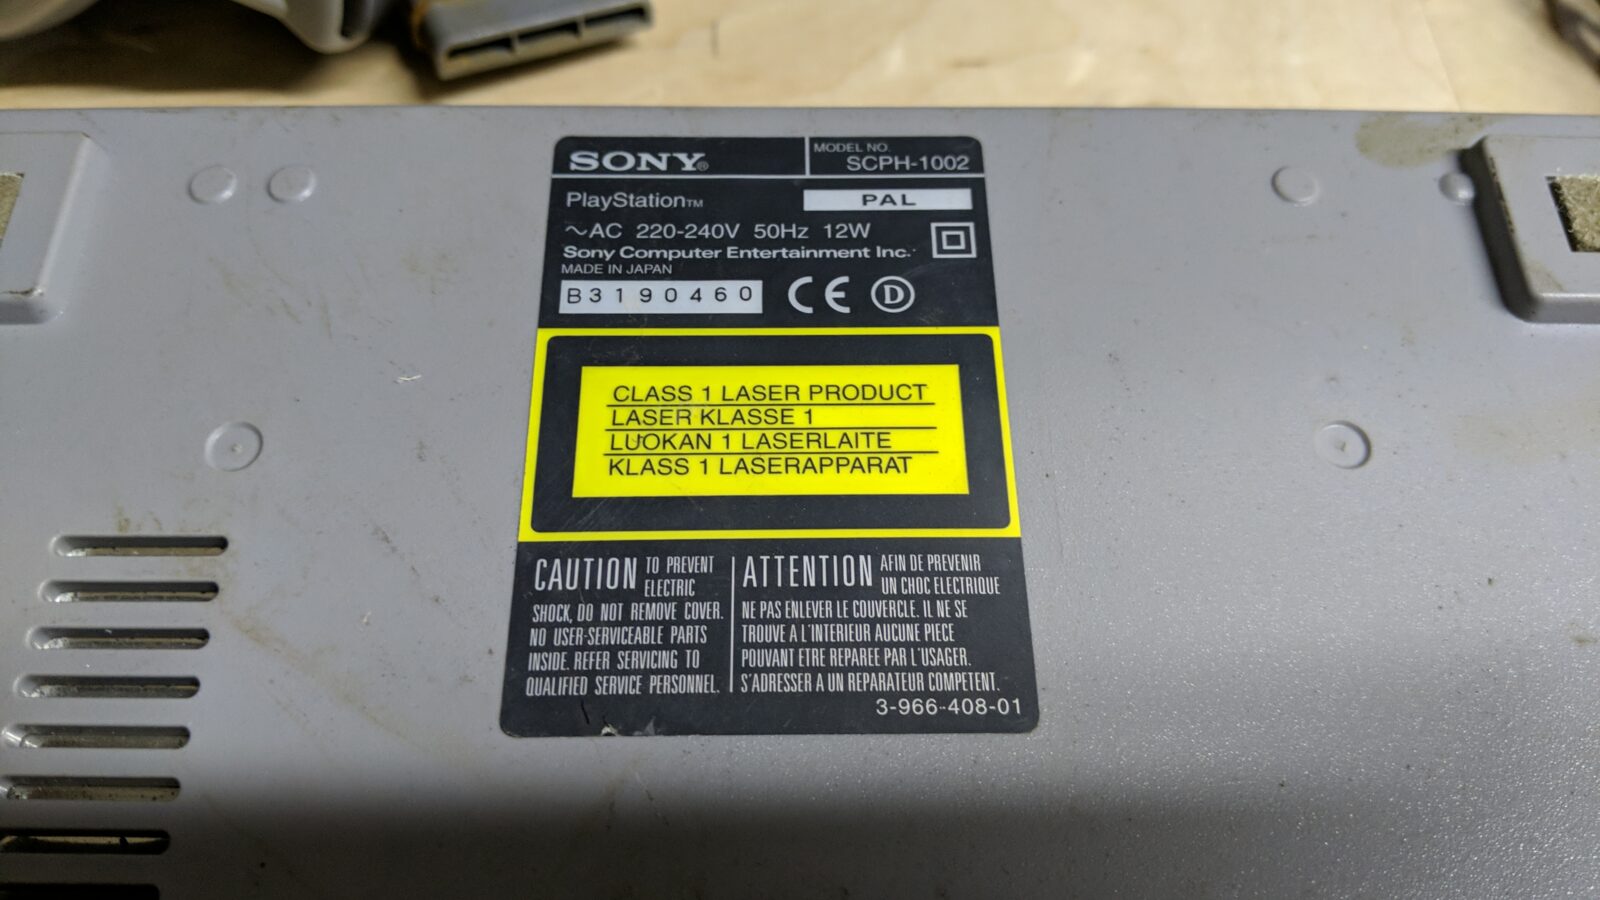
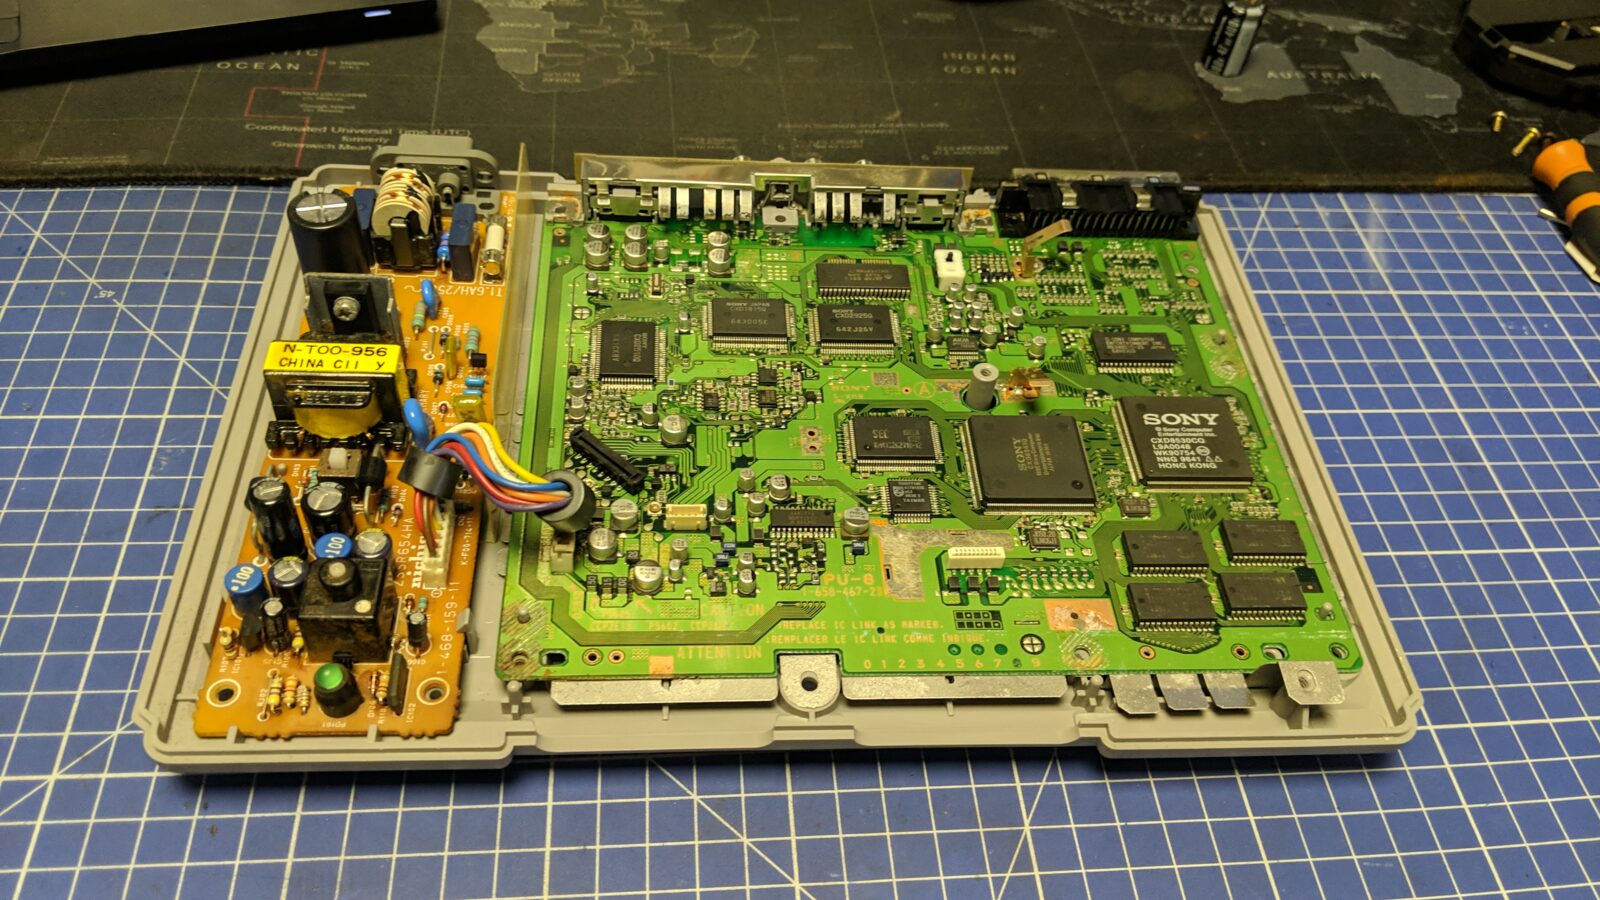
Błażej/Lamers^BooM asked me to have a look inside this console. I am not a PlayStation expert but apparently, this is one of the early releases – SCPH-1002
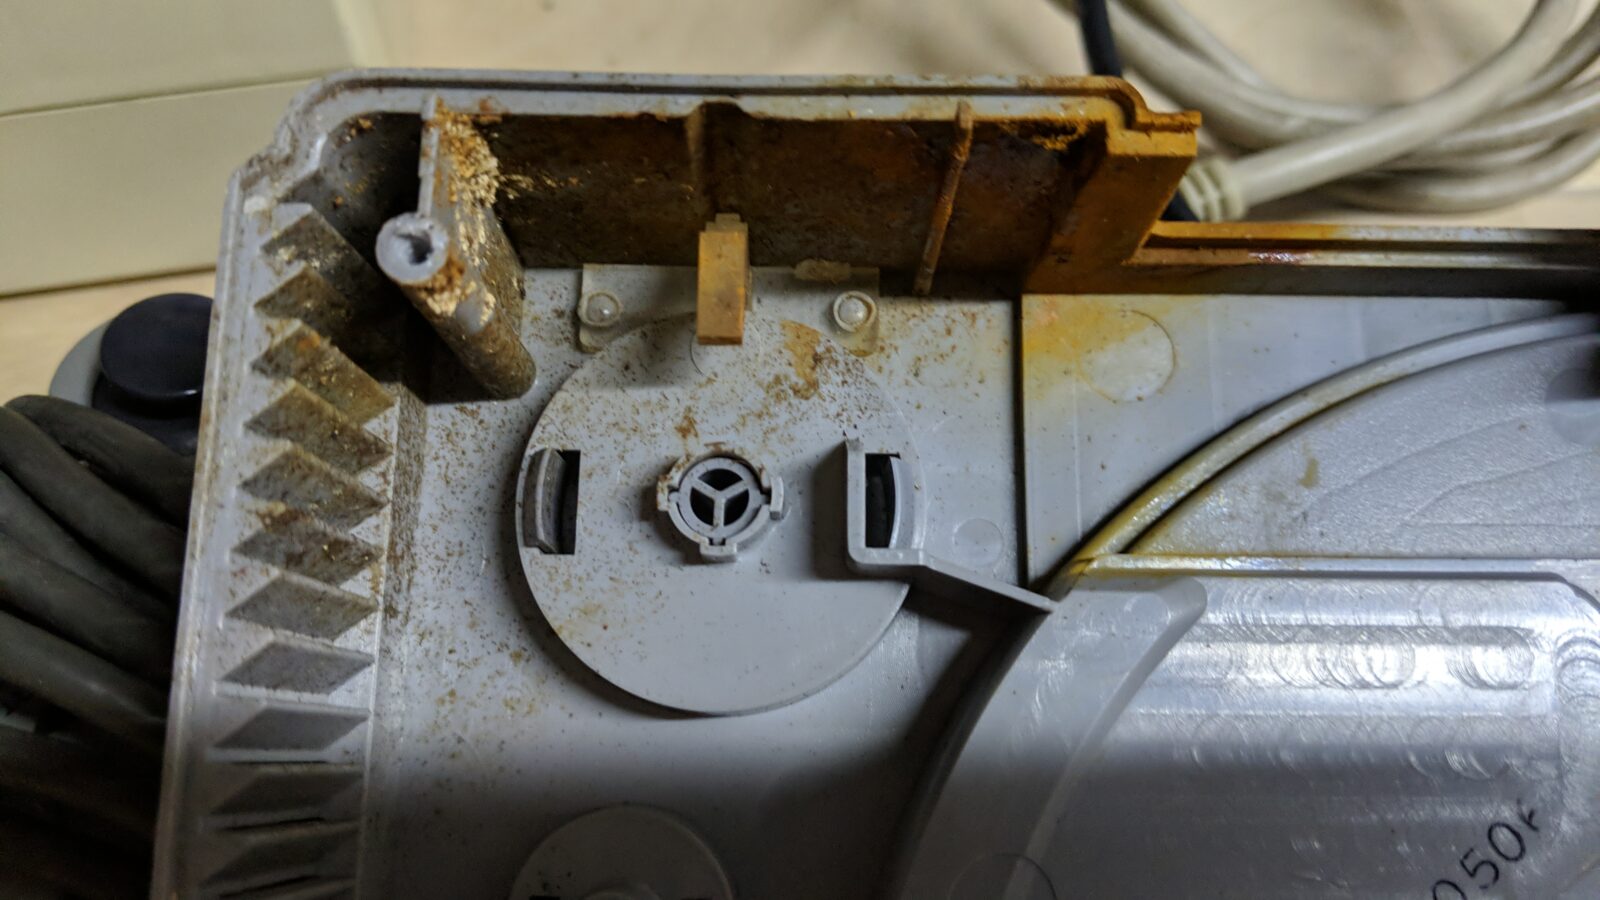
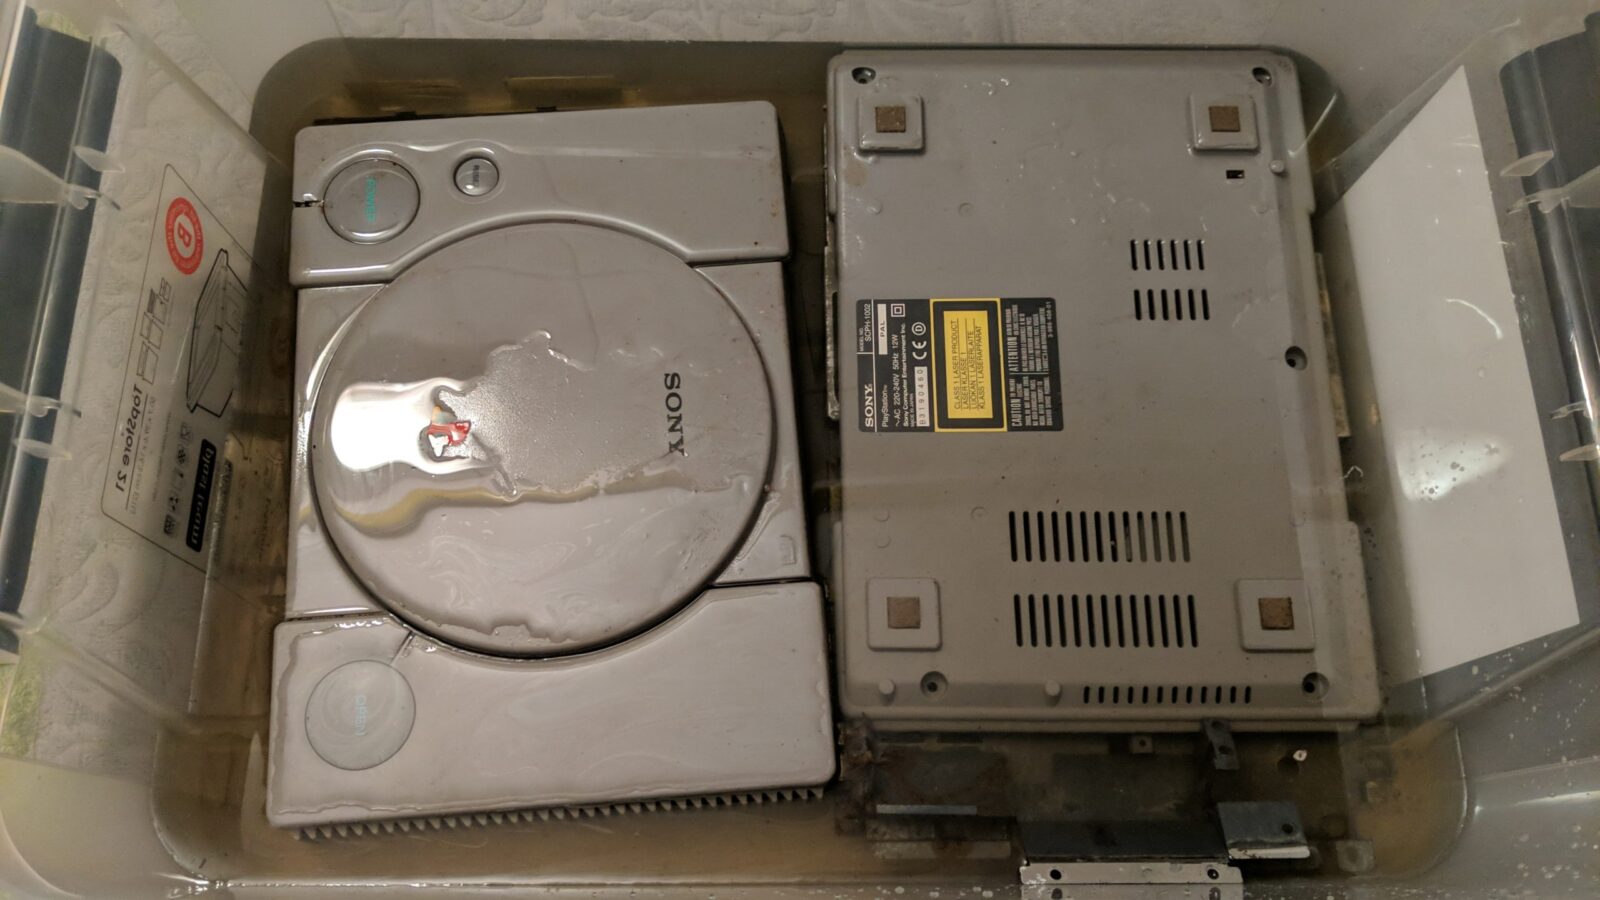
It was quite dirty and covered with rust so I assumed it was partially submerged in some sort of liquid for a decent amount of time.
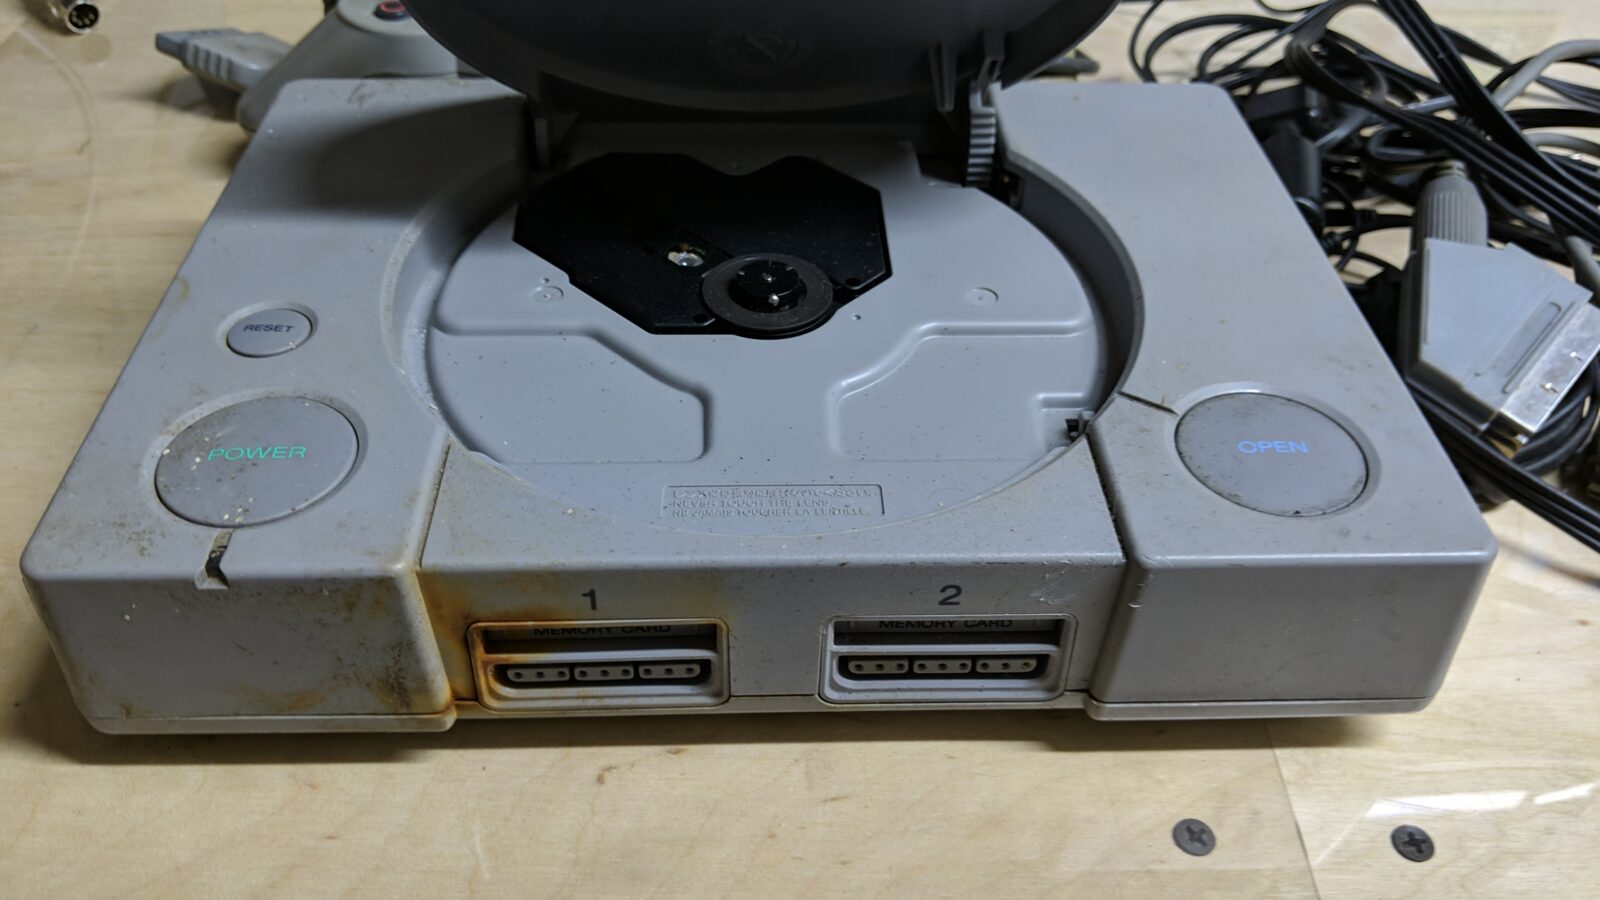
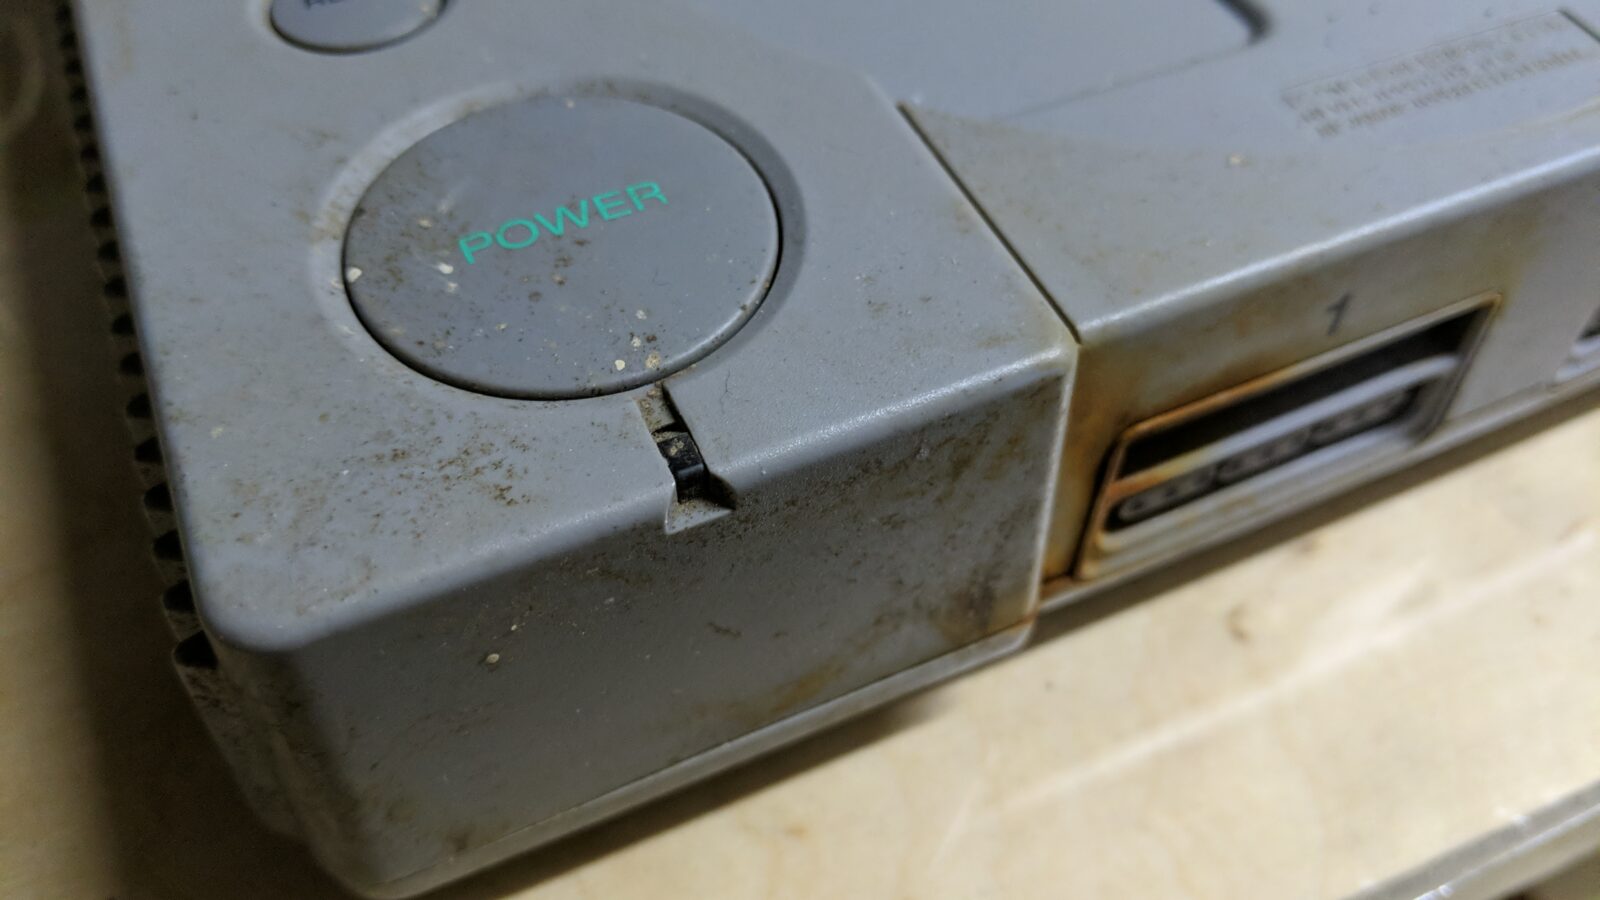
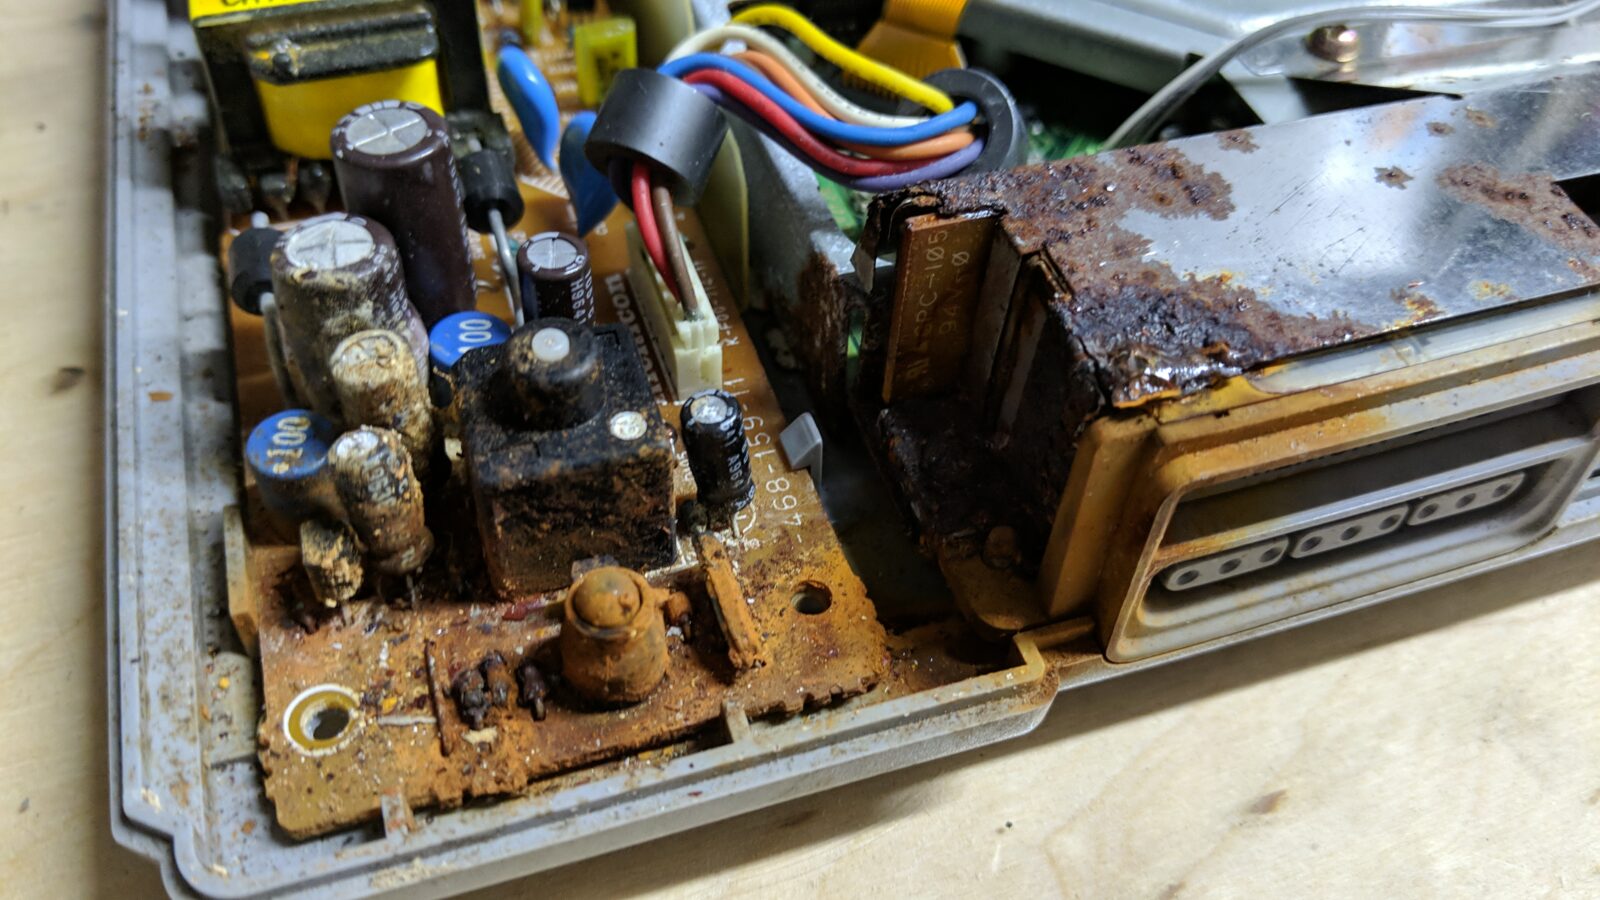
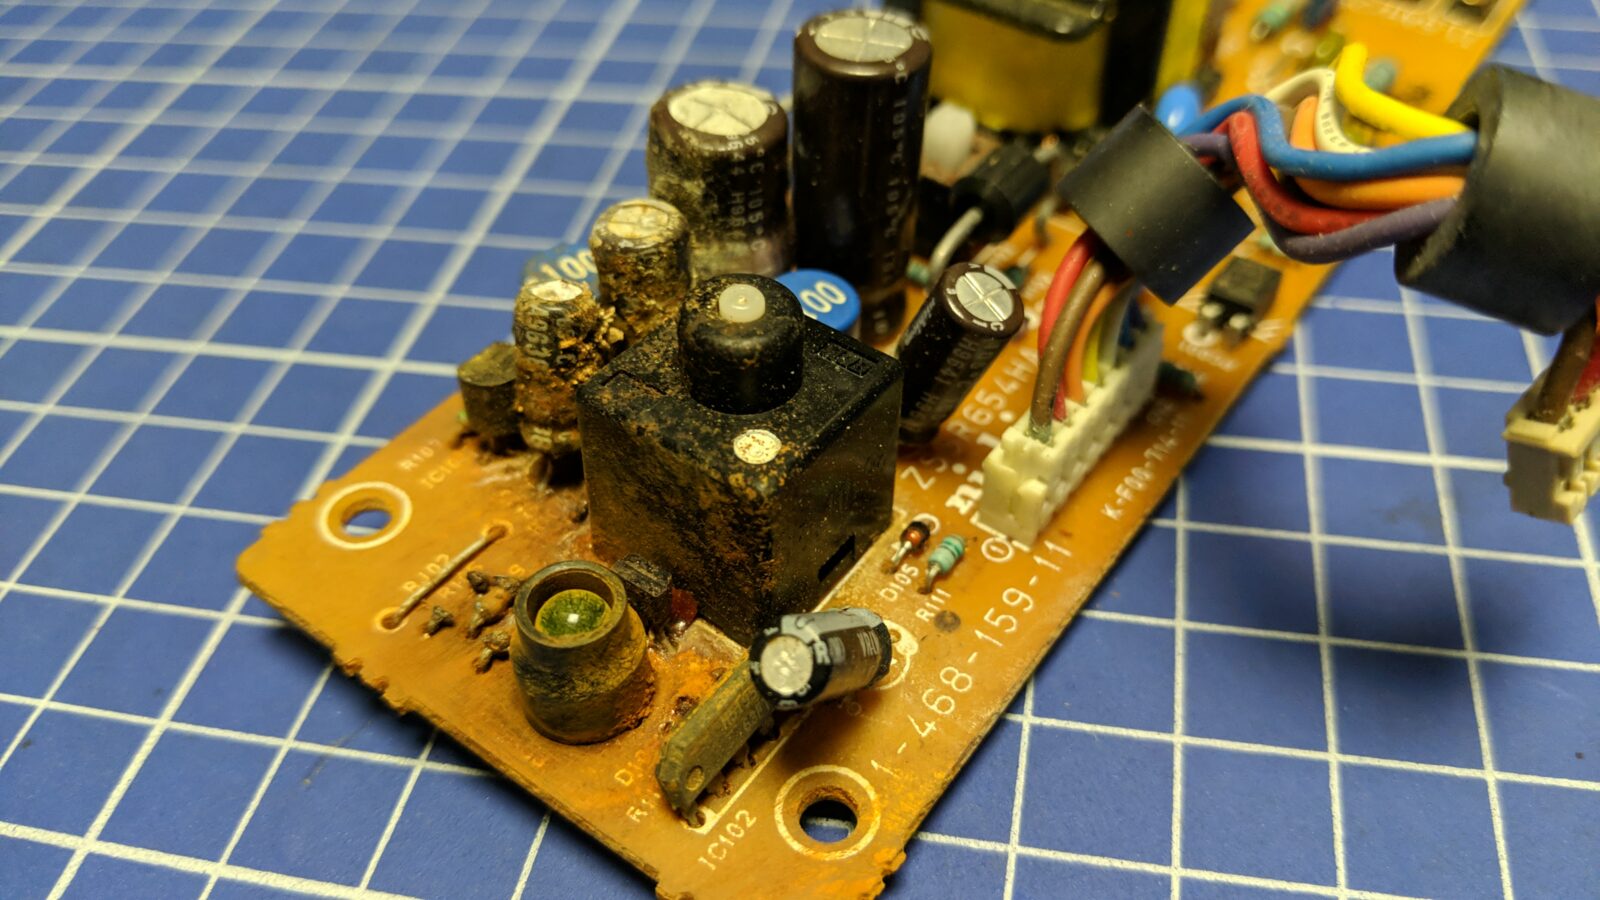
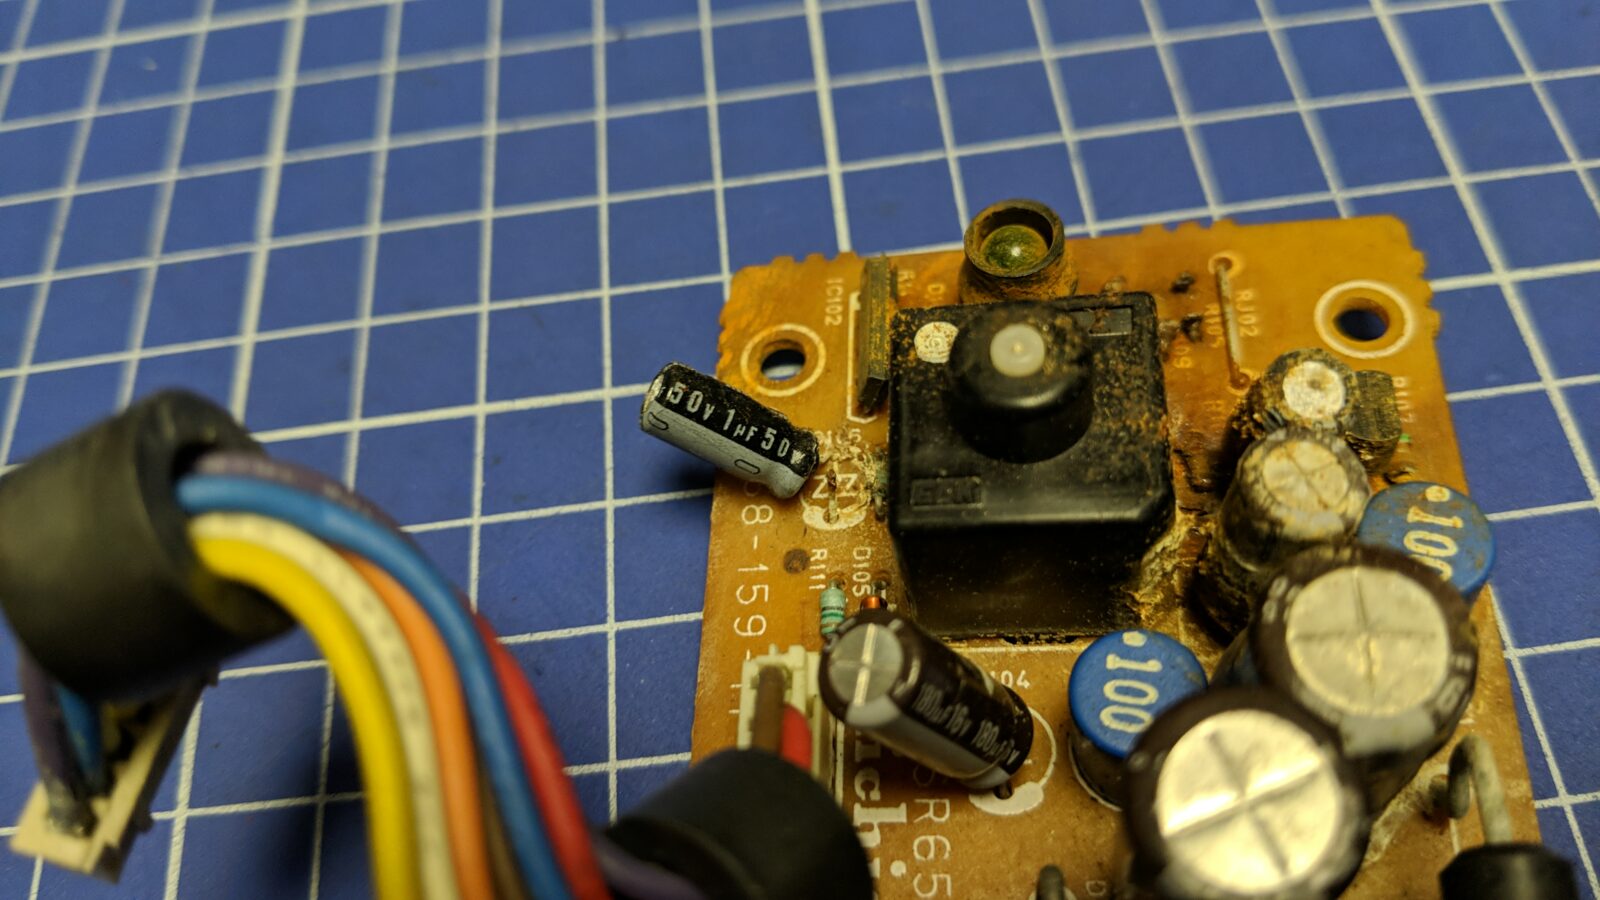
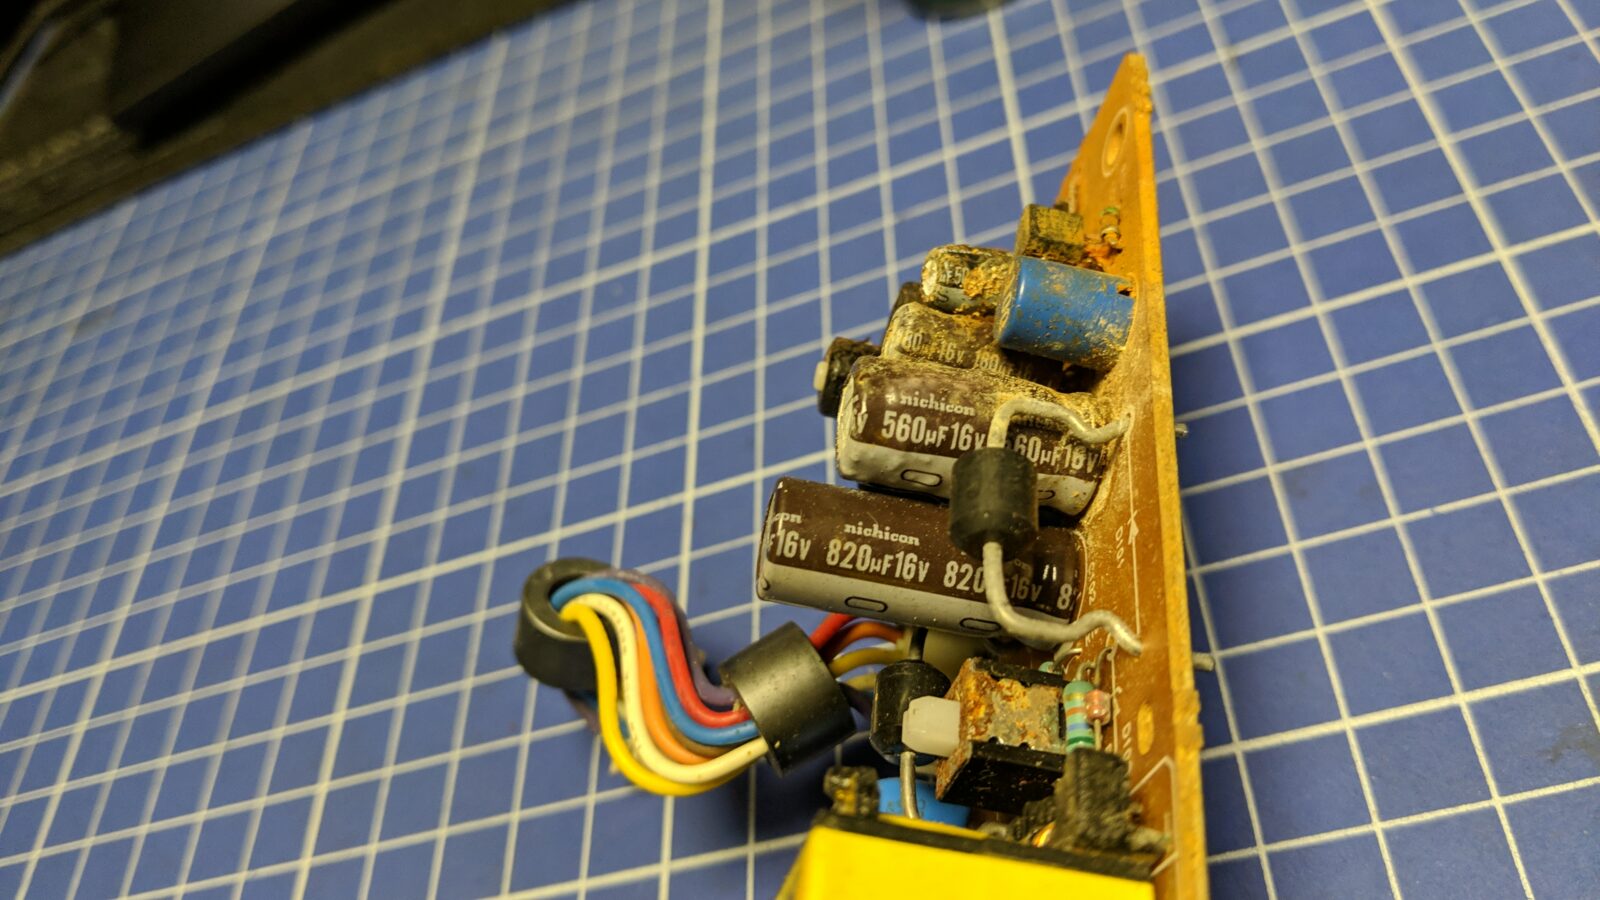
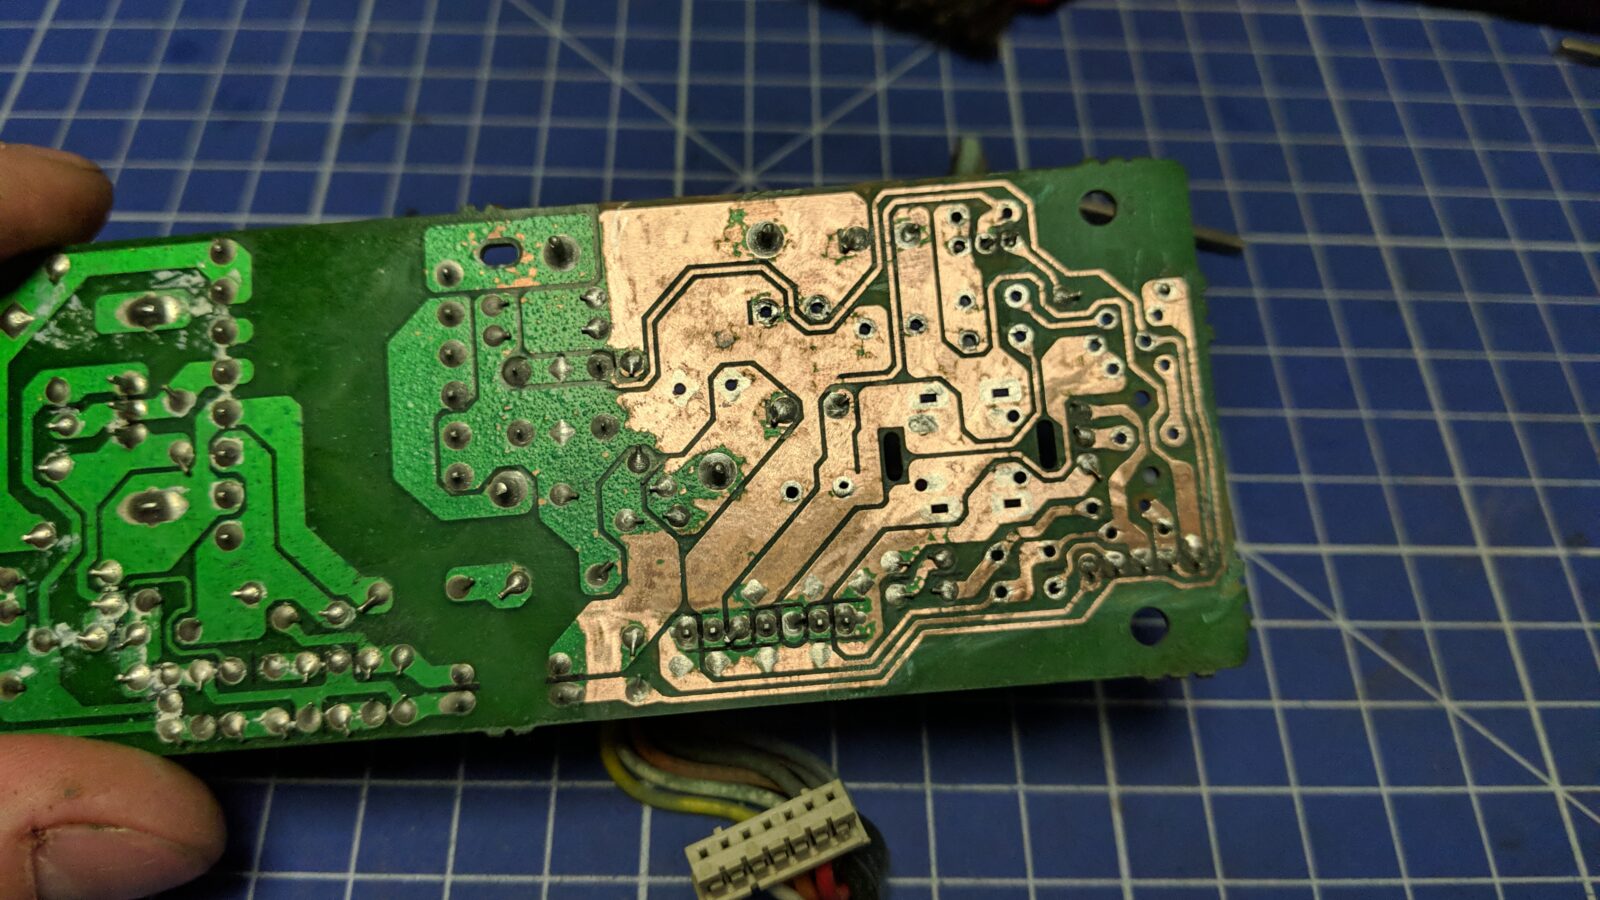
After opening it, it was clear that the PSU and shielding were completely covered in rust.
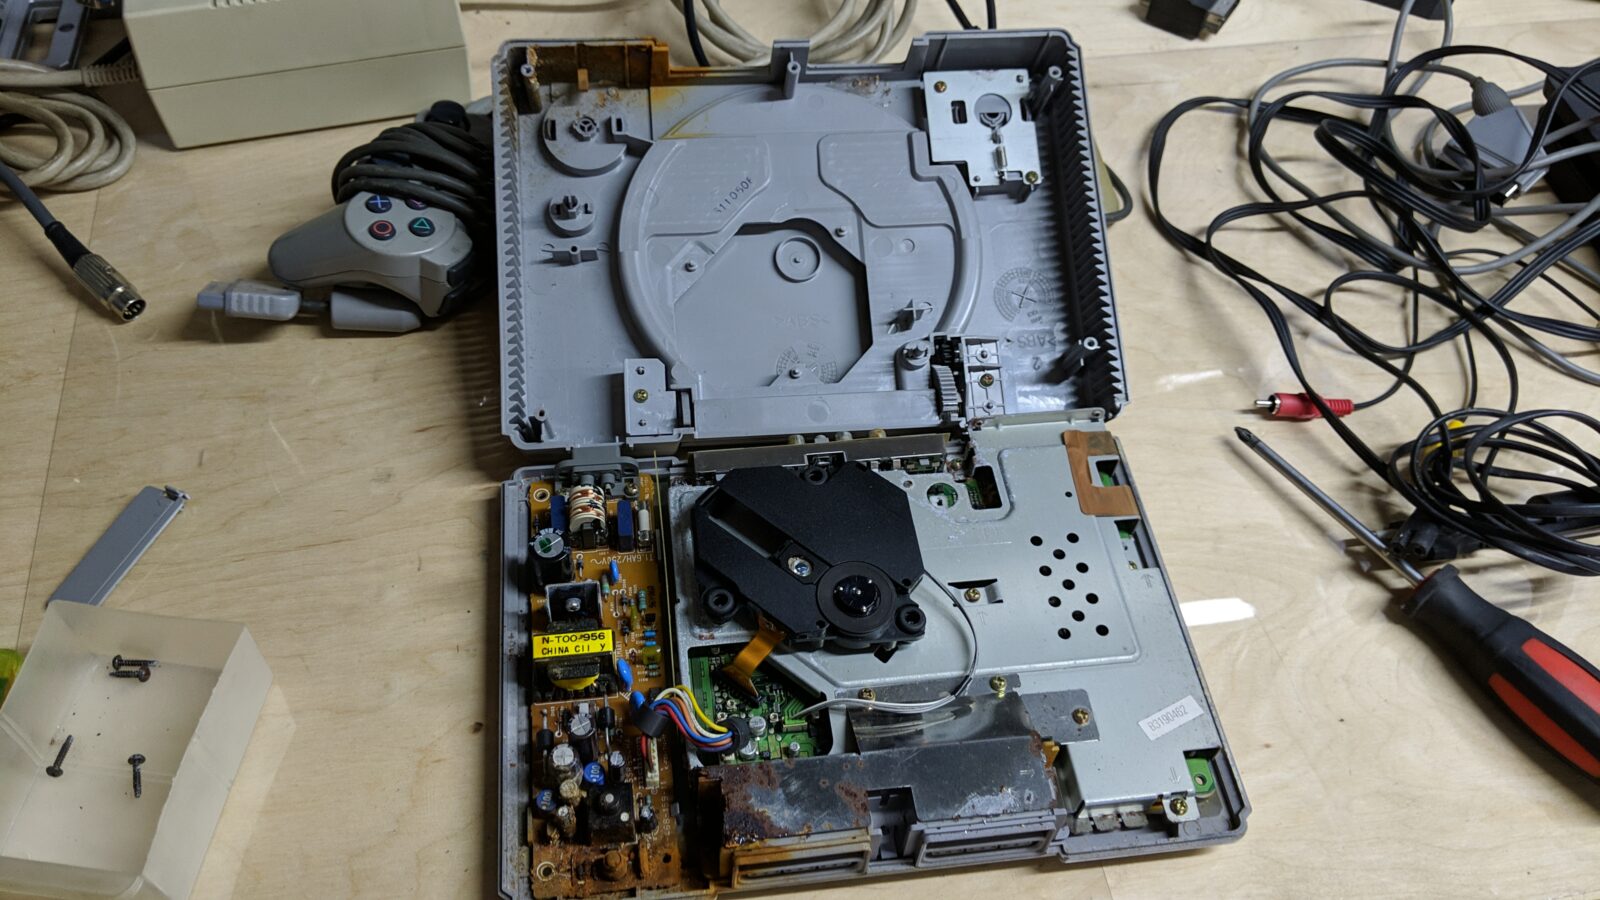
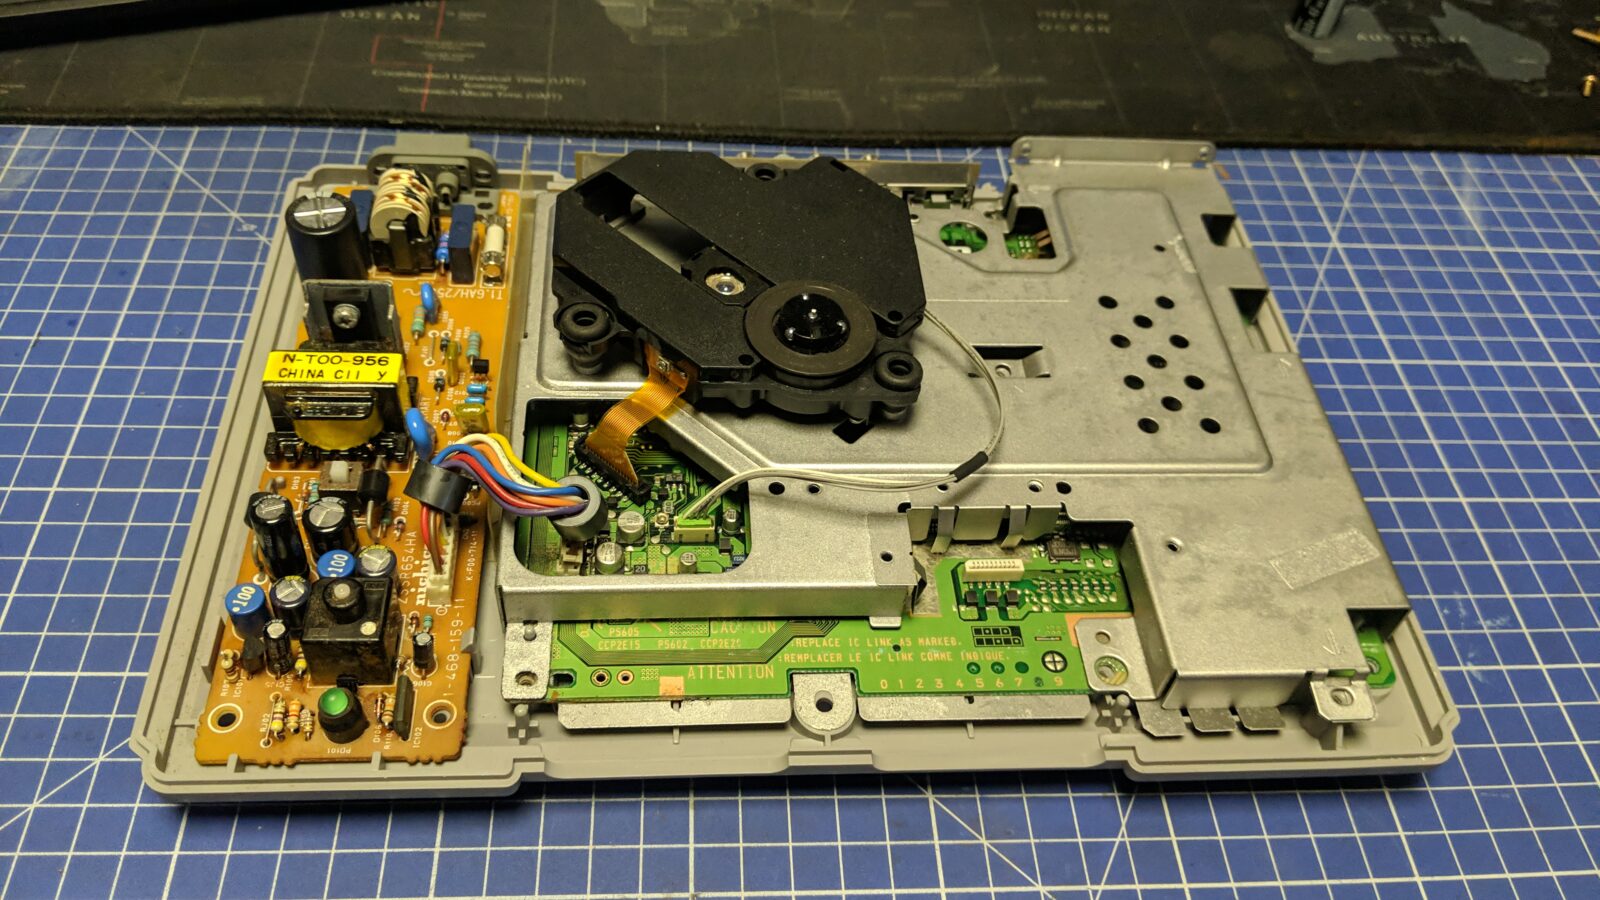
I’ve managed to unscrew internal parts with the use of Black Magic lol 😀
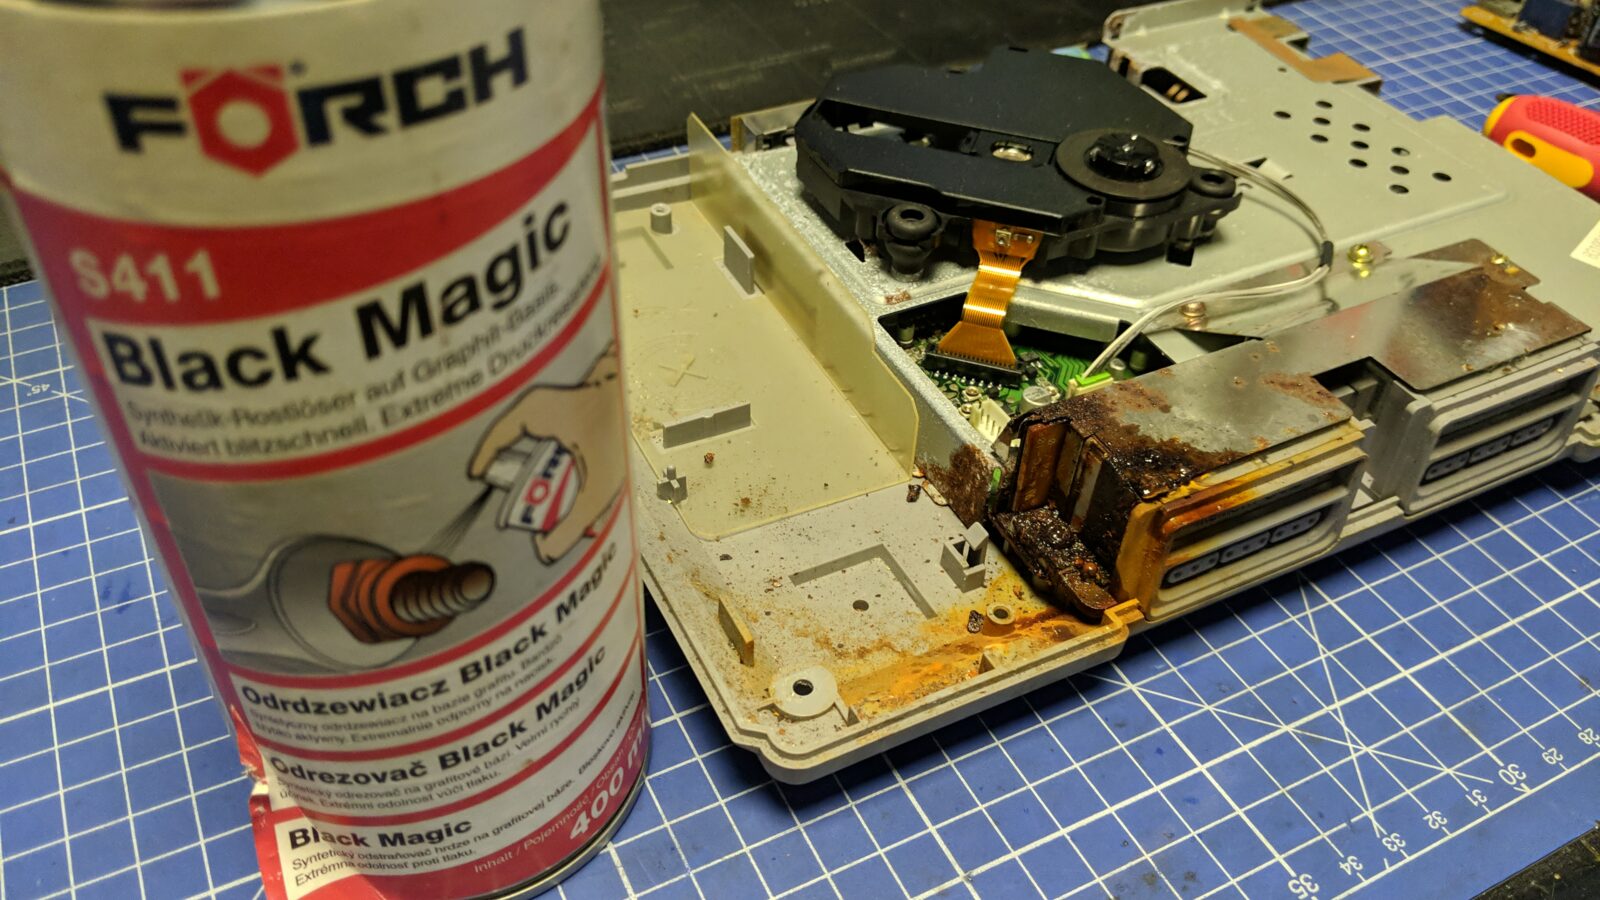
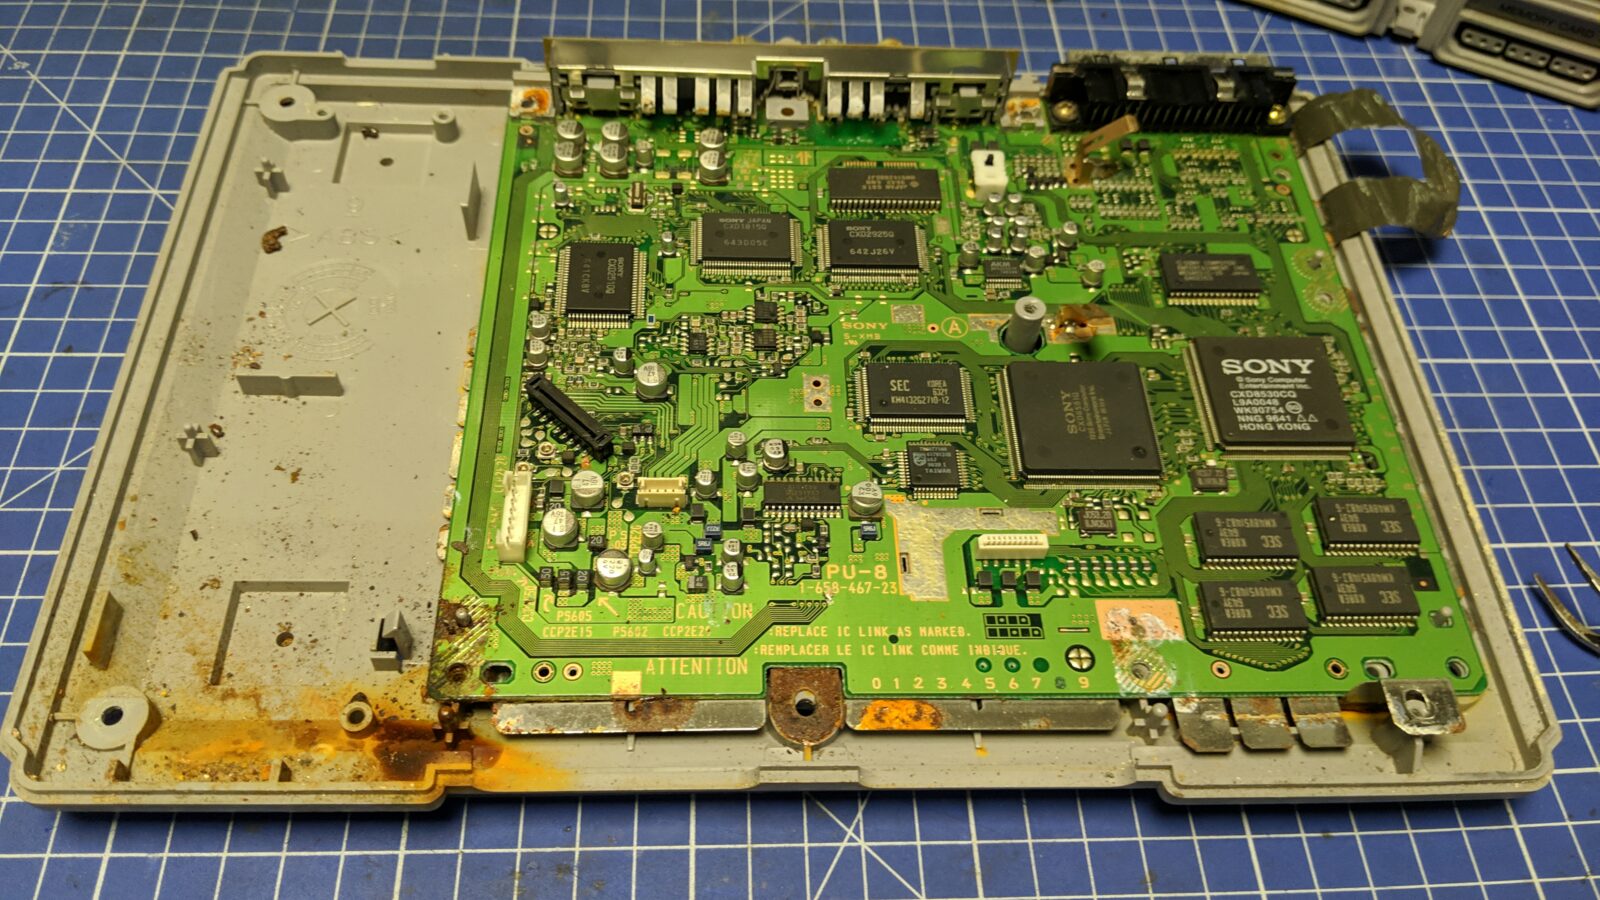
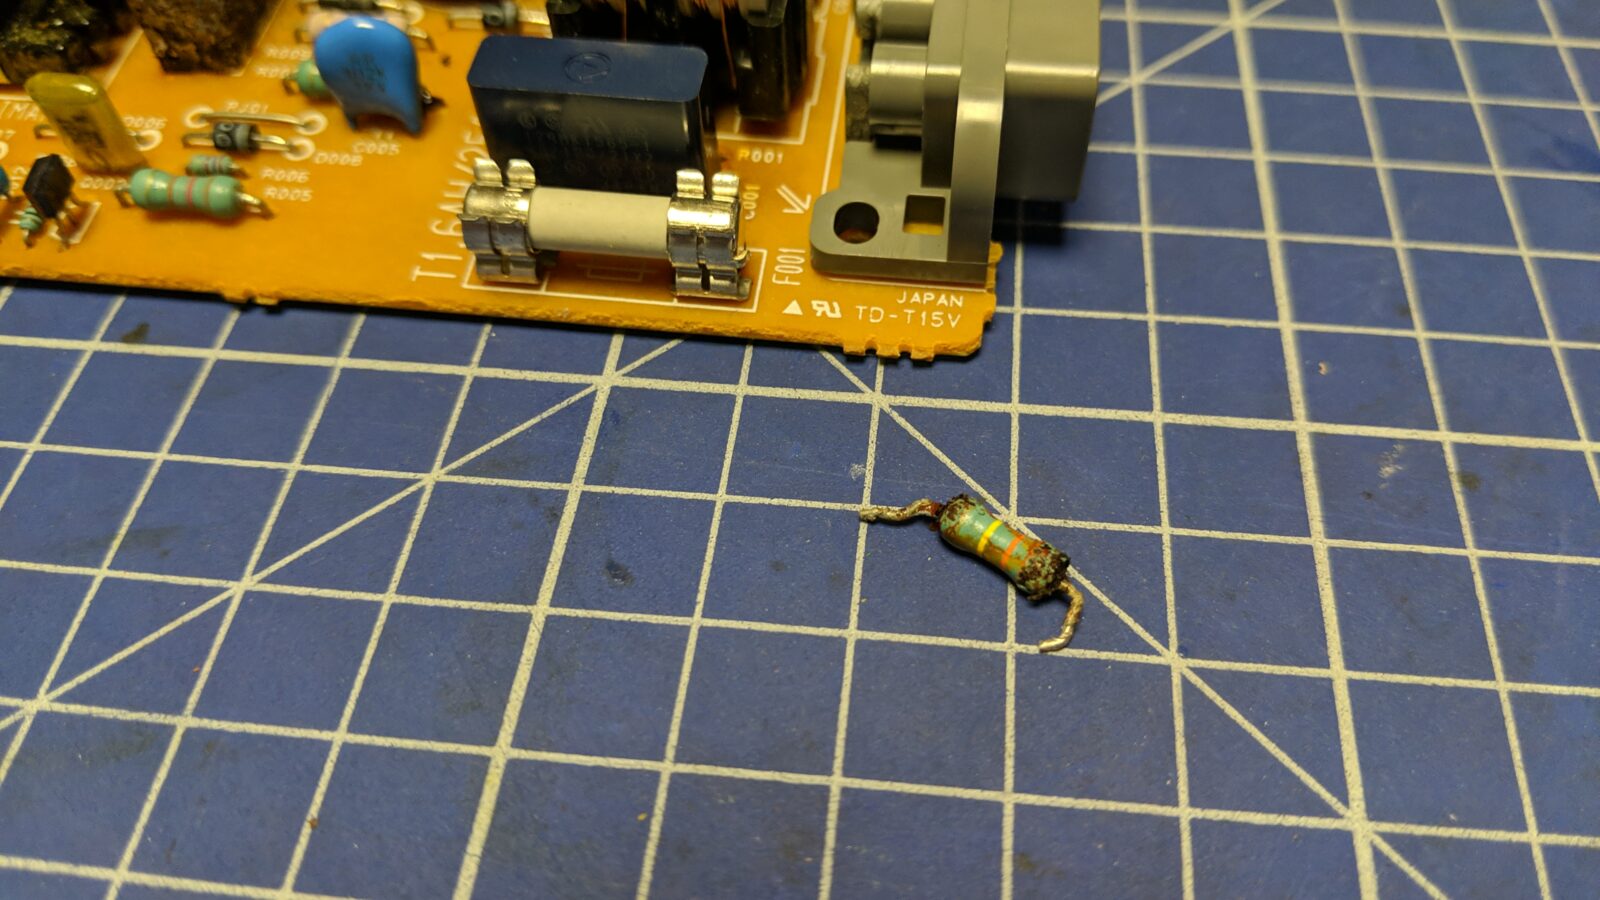
Most of the caps and some resistors were destroyed and required replacing.
The repair
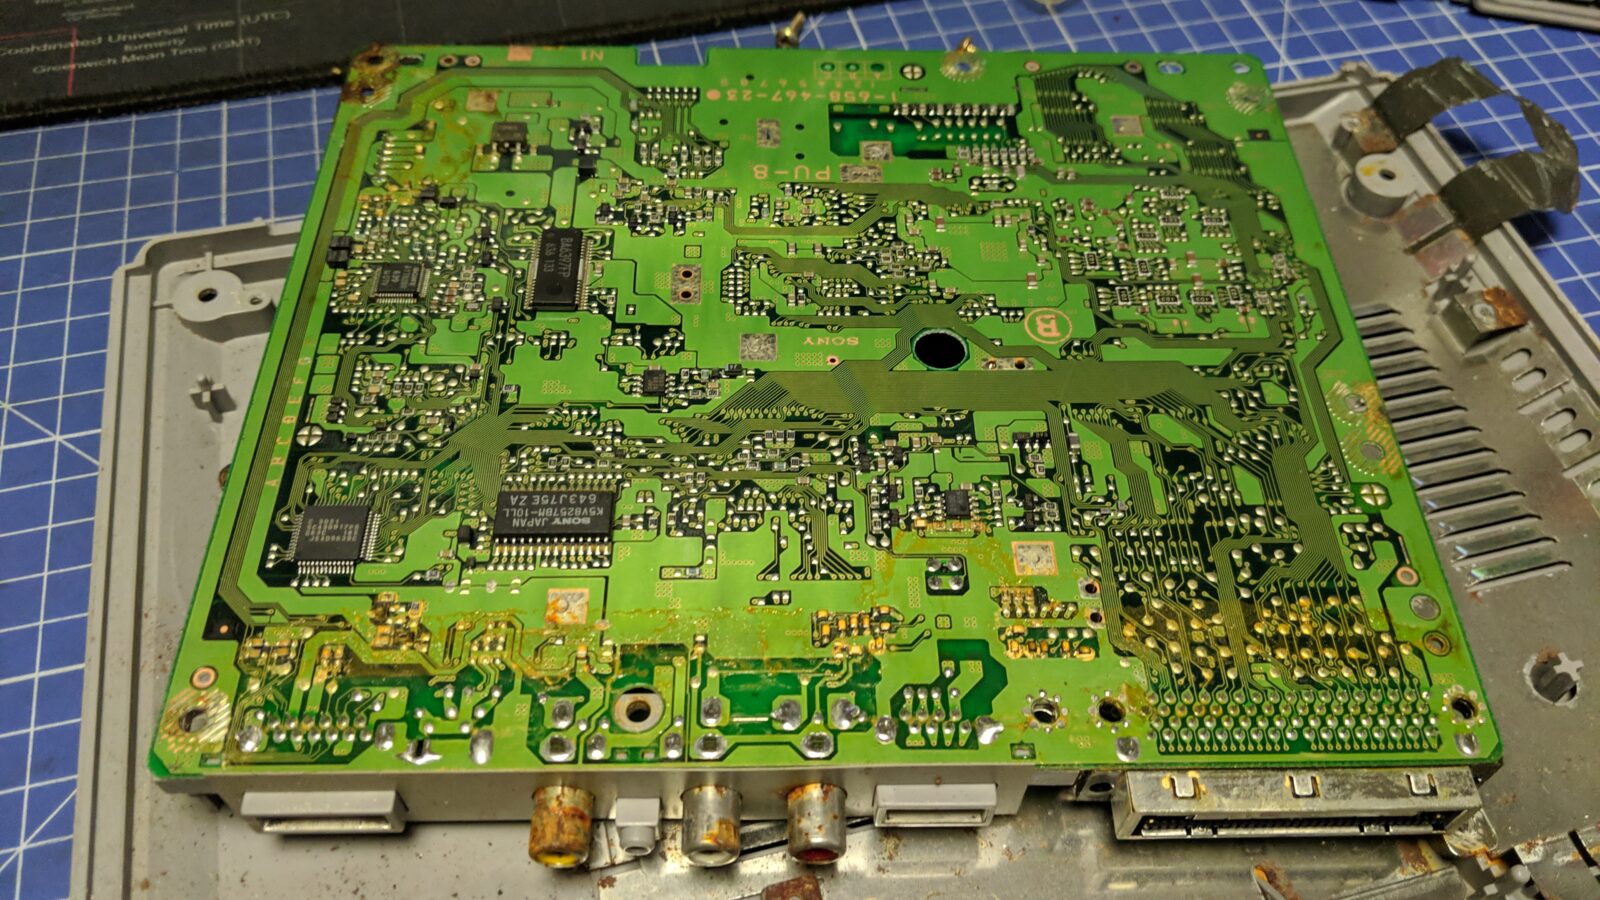
I’ve removed all destroyed parts and cleaned the bloated solder mask on the other side of the PCB.
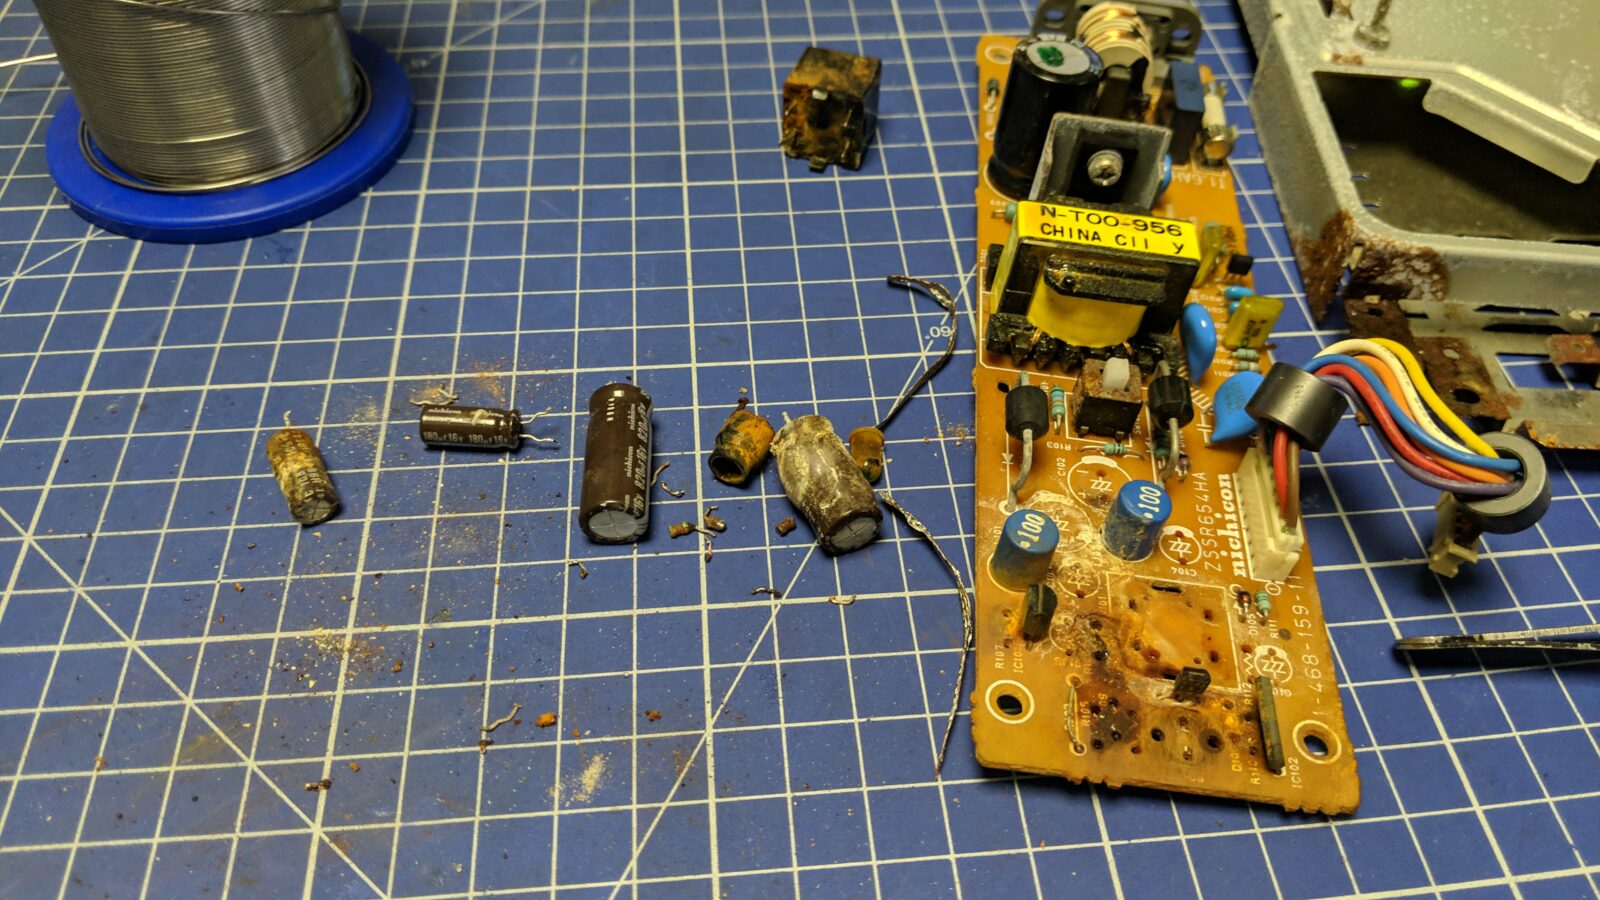
After that was done, I put the PSU PCB along with the logic board into ultrasonic cleaners.
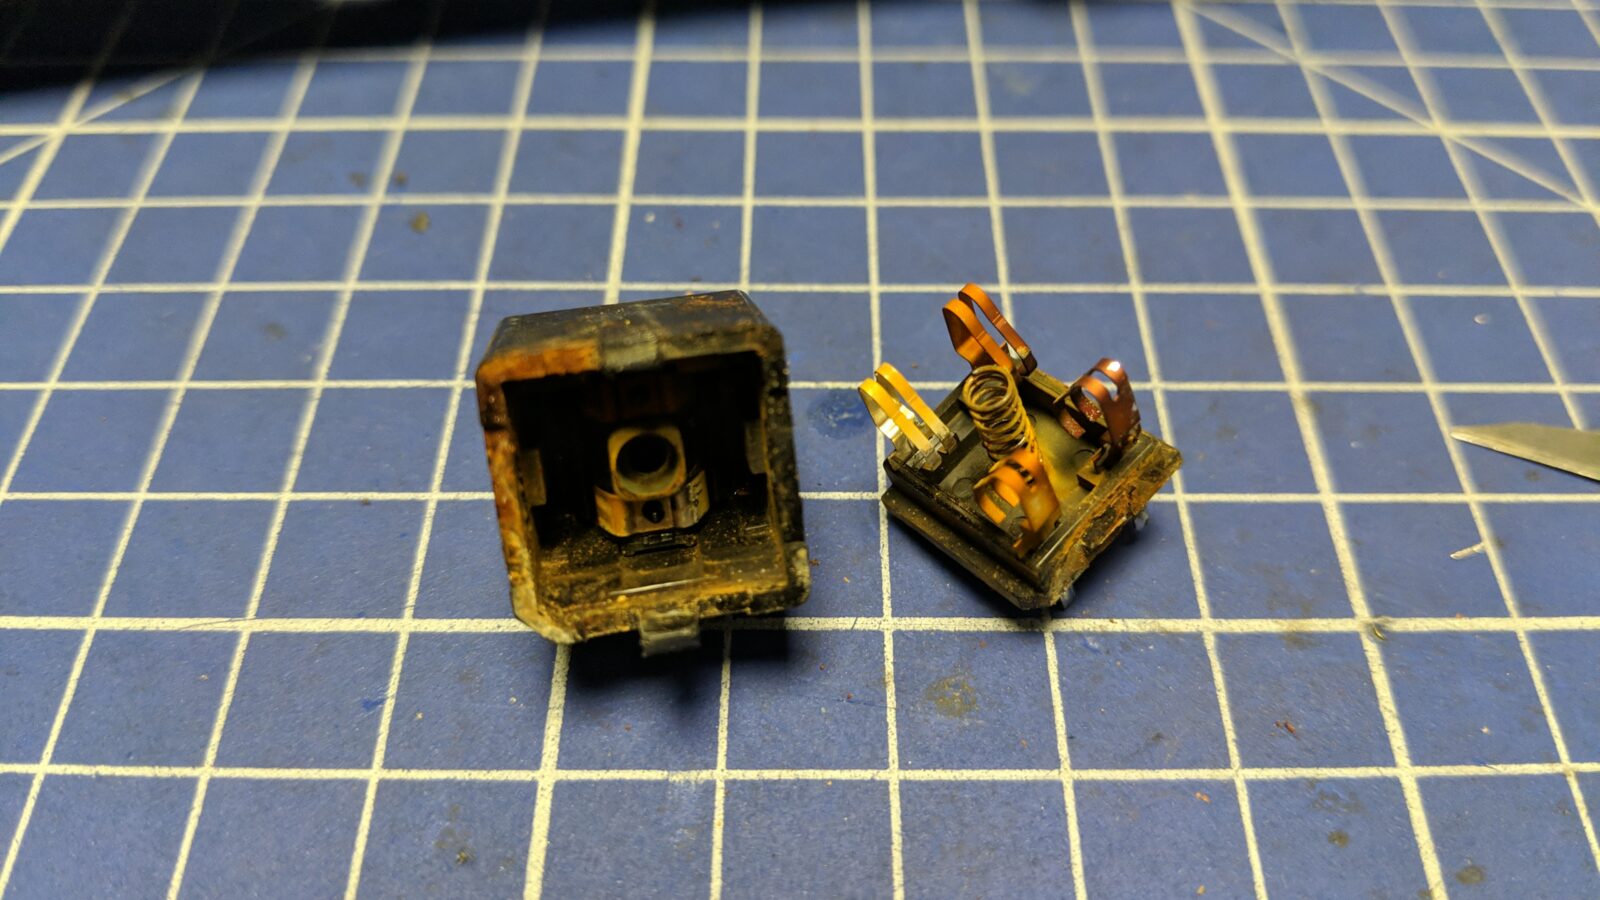
I also had to address an issue with a non-conducting power switch. I’ve disassembled it and removed the oxide layer with a droplet of hydrochloric acid.
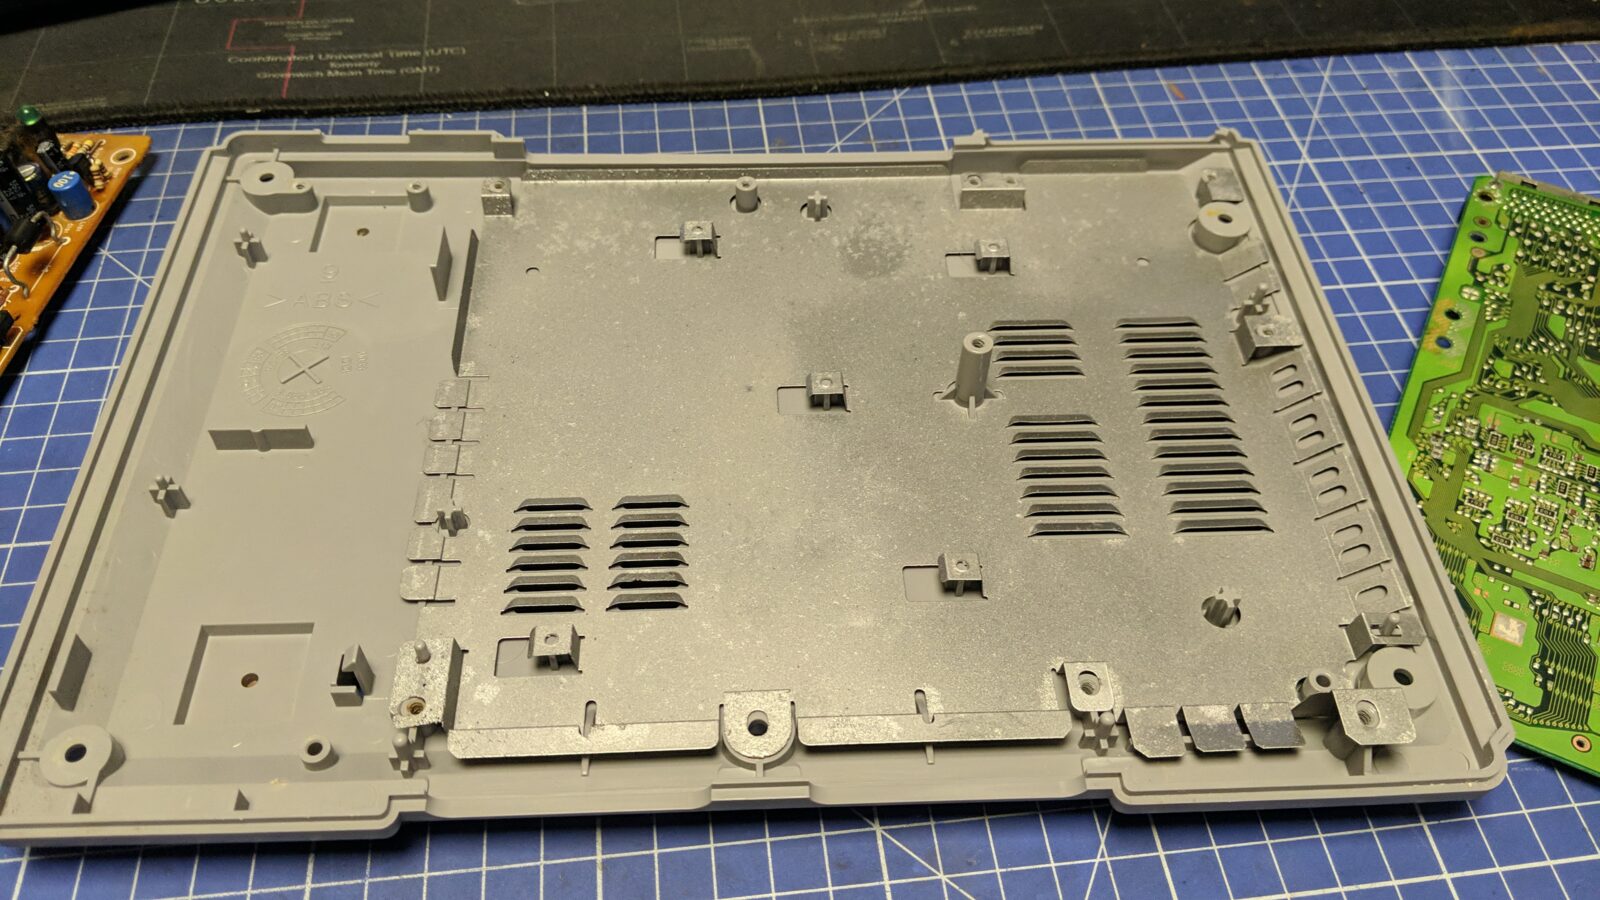
Meanwhile, I’ve prepared a phosphoric acid bath for the plastic case. This removed all the rust stains from it.
I’ve also cleaned and spray-painted all the shields with a zinc coating and assembly followed shortly.
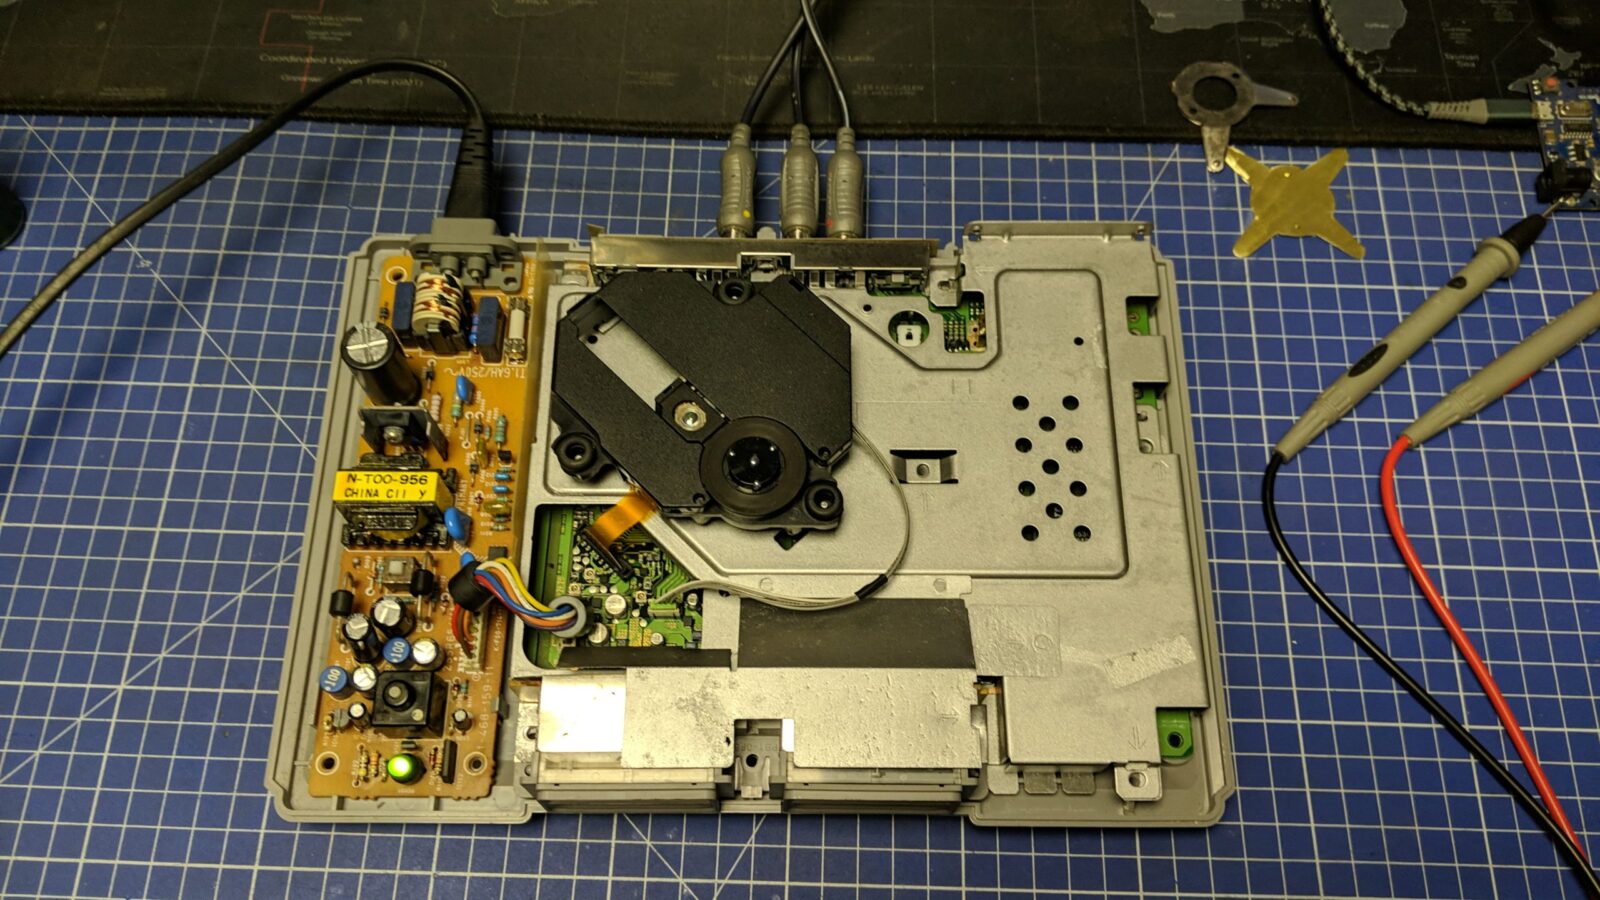
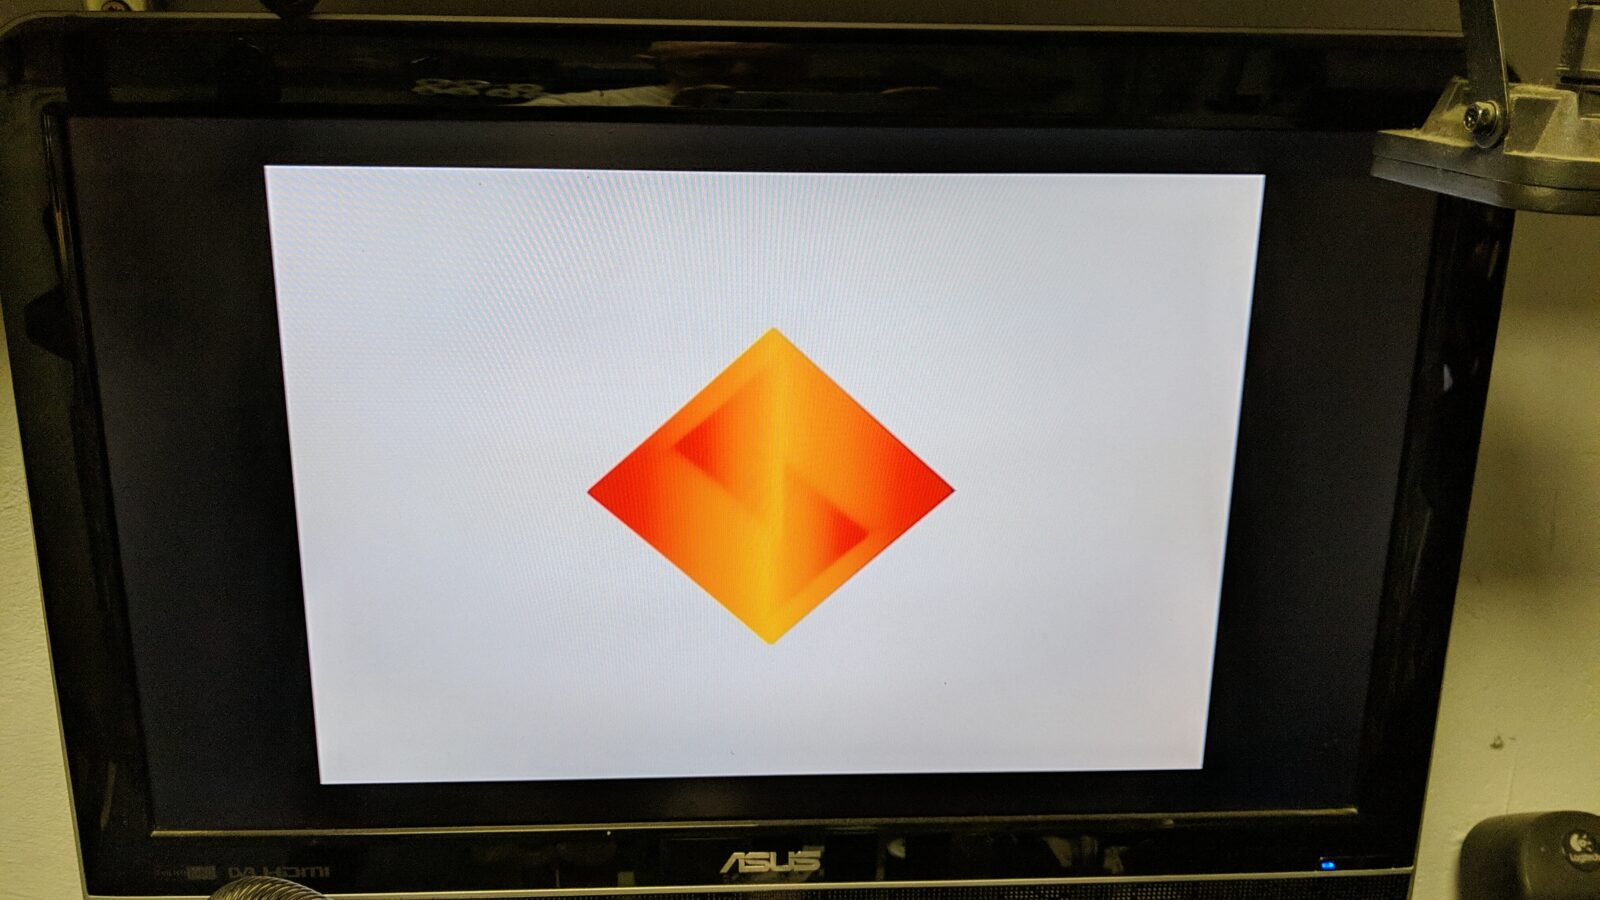
It works!!! Yay! :>
That’s all in this short post. Consider subscribing if you want to get an email notification about fresh blog posts.
See you in the next post 🙂


One thought on “#shorts Fixing a Sony PlayStation 1 – SCPH-1002”