… or finally, the project is finished
First transport …
… finally arrived.
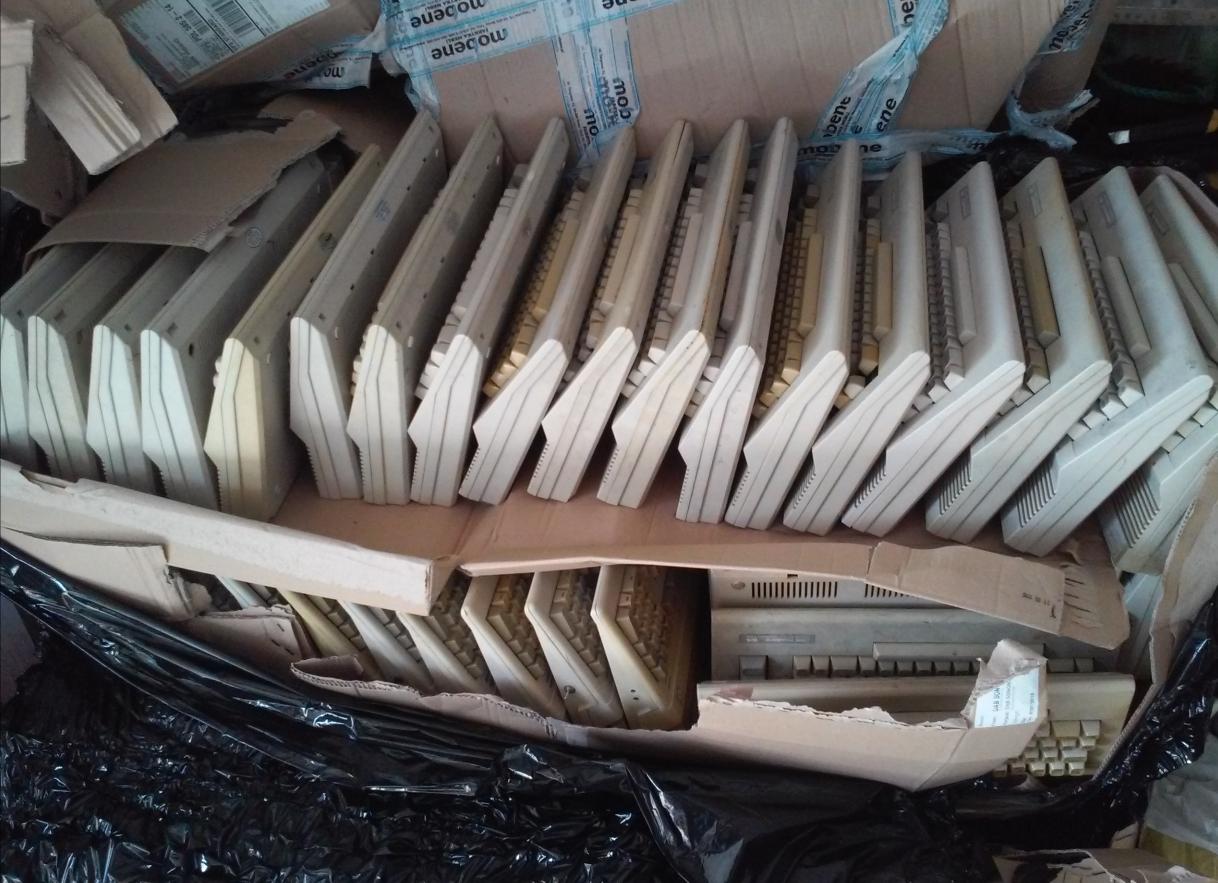
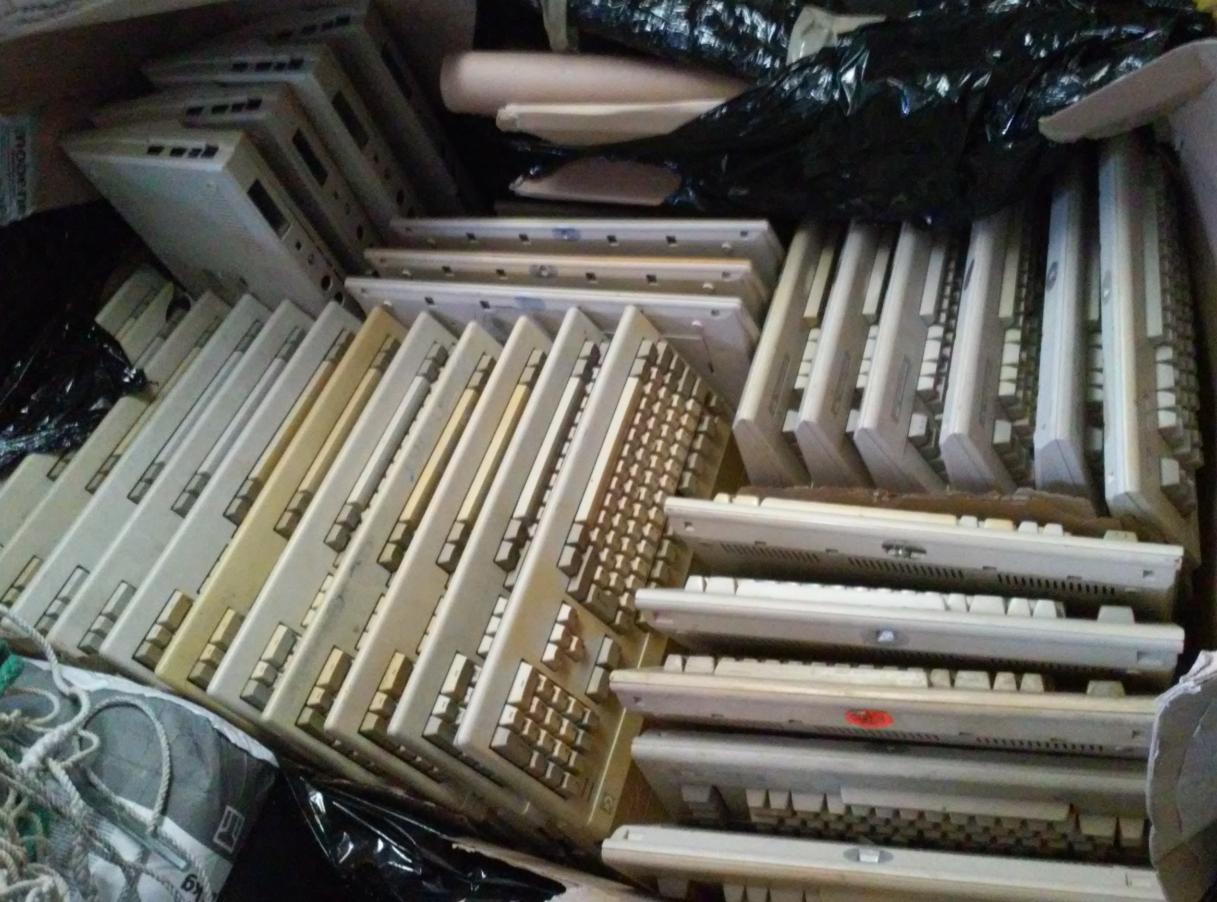
… but I am still waiting for the second half 😀
It’ll take a while to refurbish it all 😉
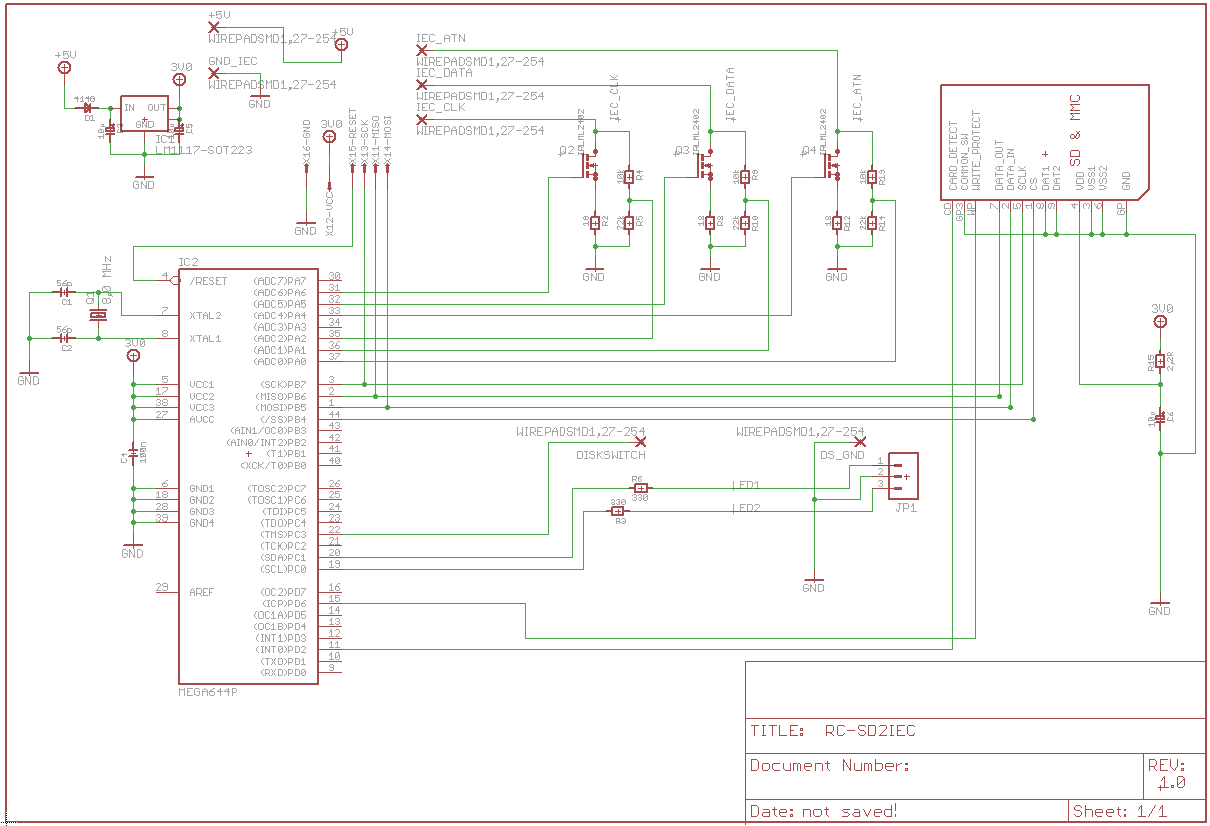
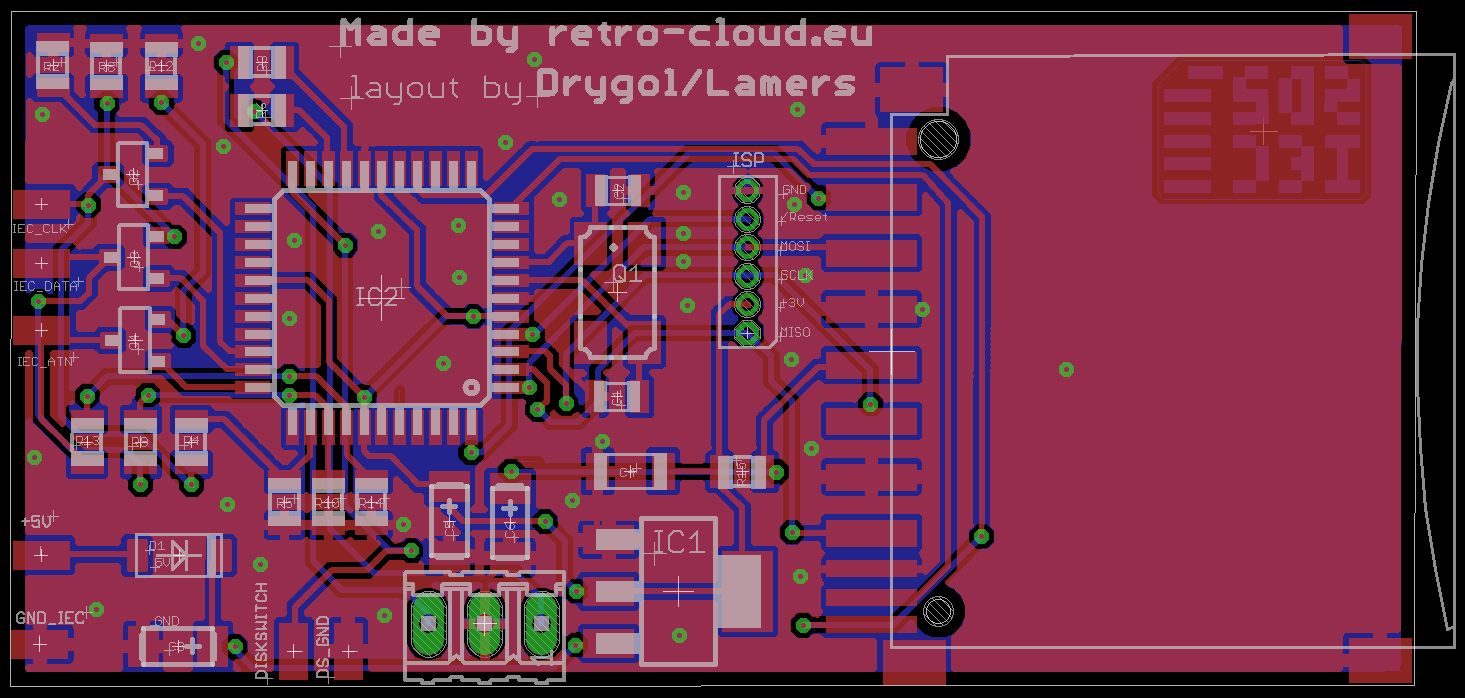
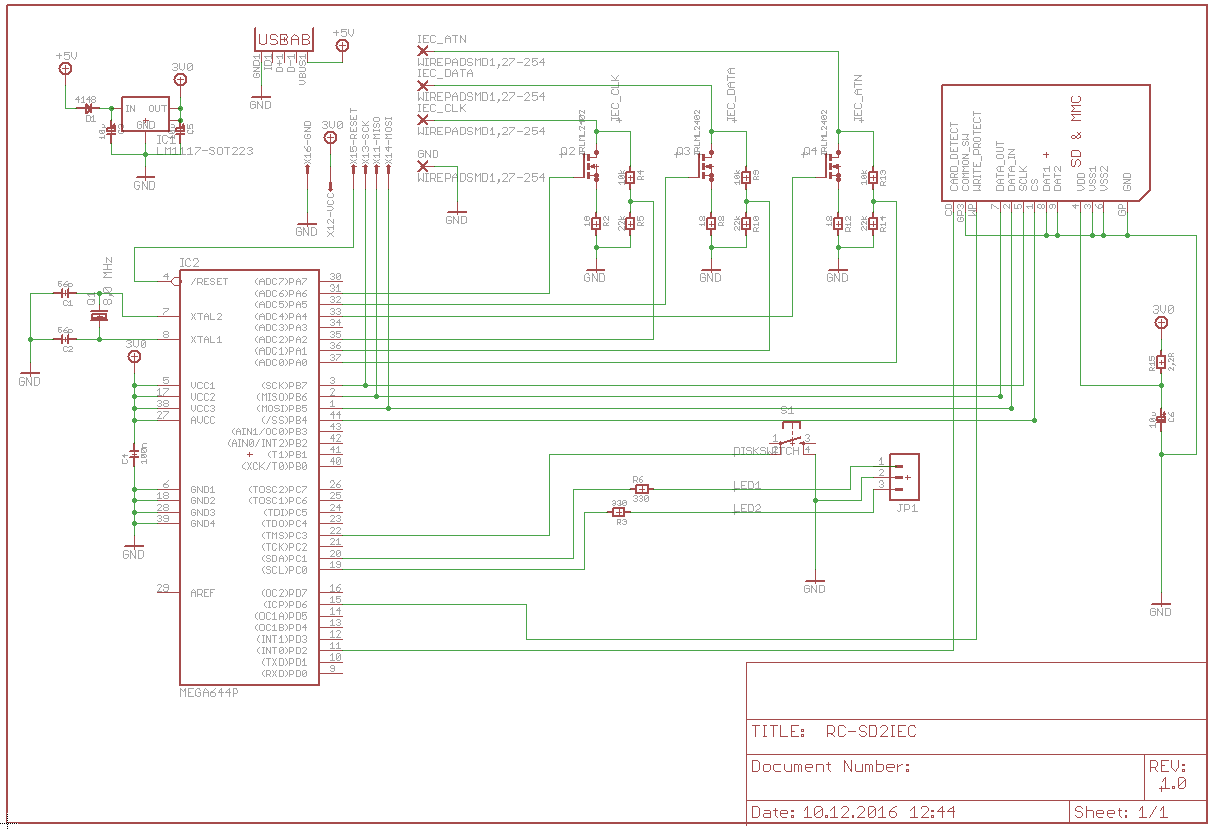
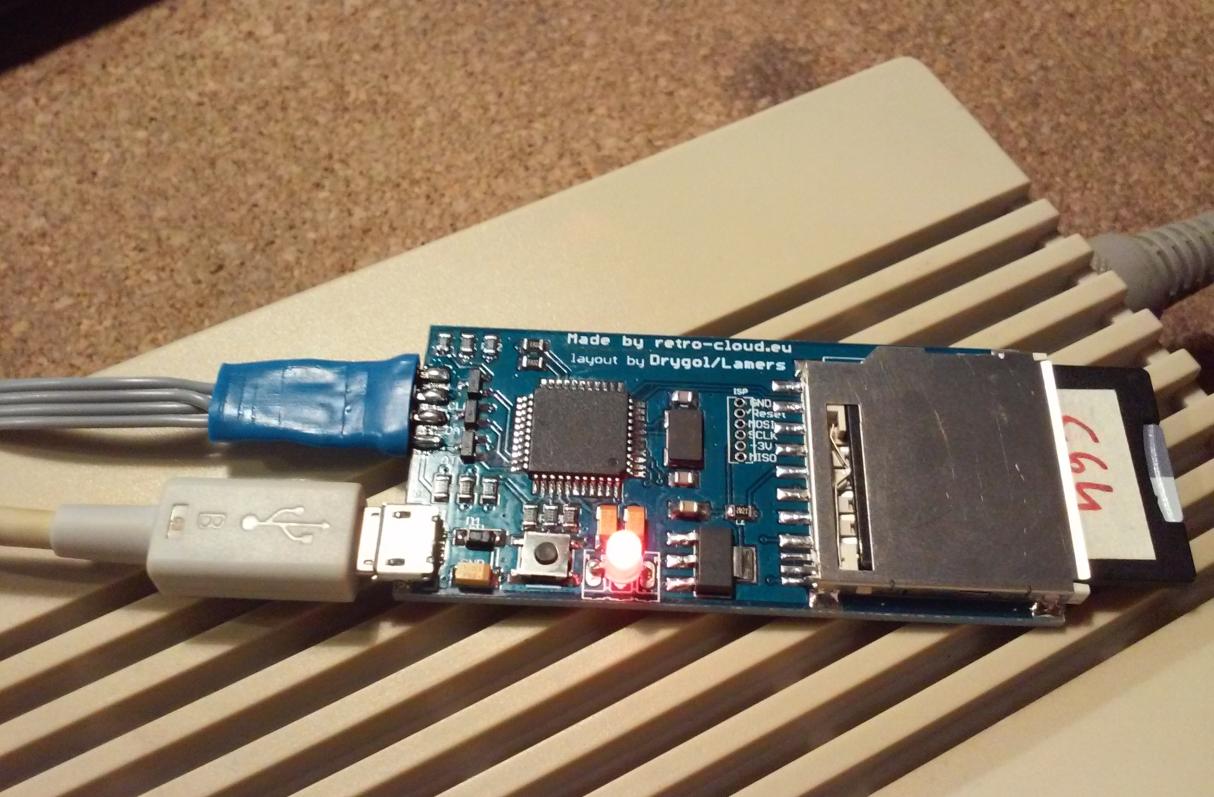
SD2IEC revisited
Some time ago, I wrote a post about SD2IEC and my PCB layout of it.
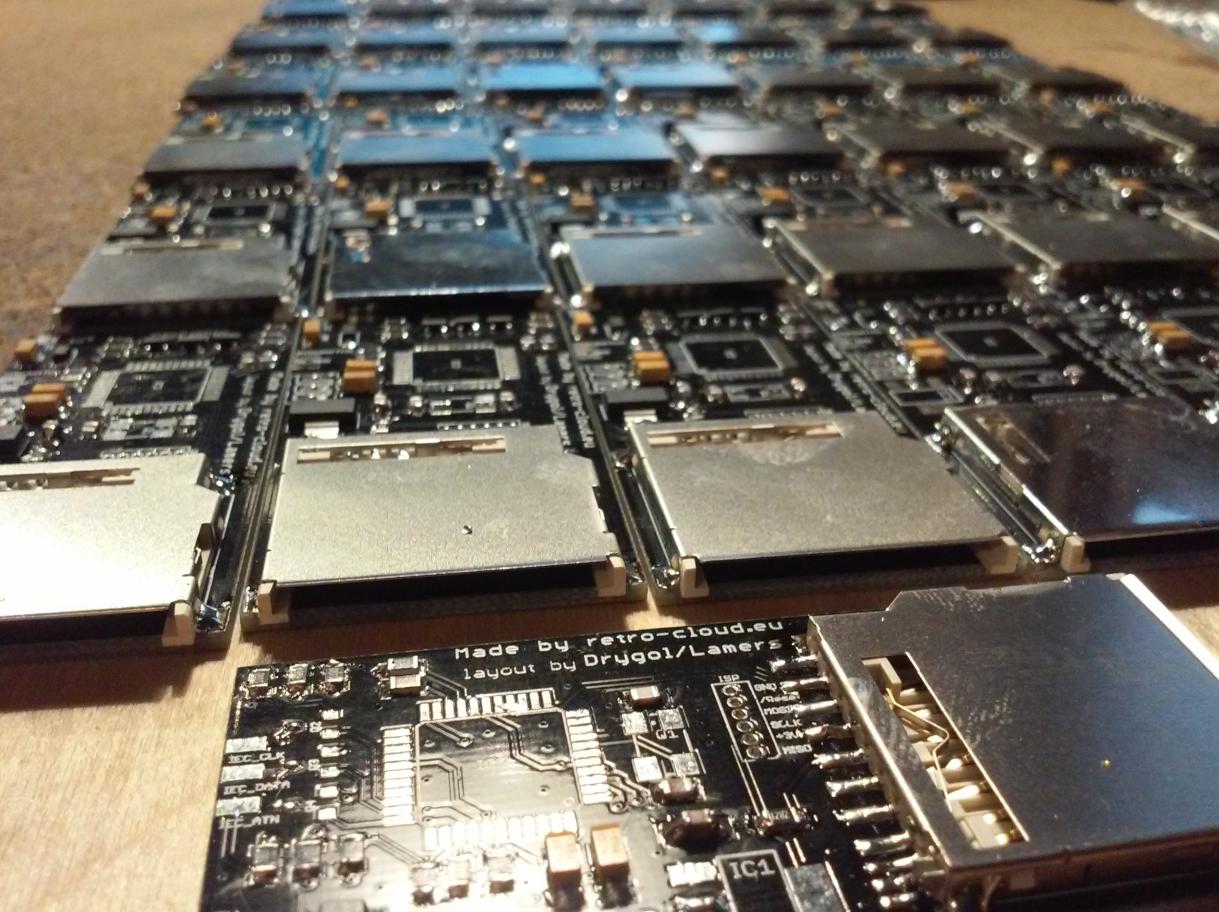
I actually finished the newest version some time ago and even managed to manufacture and test quite a few of these devices.
This is a revisited version and so far works flawlessly, plus it suits my needs so hopefully, this is the final PCB layout. Obviously, GERBER files will be available to download as a “Thank you” to the community.
Feel free to share and use it.
Link to GERBERS at the bottom of the post.
I’ve decided that it has to be revisited because I wanted to make two options – internal and external.
Also, making it one-sided SMD was a major factor – lower manufacturing costs – Big thanks for this hint to Willy/Lamers who also pointed out a few flaws in previous versions.
Assembled and tested versions are available at the online shop
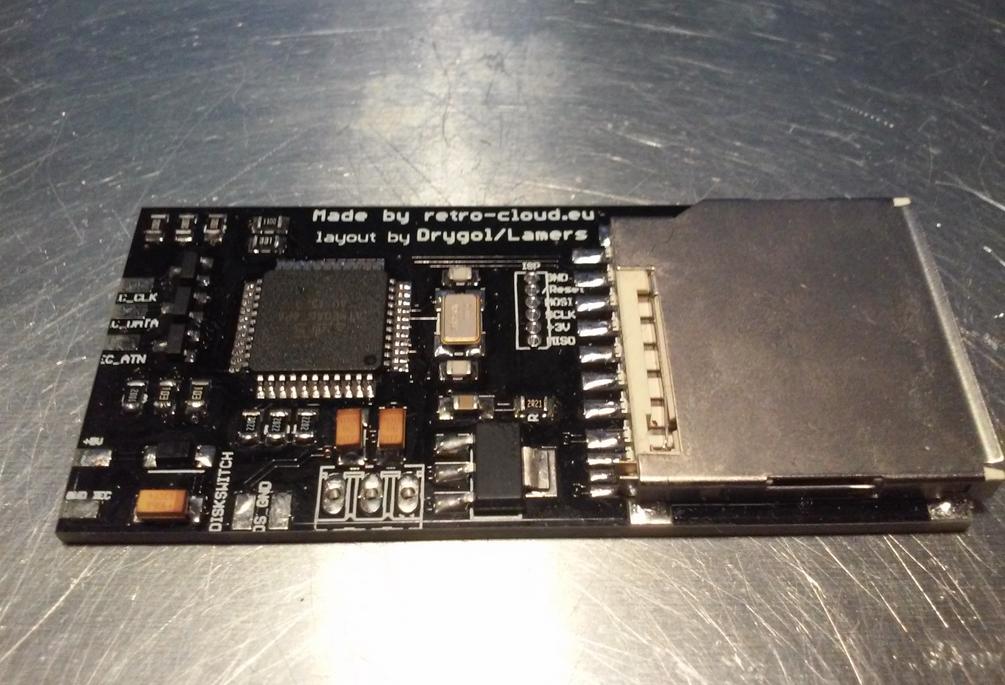
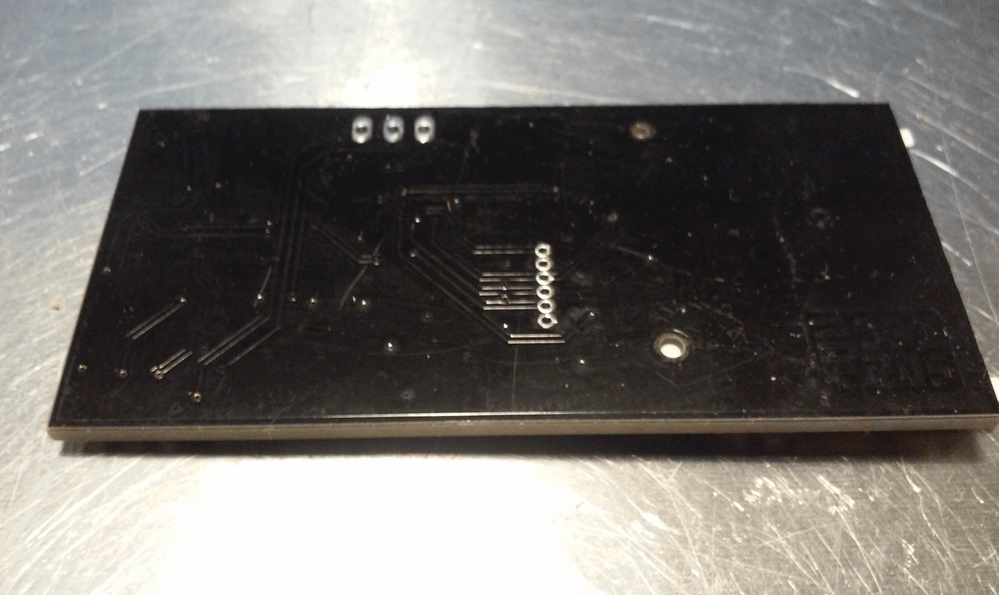
My layout version
This is going to be a rather short post with a few photos in it and of course GERBERs.
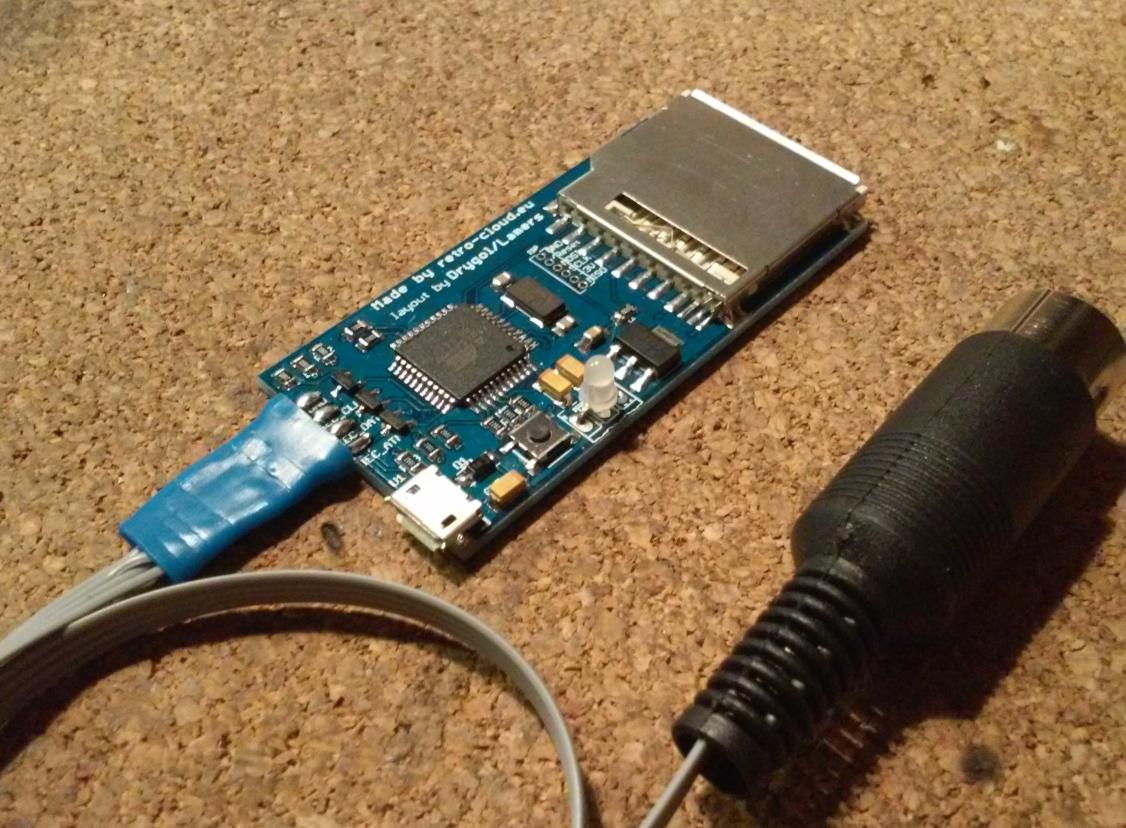
Apart from Vreg, oscillator, and sockets, all parts are the same as in Shadowolf version 1.2 but mostly 0805.
Vreg – TI LM1117IMP 3.3V
Oscillator – ABRACON ABM3B-8.000MHZ-10-1-U-T
SD Socket – Amphenol GSD090012SEU
USB Socket – Molex MX-47346-0001
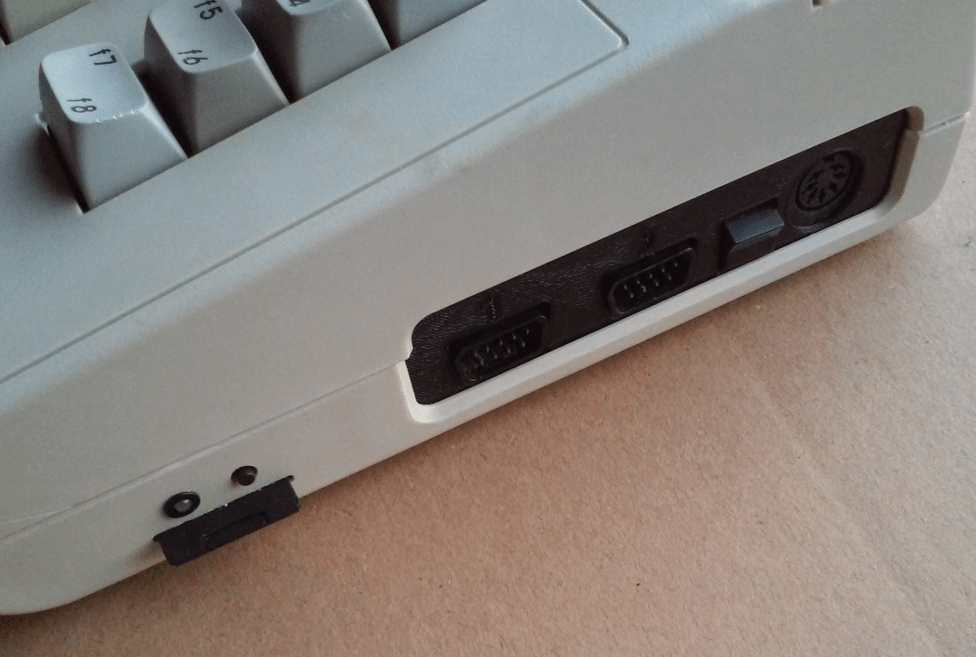
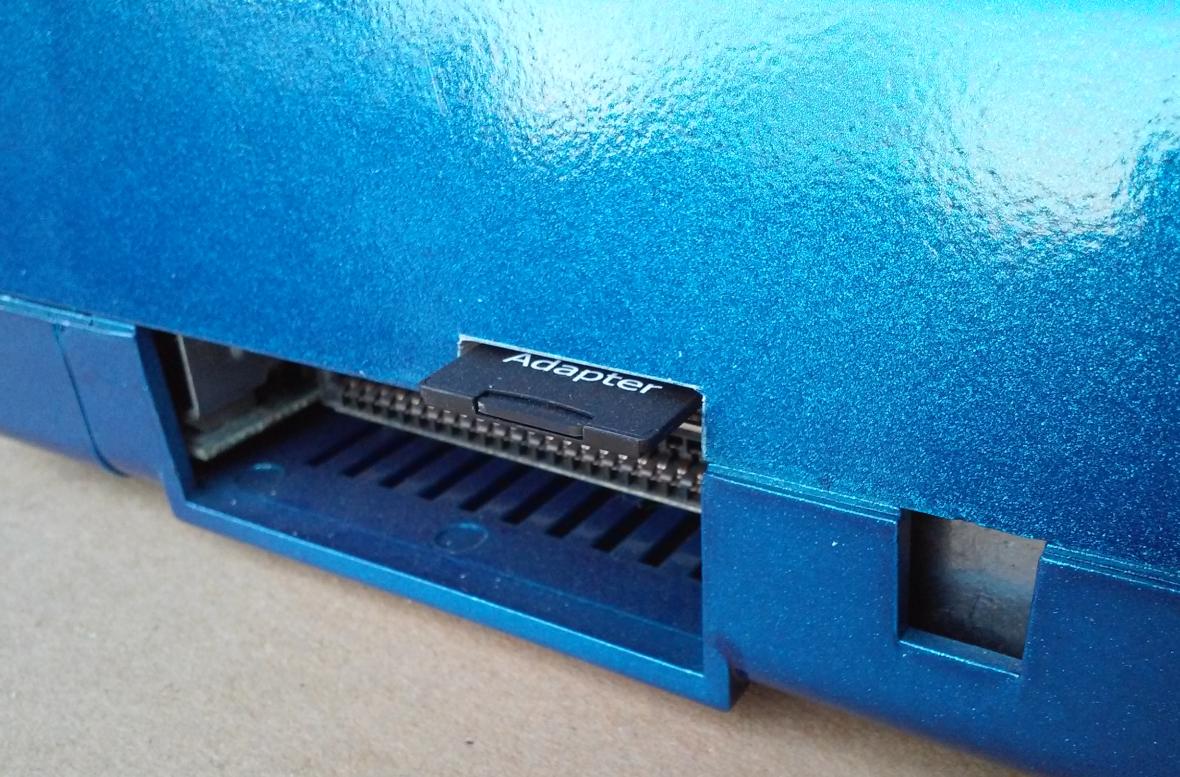
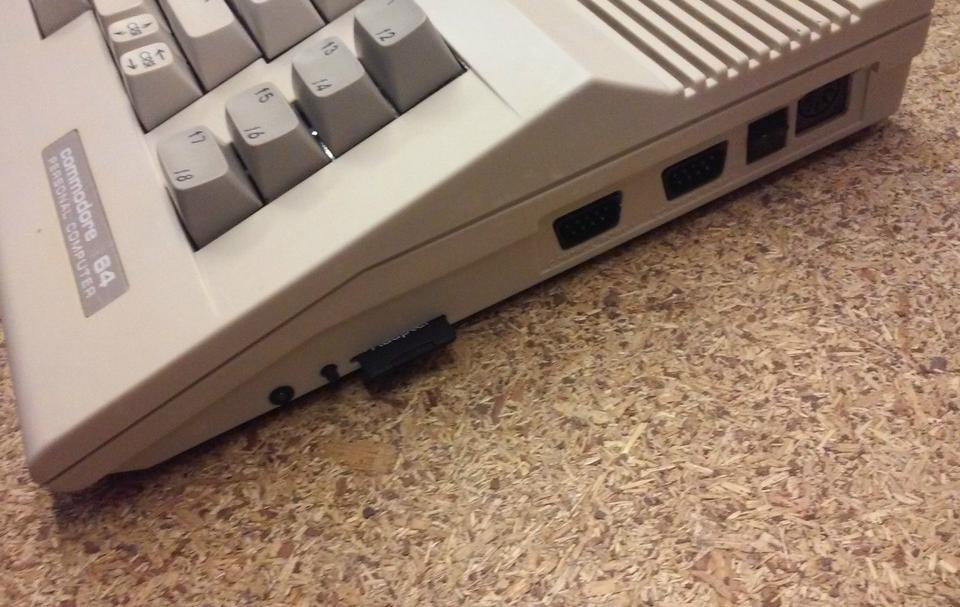
Internal

Installation examples
External
Schematics is not so different from the internal version.
External SD2IEC is simply powered via a standard USB phone charger. It eliminates problems with a blocked joystick or datasette port plus it does not steal power from C64. It also has a tact switch on a PCB to simply disable/enable it or to swap a disk when using autoswap.lst function.


Case
I’ve also started to work on a basic 3D printed case for it.
It still requires some further tweaks.

Various
It seems that not everyone is aware of a simple trick to conveniently load a file browser located in SD cards root dir under JiffyDOS.

That’s it for today 🙂
Revised GERBER files to DOWNLOAD
and here are Eagle internal BRD internal SCH and external BRD external SCH files.
You can get ready SD2IEC here
UPDATE
Daniel, who read my post, emailed me a link to his version of SD2IEC.
https://hackaday.io/page/5295-sd2iec-board
It has no vias under components so toner transfer is now way easier.
Excellent work! Thank you for sharing this Daniel!
OUTRO
If you want to get retro gear or hardware modules, please visit our shop
New products are being added every month.
Also, please support our work by spreading info about it.
Without your support, we simply cannot grow and we have a lot of new cool retro hardware (and more) products to come

Witaj
czy można u Ciebie zamówić sd2iec jeśli tak to jaka jest różnica w cenie miedzy wewnętrzą wersją a zewnetrzną
Cześć,
Nie, już ich nie produkuję. Można za to sobie zrobić samemu bo wszystko udostępniłem – zakładka PROJECTS.
Nie ma różnic poza złączami.
Pzdr
D
Hi,
I have build me one of these and programming went without any errors.
However the units led flashes when turned on and when trying to load the directory “load”$”,10 is says searching for and then nothing, freezes, In some cases I get a device not present.
Turning the c64 on without an sd card inserted shows both LED’s are turned on but after a few seconds it starts blinking one color.
Do you have any troubleshooting guide or maybe even an idea what the issue could be?
Version of the board I used is the one almost at the end of this blog post, the internal one not usb.
The bootloader installed is the one in the post above, the newboot 0.4.1 sw2 m644p
Any help is appreciated
No, I don’t have any troubleshooting guide written down.
Did you actually flash a firmware on it through SD card?
Did you change ID to 10 by a software? Reason I am asking is that default ID after uploading a firmware is 8
I haven’t changed anything and left it by default, I programmed the 644P with Avrdude settings as you mentioned also here in the post but feeling kinda stupid for totally missing the firmware part on the SD card so that will explain the odd behavior I guess.
Checking now the firmware part/
Thanks for responding so quickly!
Flashed the sd2iec with the latest firmware and both led’s were on, after a few seconds one was blinking en then all off,
Now when turning on the c64 the LED briefly flashes once en then nothing, no response.
Back to the drawing board 😉
This is ok, it means that firmware is working. Now, try loading like LOAD”your_file”,8. If it throws DEVICE NOT FOUND or will hang on SEARCHING then it means that you’ve made a connection mistake OR your CIA chip in C64 is dead 😀
It was an issue with the fuses and lock bits, I am using avrdudess and somehow the data got changed without me noticing. It work now!
Hi,
I have build me one of these and programming went without any errors.
However the units led flashes when turned on and when trying to load the directory “load”$”,10 is says searching for and then nothing, freezes.
In some cases I get a device not present.
Turning the c64 on without an sd card inserted shows both LED’s are turned on but after a few seconds it starts blinking.
Do you have any troubleshooting guide or maybe even an idea what the issue could be?
Version of the board I used is the one almost at the end of this blog post, the internal one not usb.
The bootloader installed is the one in the post above, the newboot 0.4.1 sw2 m644p
Any help is appreciated
Nice! What instructions do you recommend for using it? Is it the same for all SD2IEC units. Instructions can be found online, or do you have specific instructions that best suit your version?
Oh, my SD2IEC uses exactly the same firmware as the others so the commands are the same. I’ve only created a layout that suits my Commodore projects 🙂
Nice, but when the wires are connected in this way, they will always come off after some time.
I already own another different external sd2iec, but was thinking of going internal. Mines has have two buttons one for disk swap and another for reseting to parent dir. How does the button in yours work? What are its functions? I see there’s only one button.
This single button has two functions. One is for disk swapping and the other for disabling SD2IEC. You have to press and hold for 4 seconds and SD2IEC will be disabled.
what firmware and fuse bit settings do you use
This is what I use to program an Atmega
avrdude -c usbasp -p m644p -U flash:w:newboot-0.4.1-sw2-m644p.hex :i -U hfuse:w:0xDA:m -U efuse:w:0xFD:m -U lfuse:w:0xE7:m
There is also more info about this device in my previous blog post https://retrohax.net/c64-sd2iec/