… or I would like to think it is ultimate but it’s lame instead 😀
Intro

I needed to write a blog post showing different RAM hax/configs on Amiga 500 8A motherboard to serve as a reminder for future Me 😀
I took all pics for this post in early 2020 and I might not remember everything properly. If there are any mistakes, please leave some feedback in the comments section below the post.
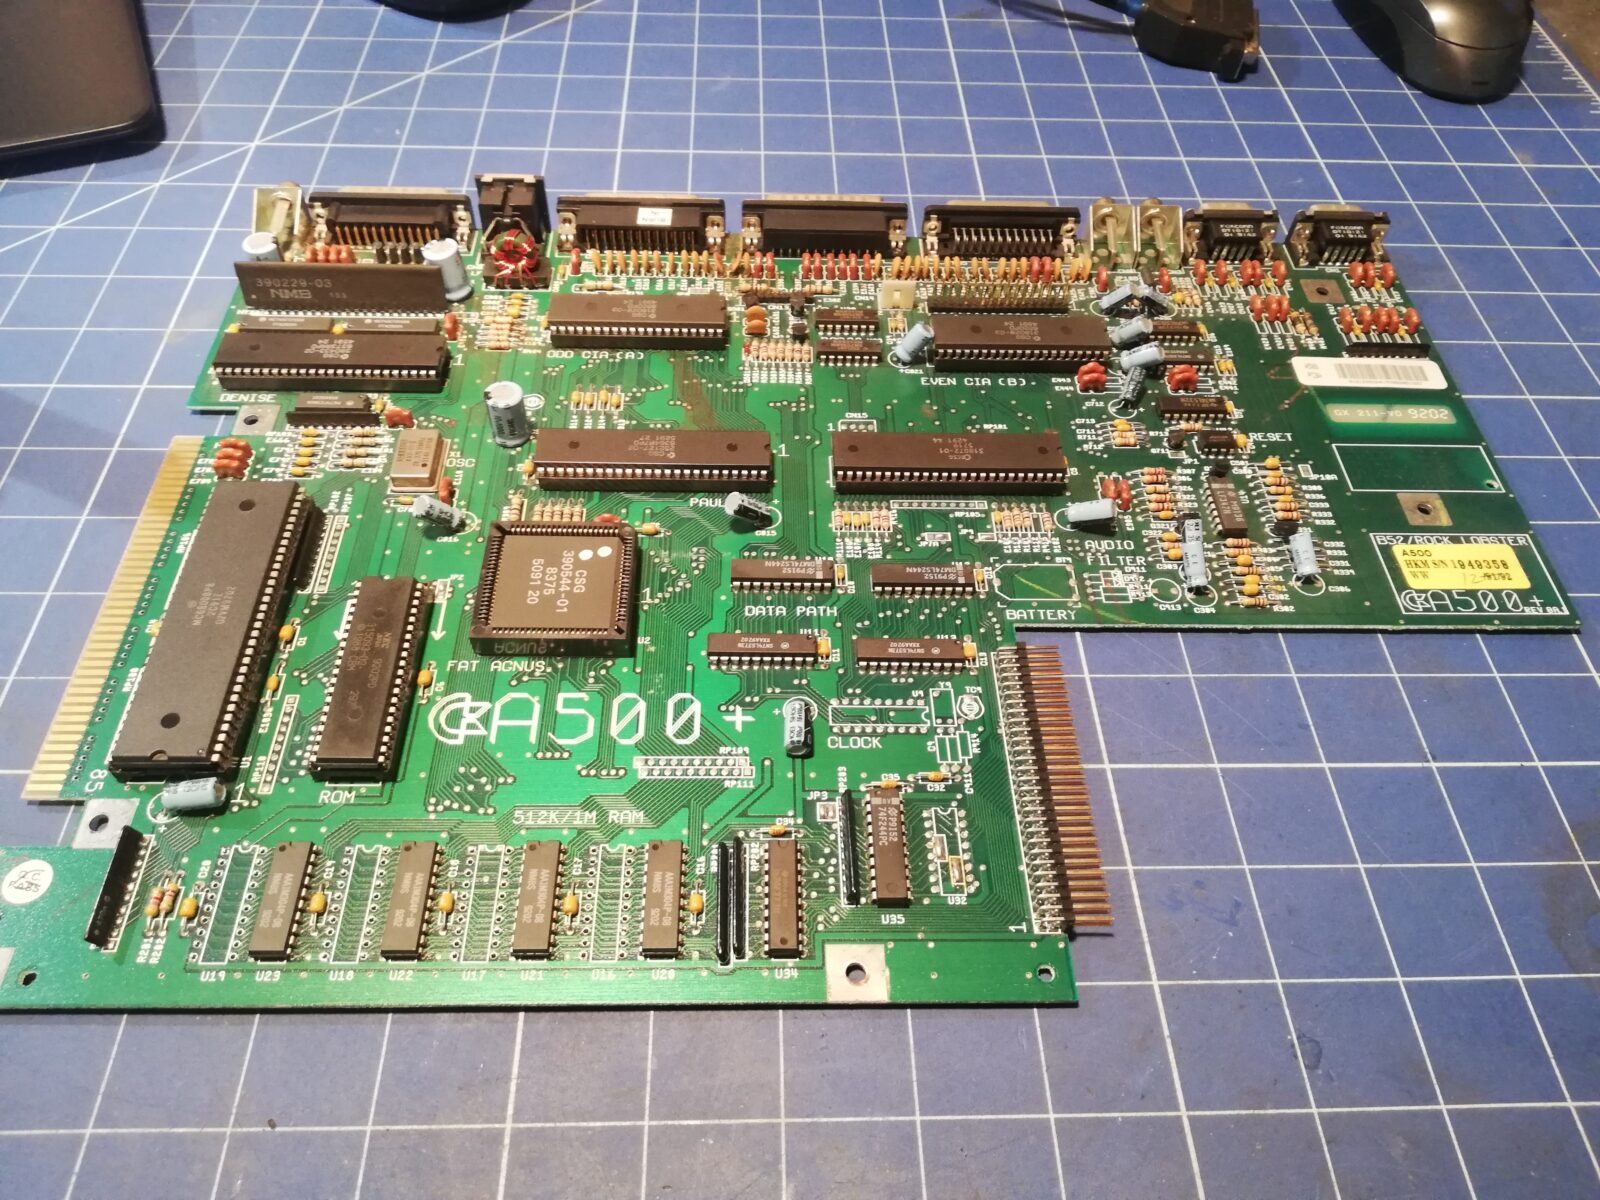
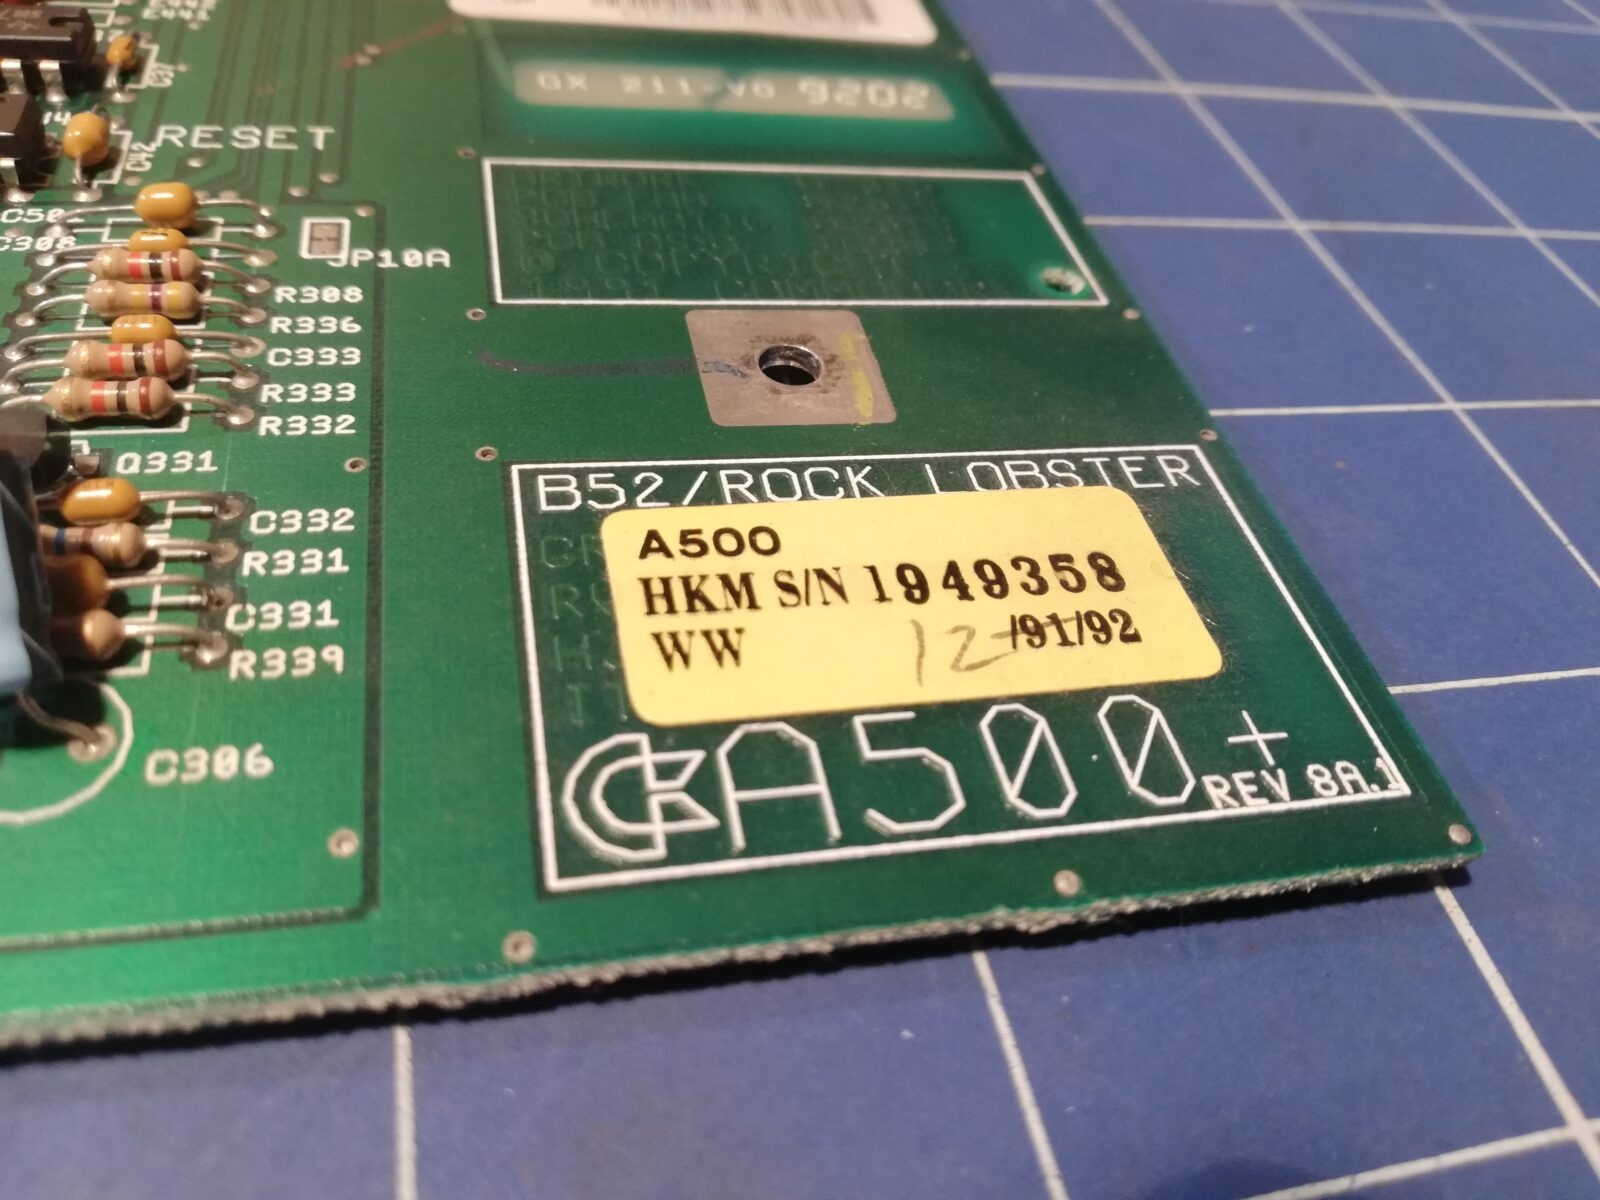
Rev. 8A
When working with my stash of A500s, I’ve found two common motherboard revisions – 6A and 8A. I will focus on 8A here but some configs can be used in 6A too. The main reason is that 8A mobos are the latest, where 8375 AGNUS was used and it supports up to 2MB of ChipRAM. Also, I’ve already described the 6A ChipRAM mod in one of the previous posts.
Just to clarify it a bit, Rev.8 was used in A500plus AND in standard A500 but with unpopulated RTC, battery, less RAM, etc.
More info on AGNUS and A500 is HERE and HERE.
Revision details – HERE
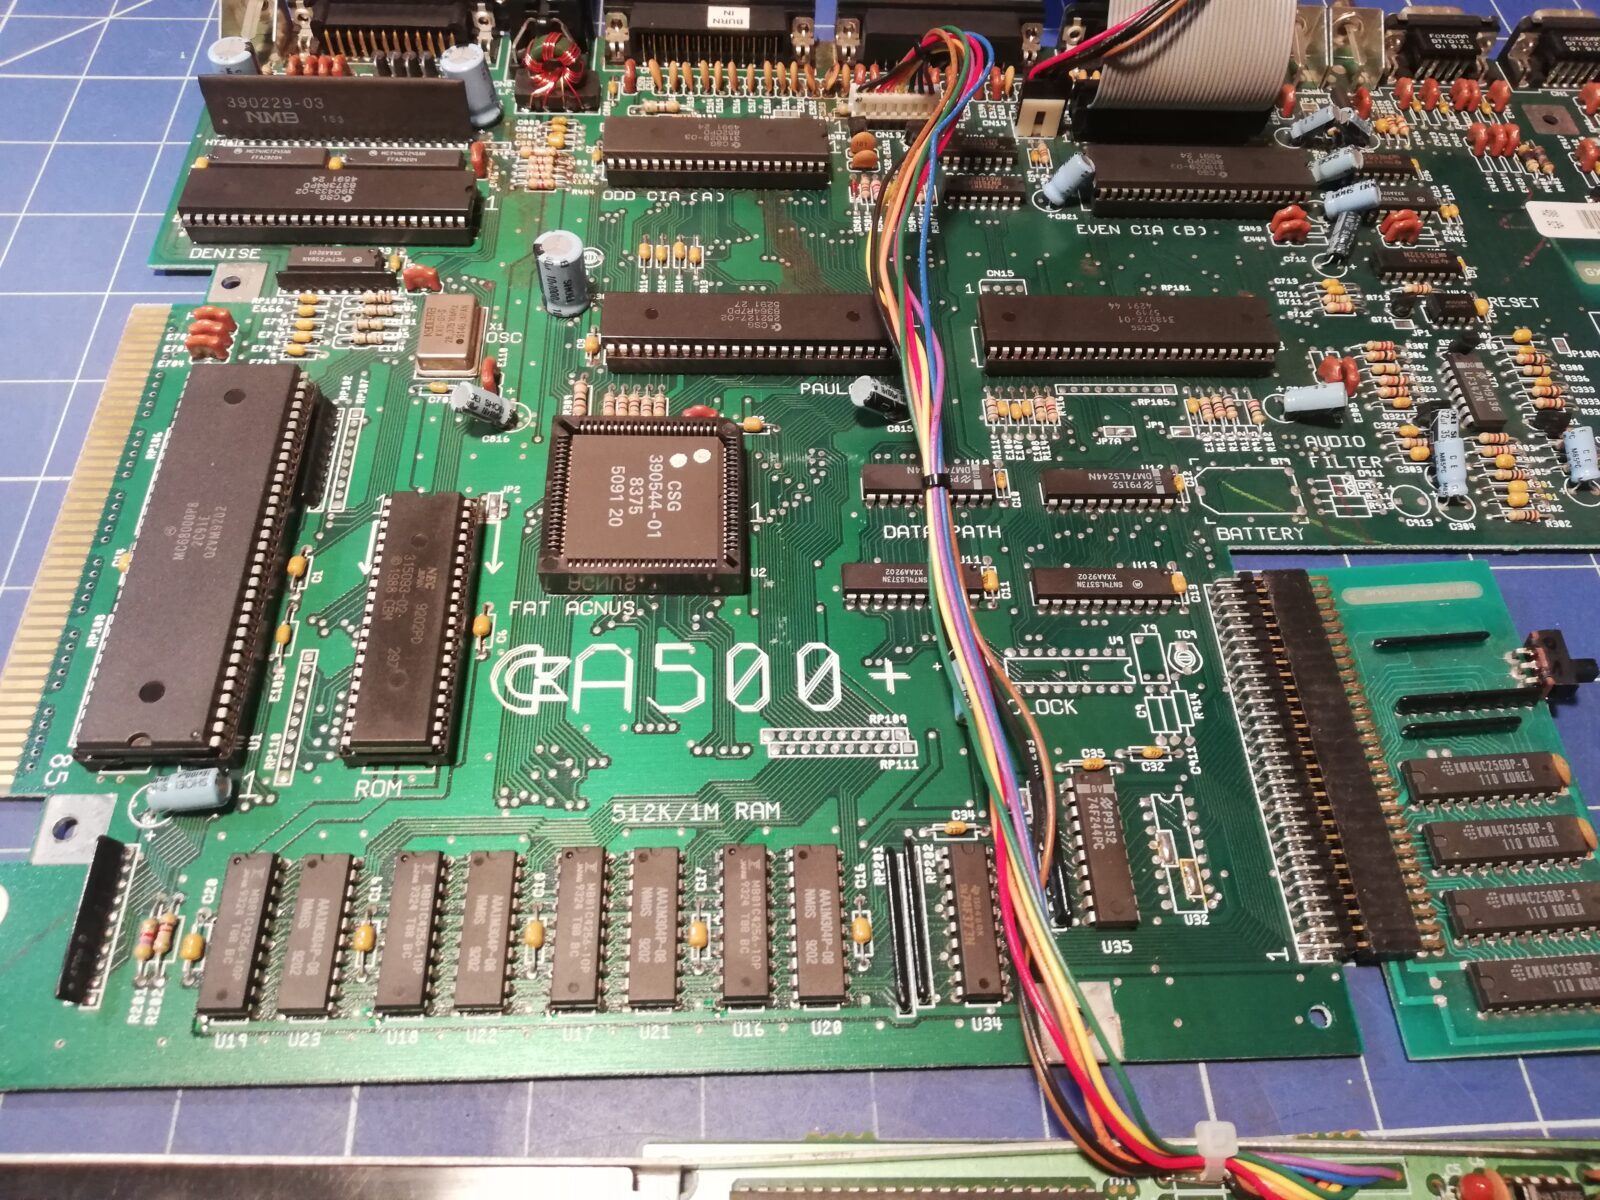
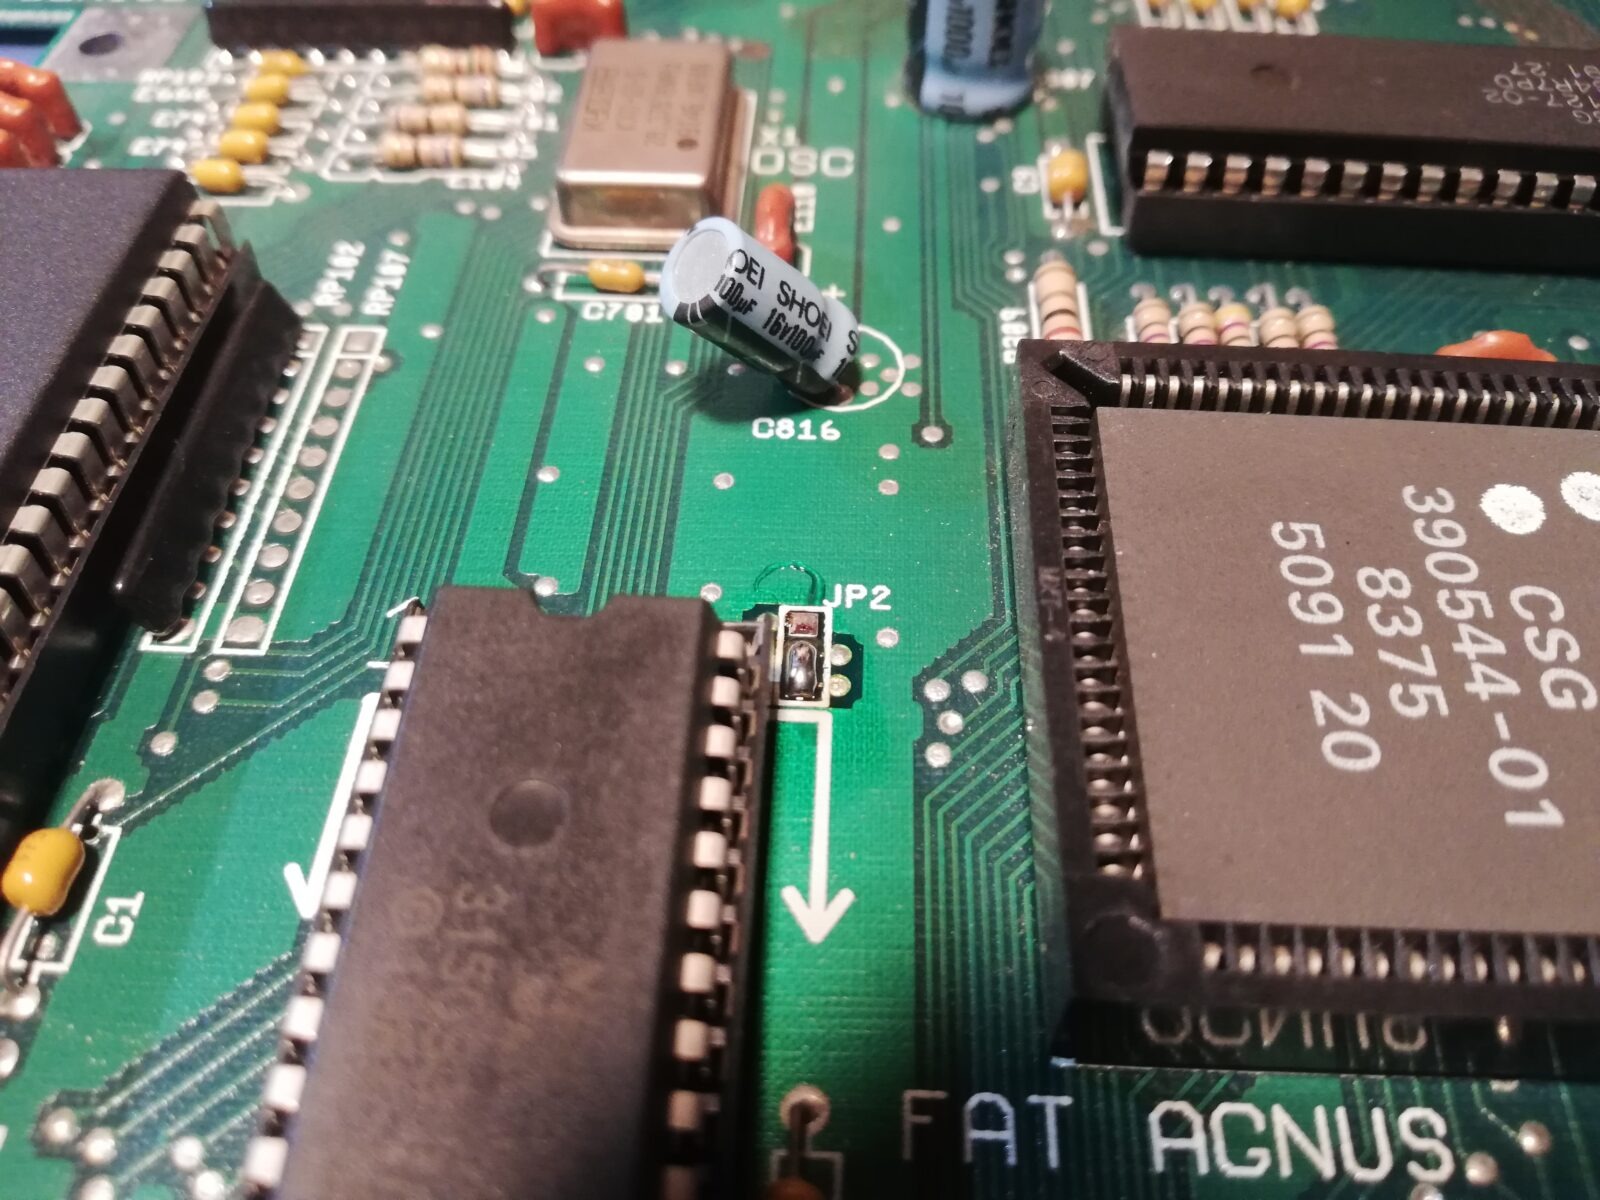
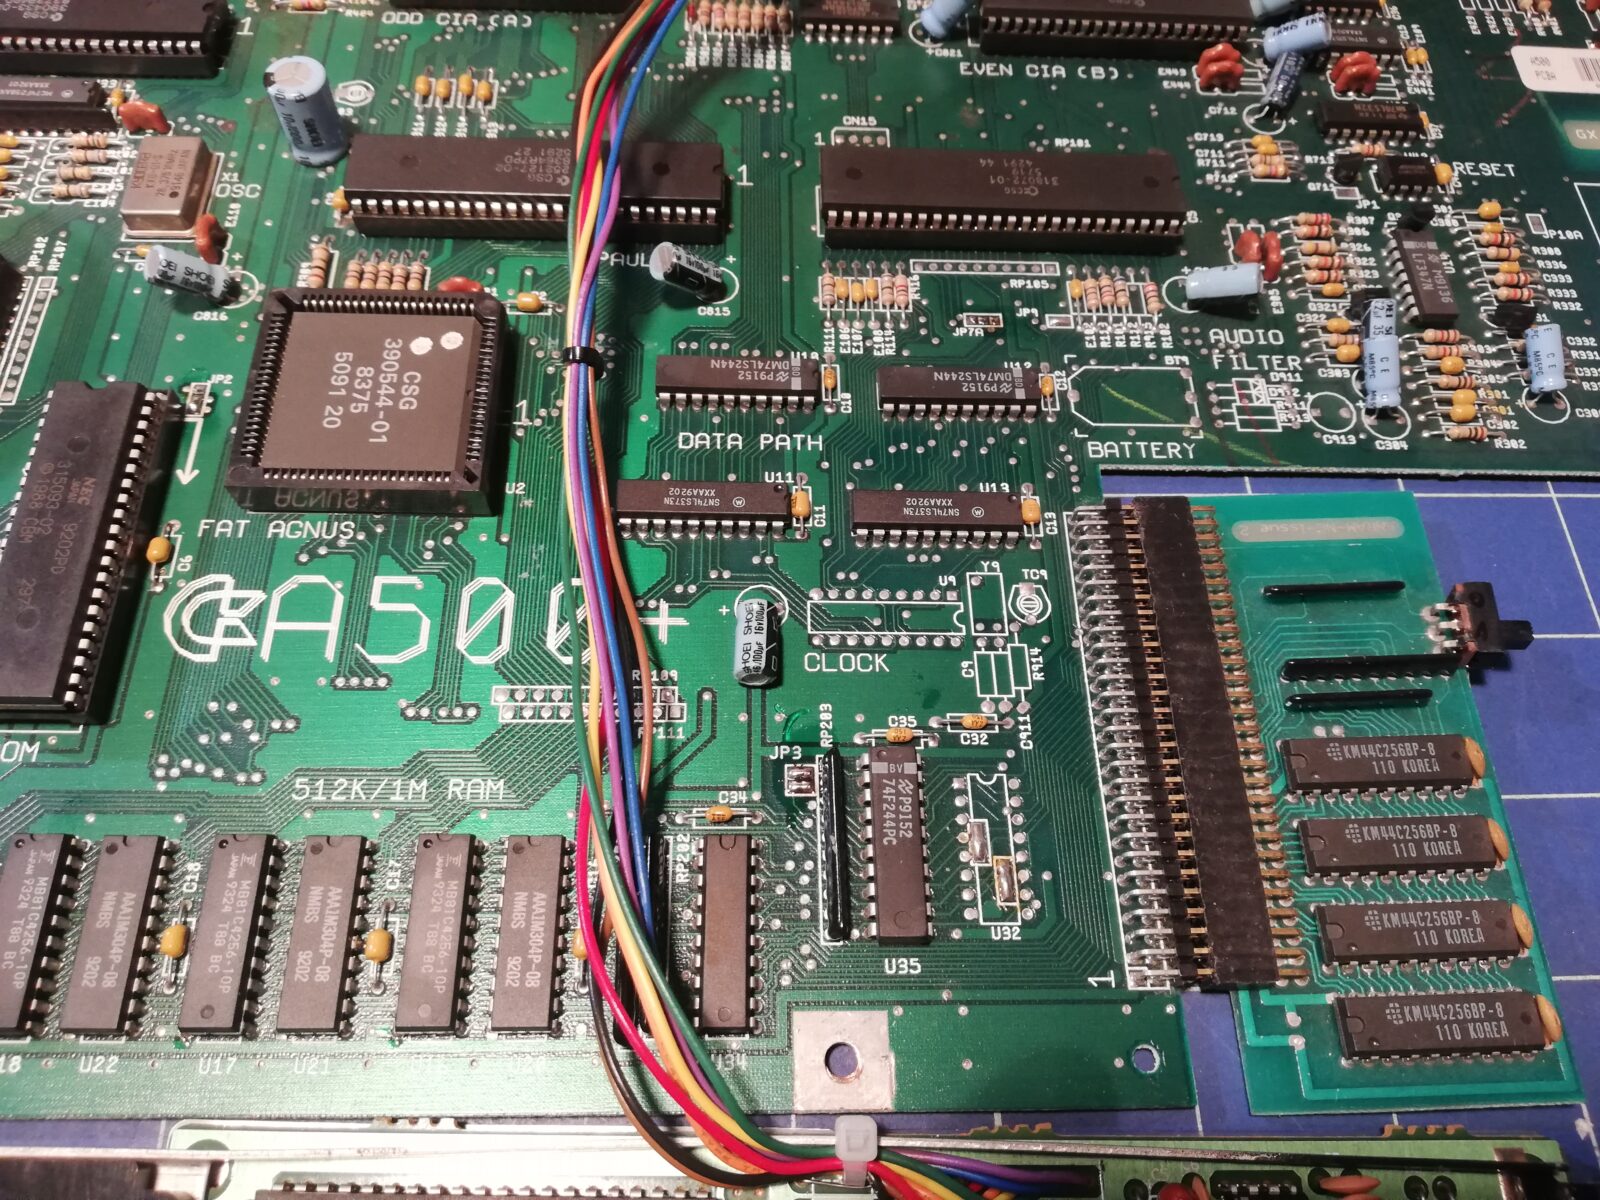
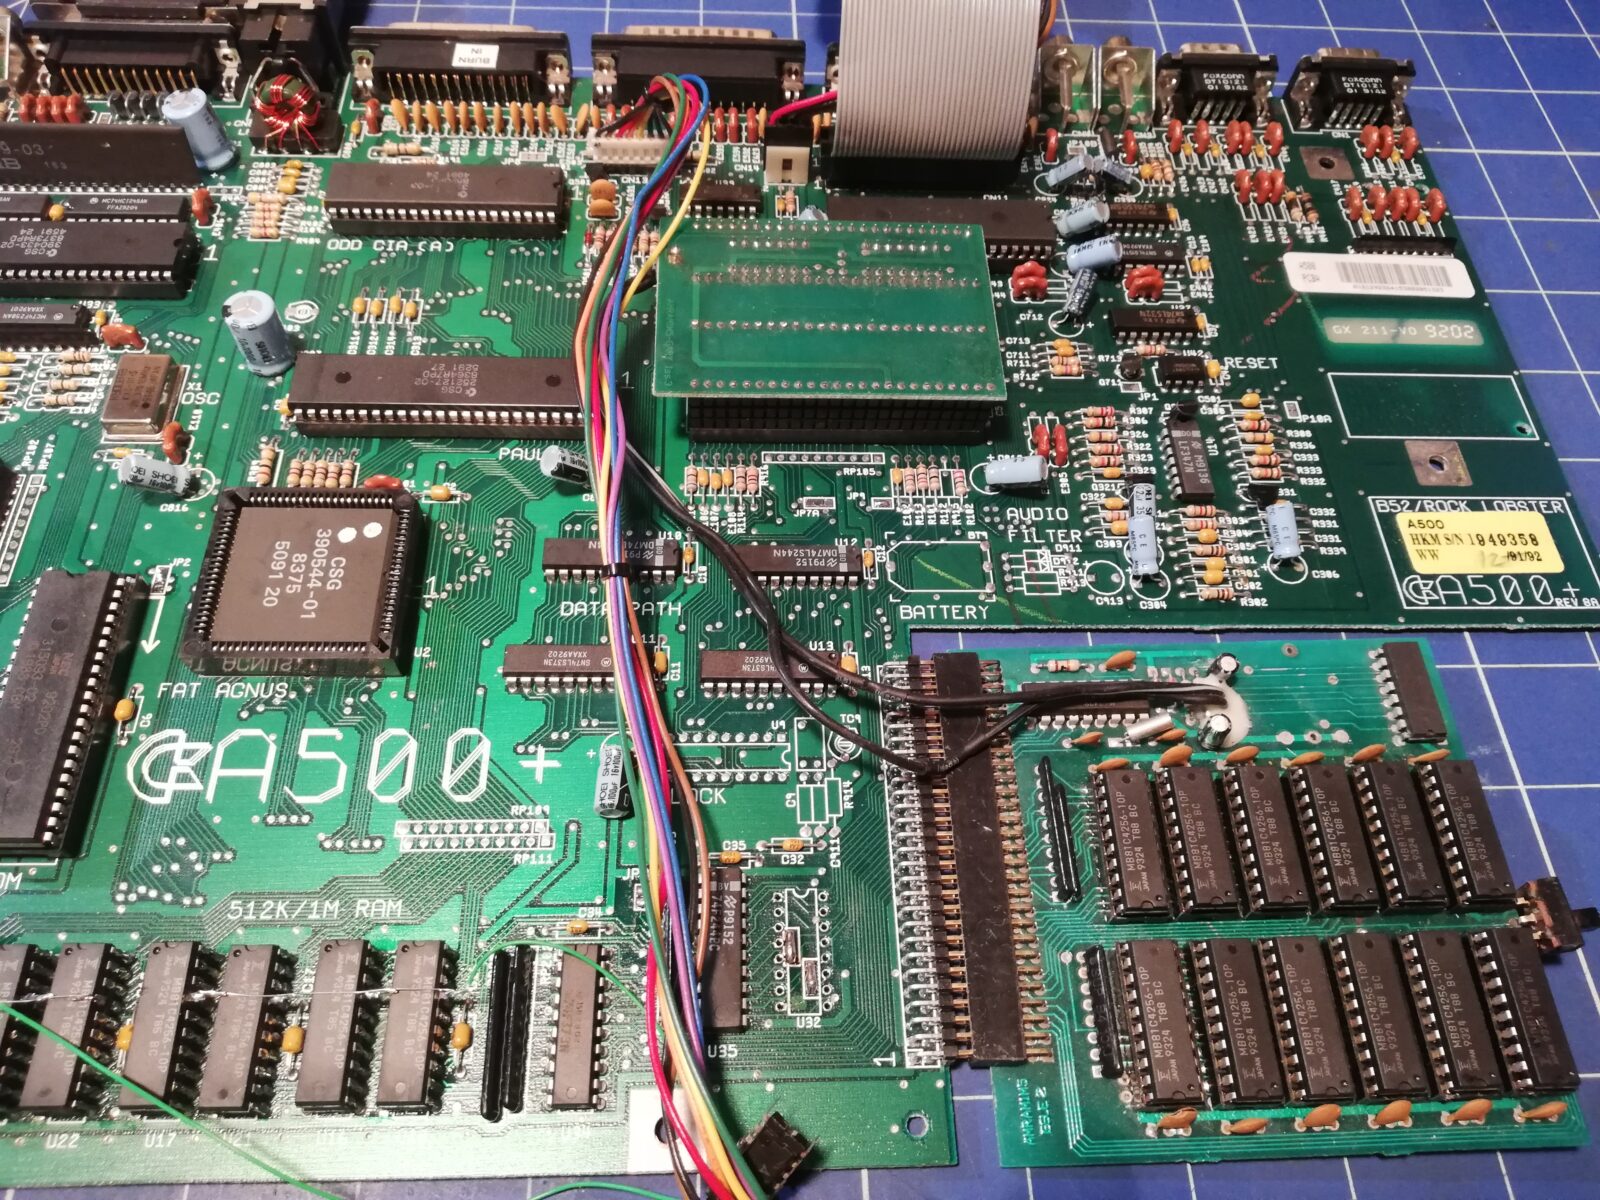
Anyway, let me show you a star of today’s blog post with the default config 🙂

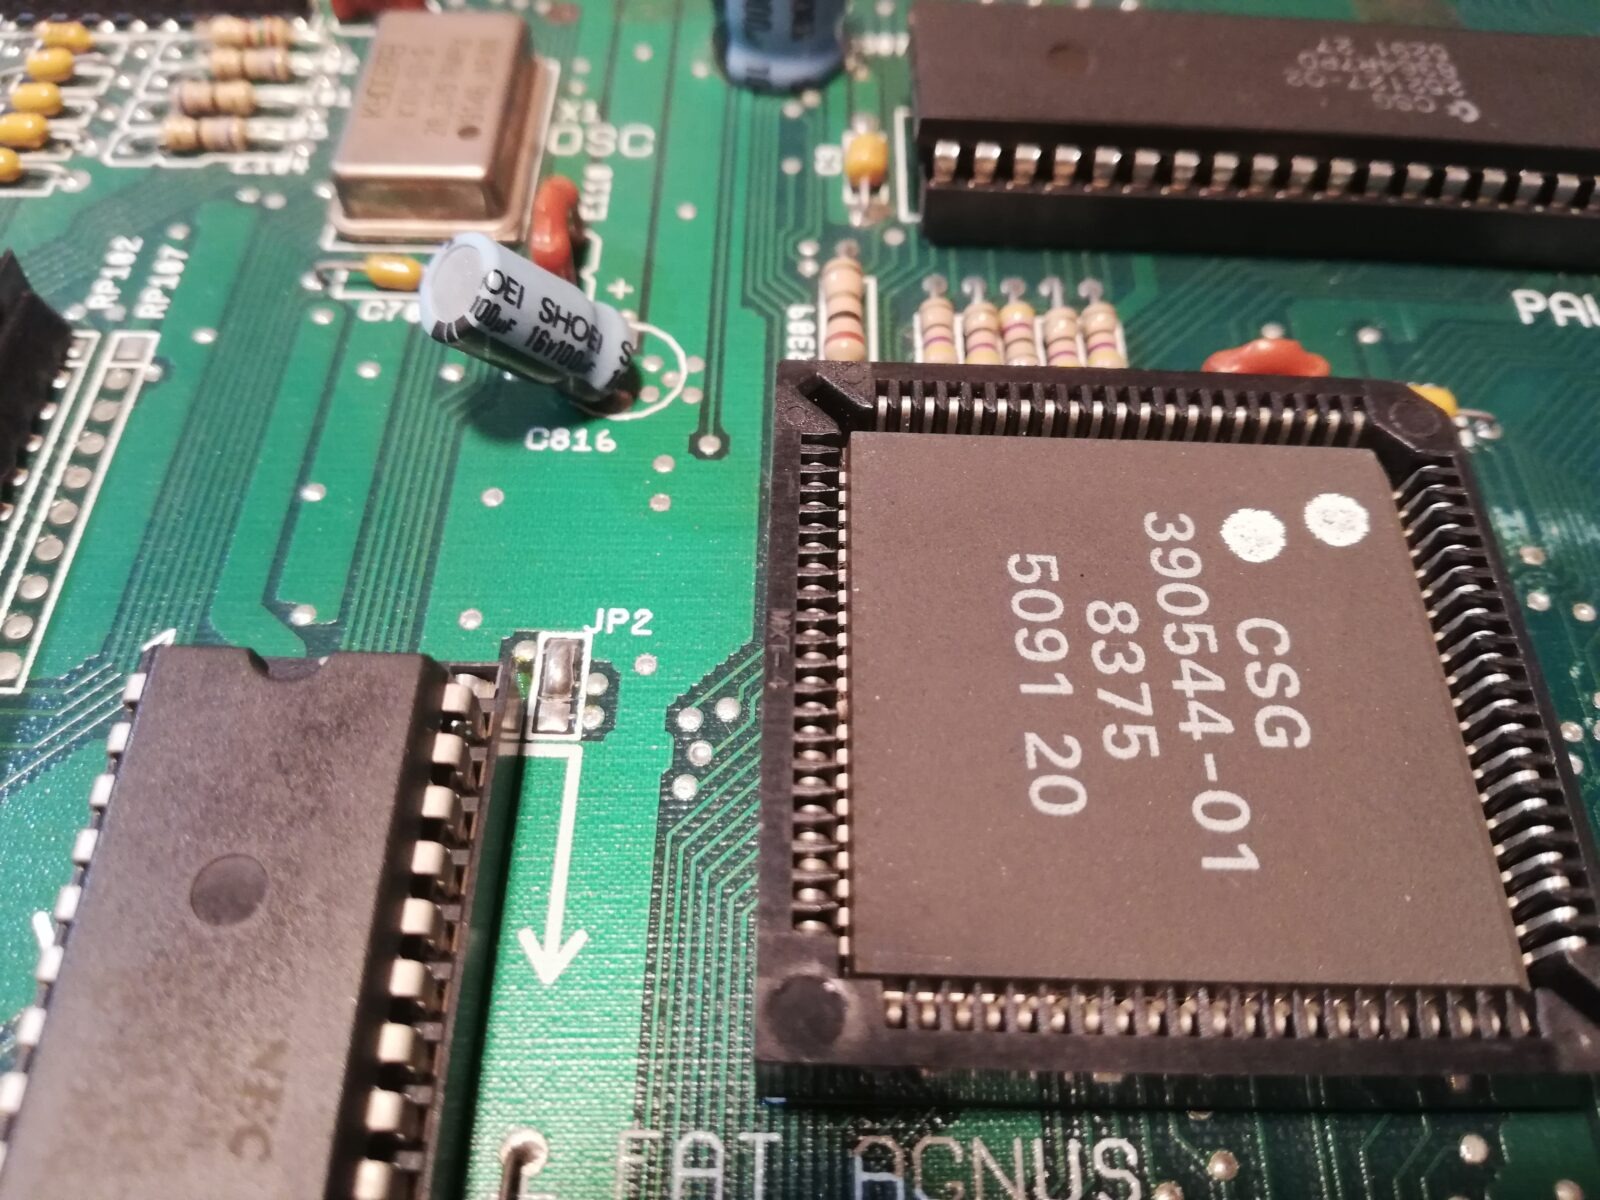
Quick start
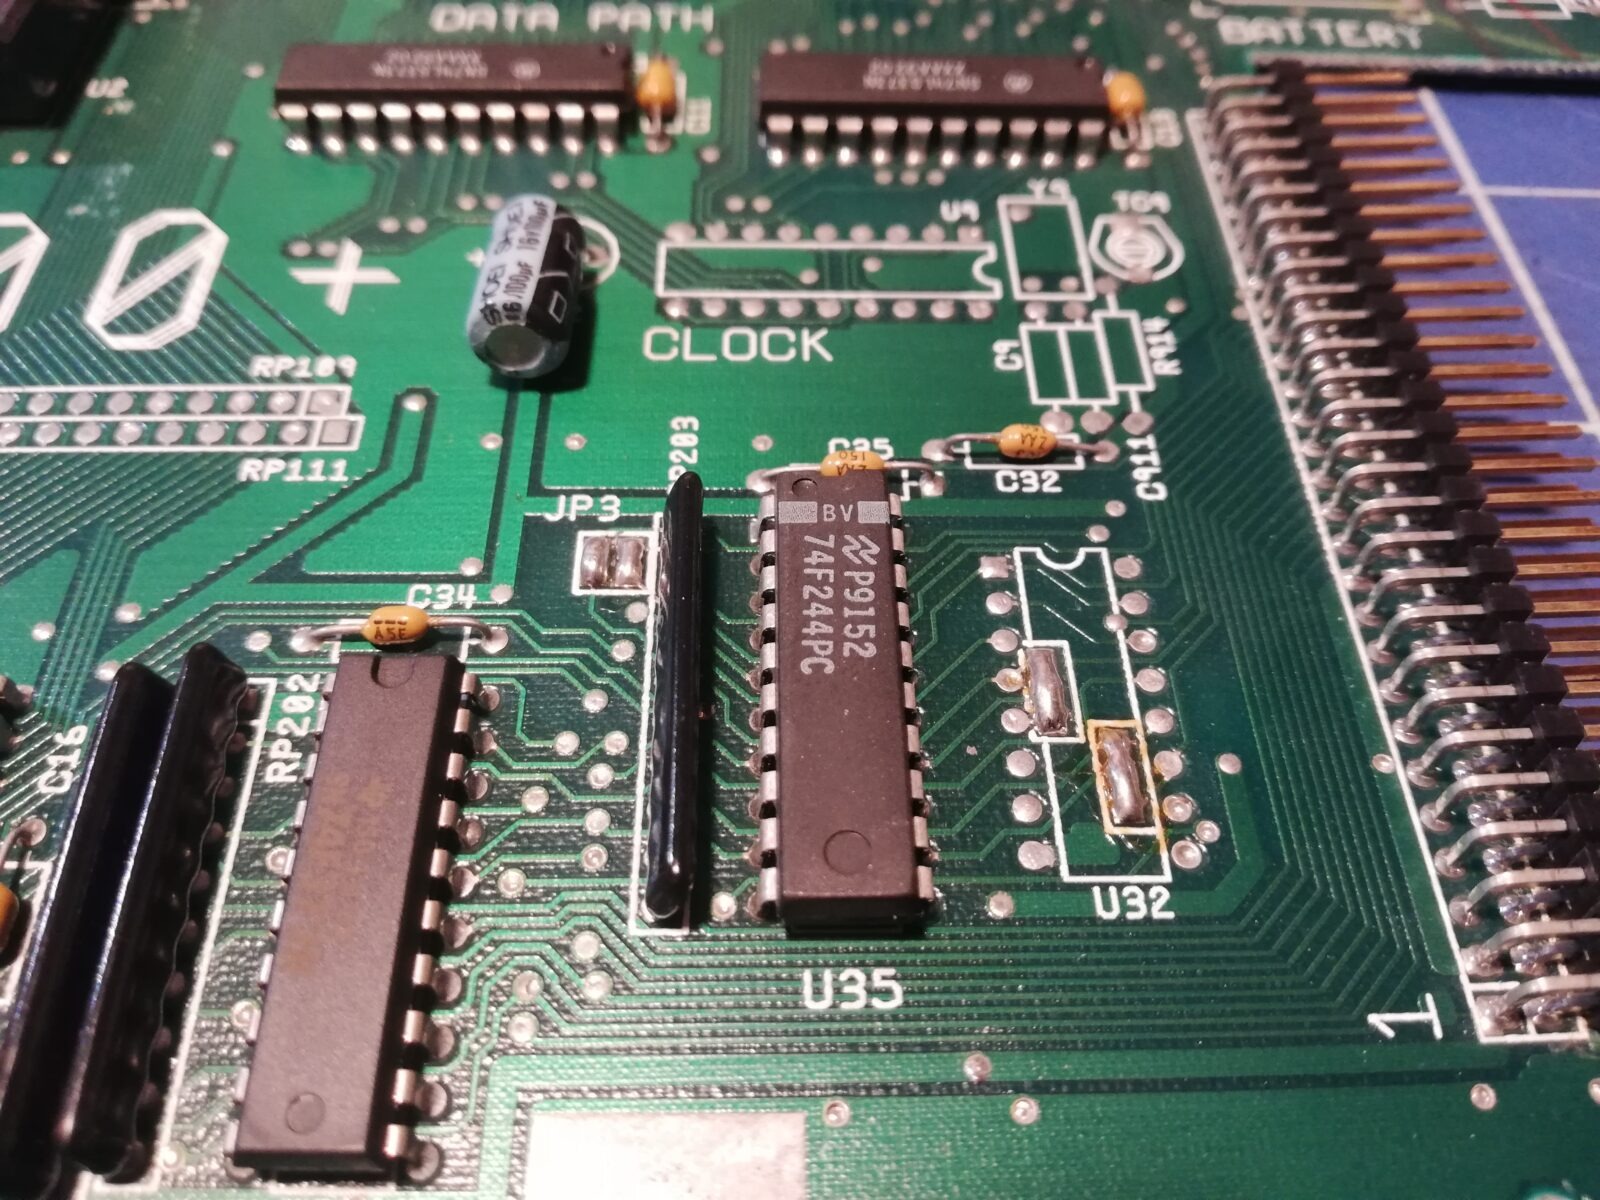
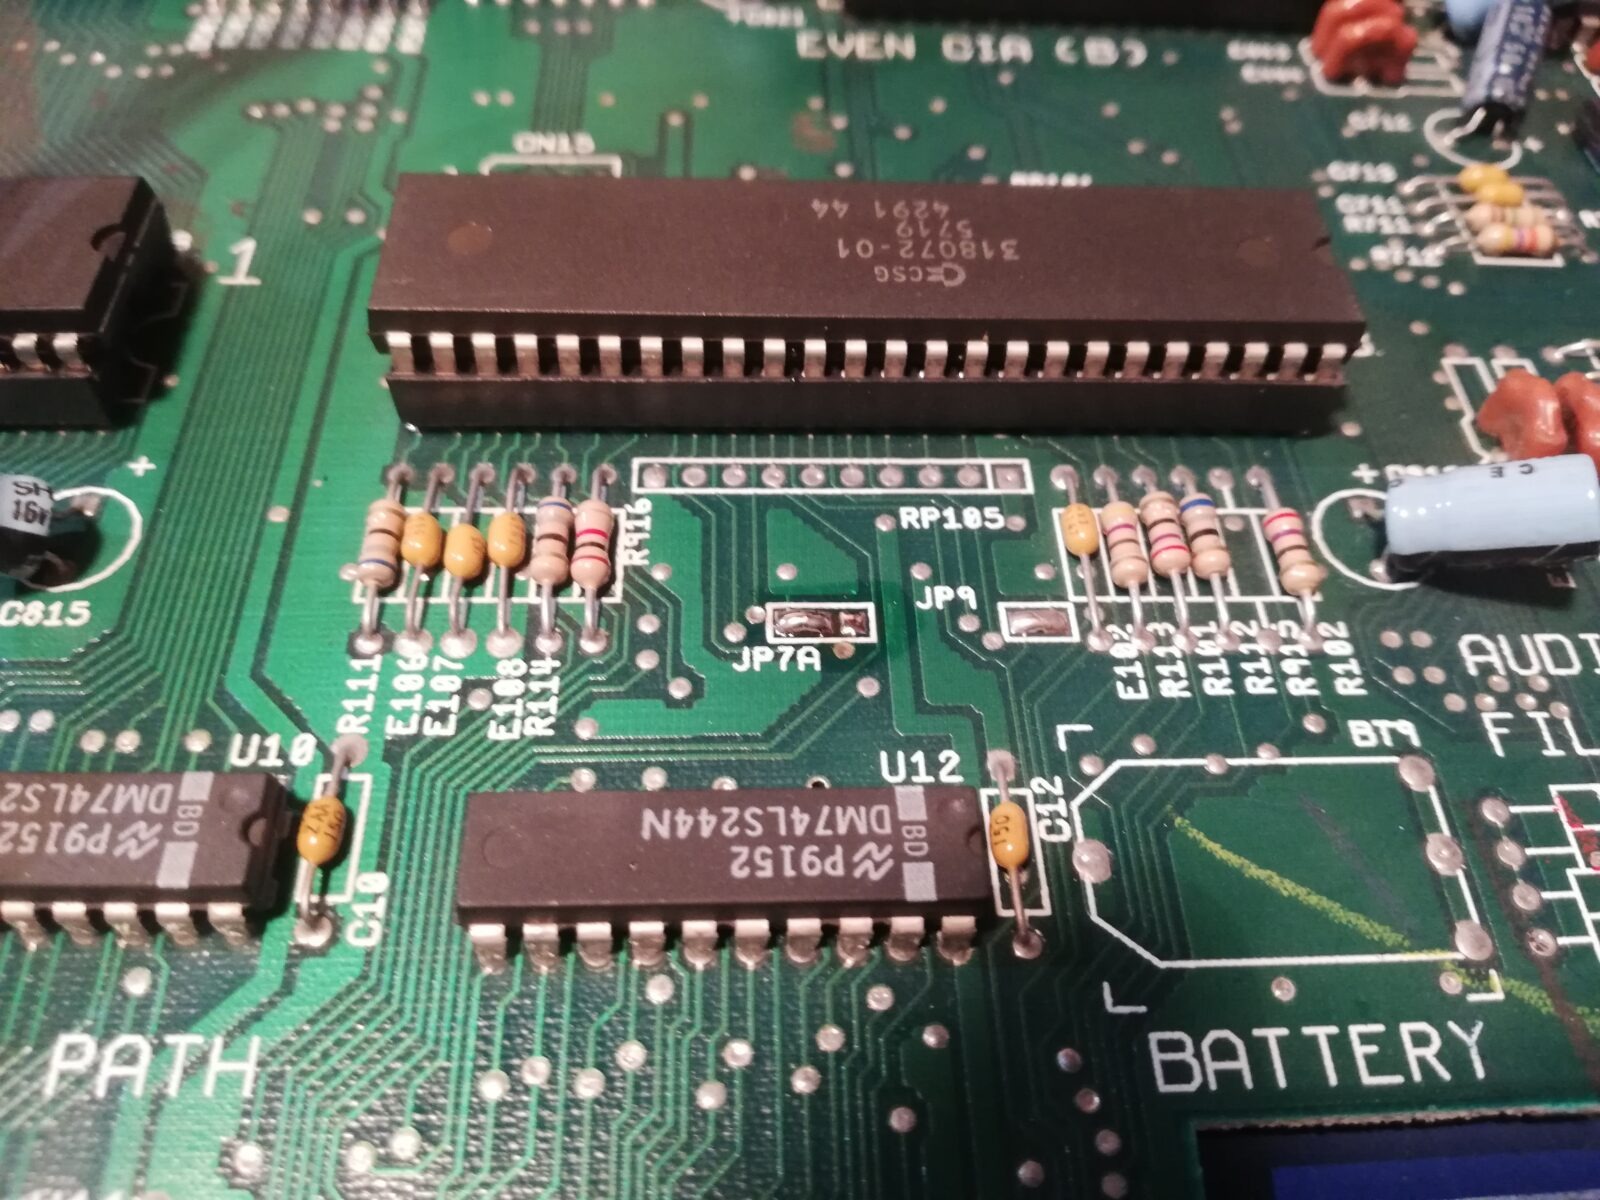
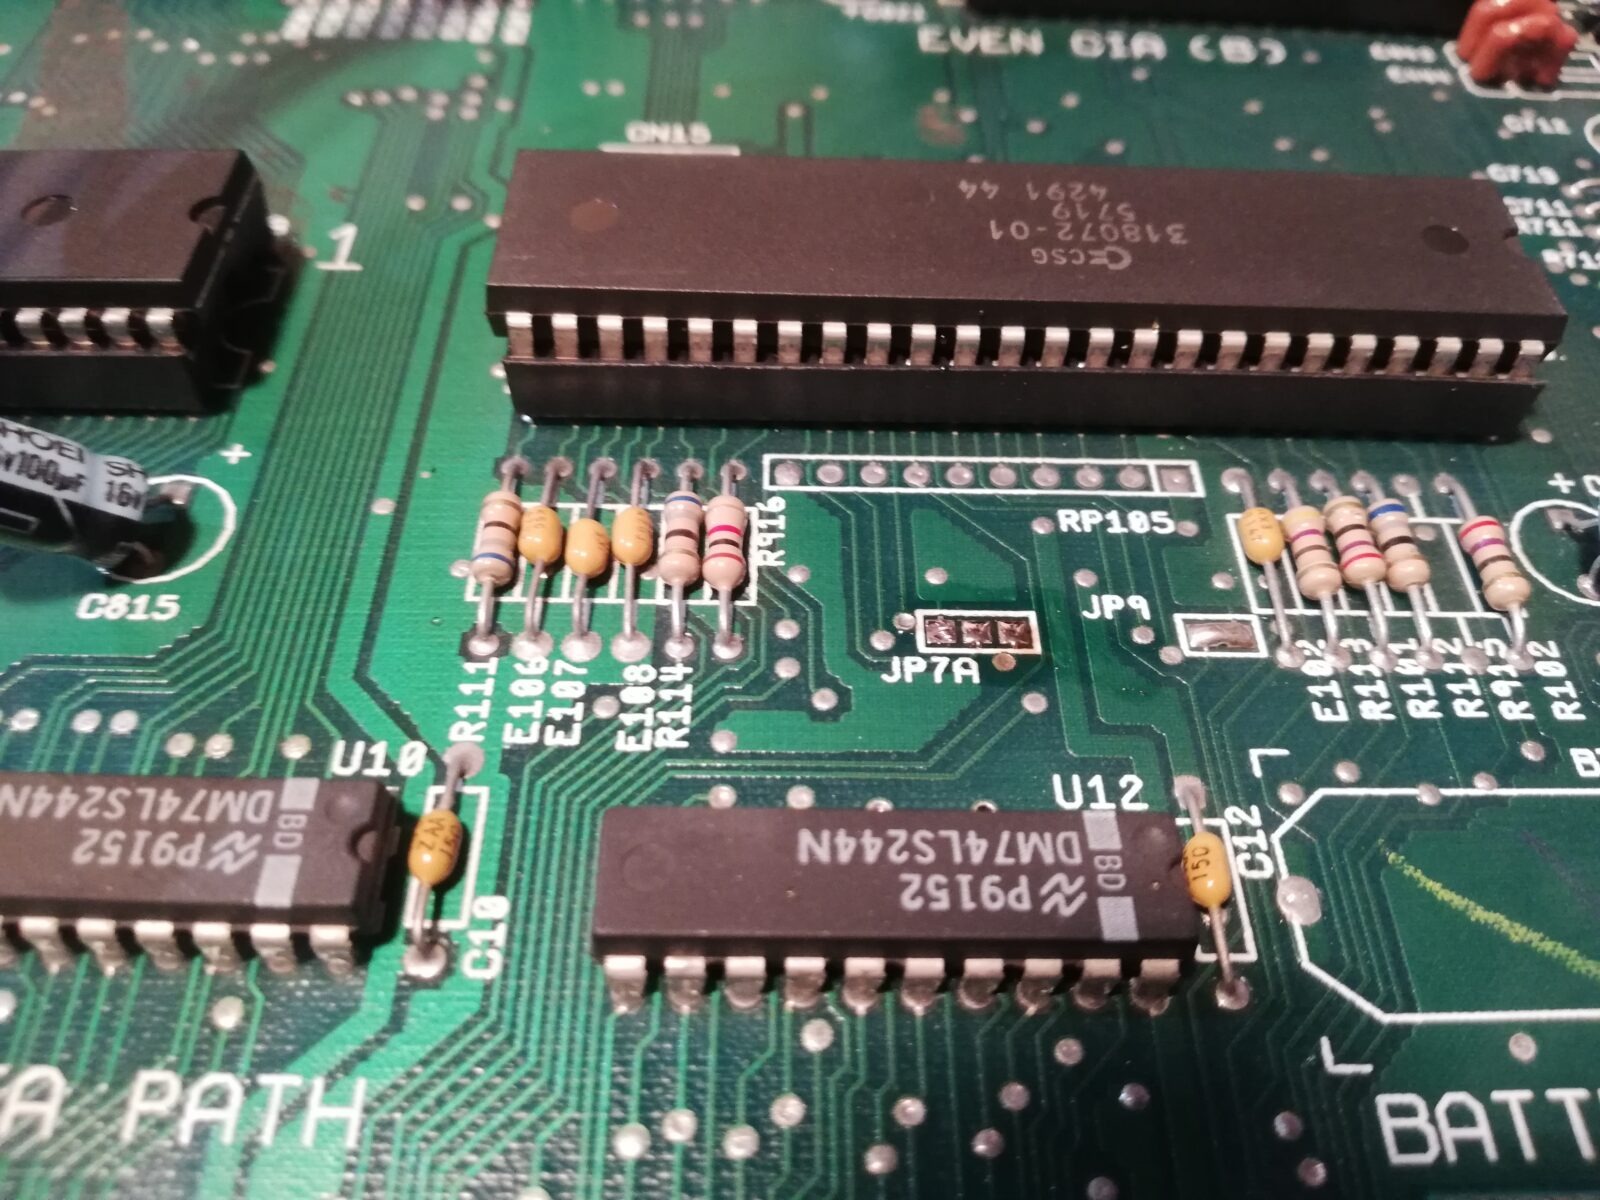
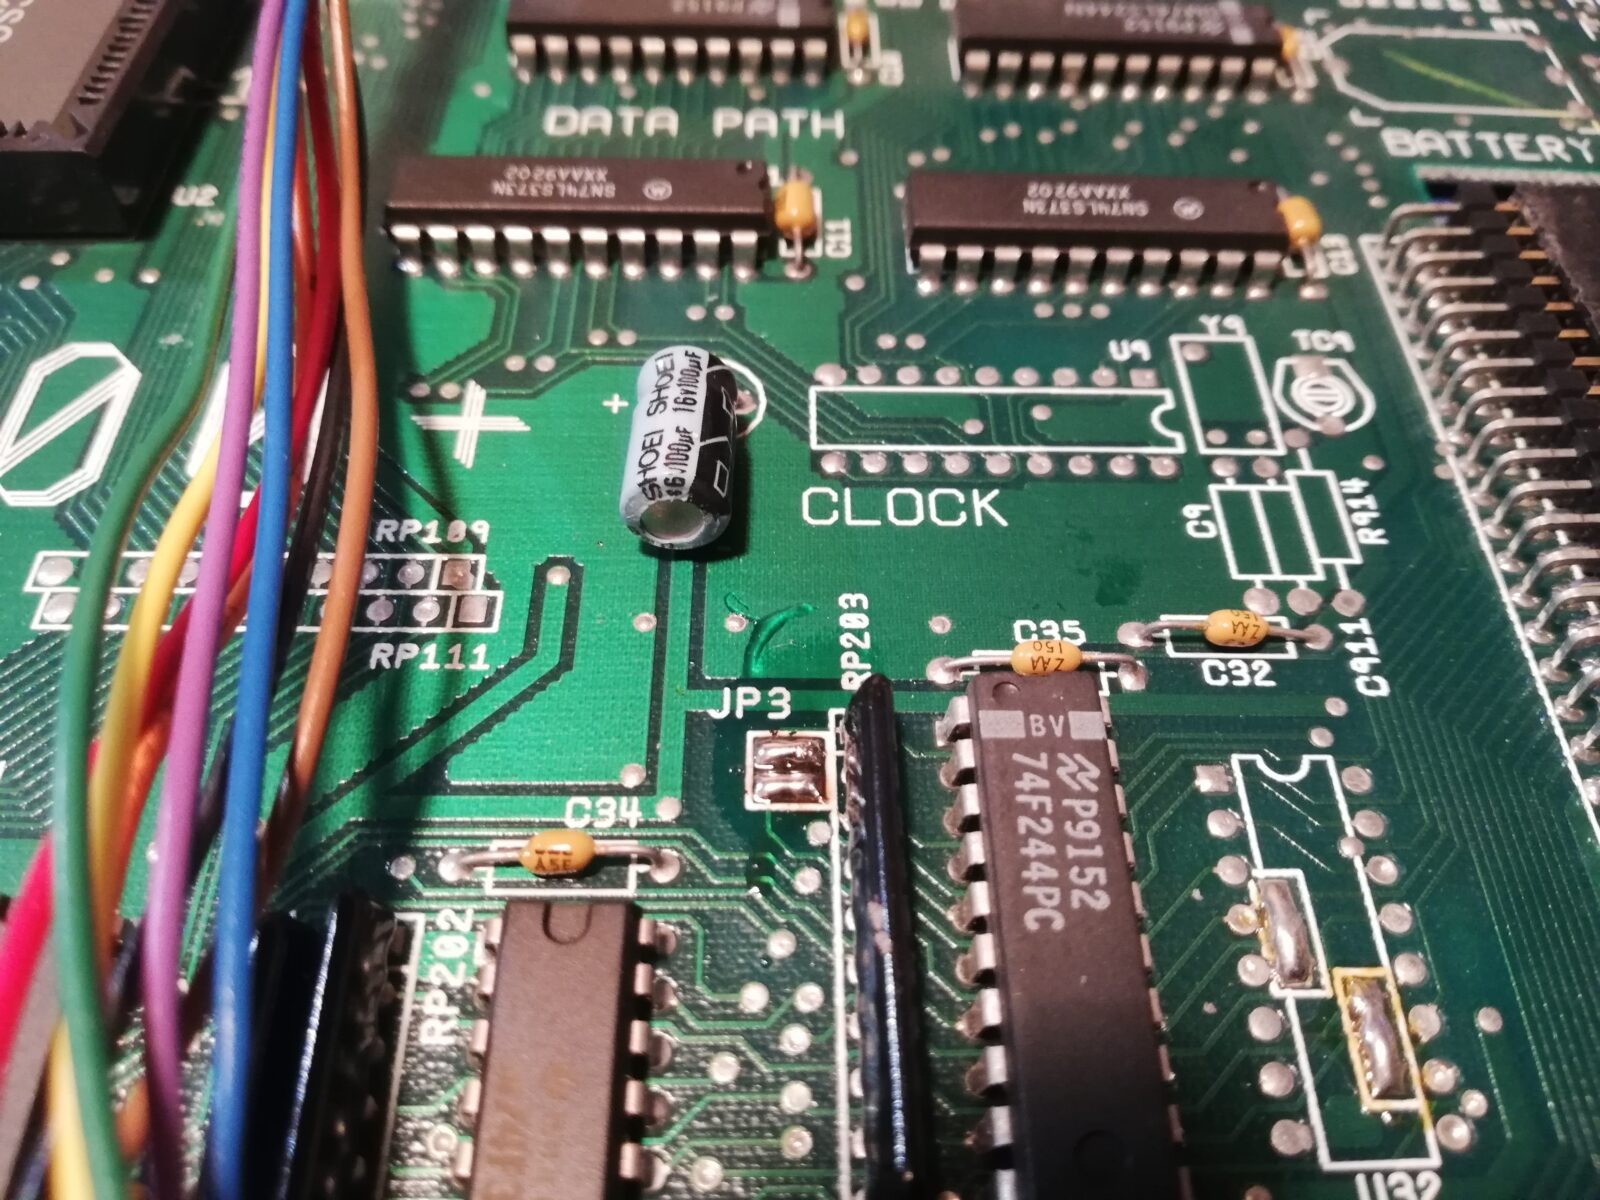
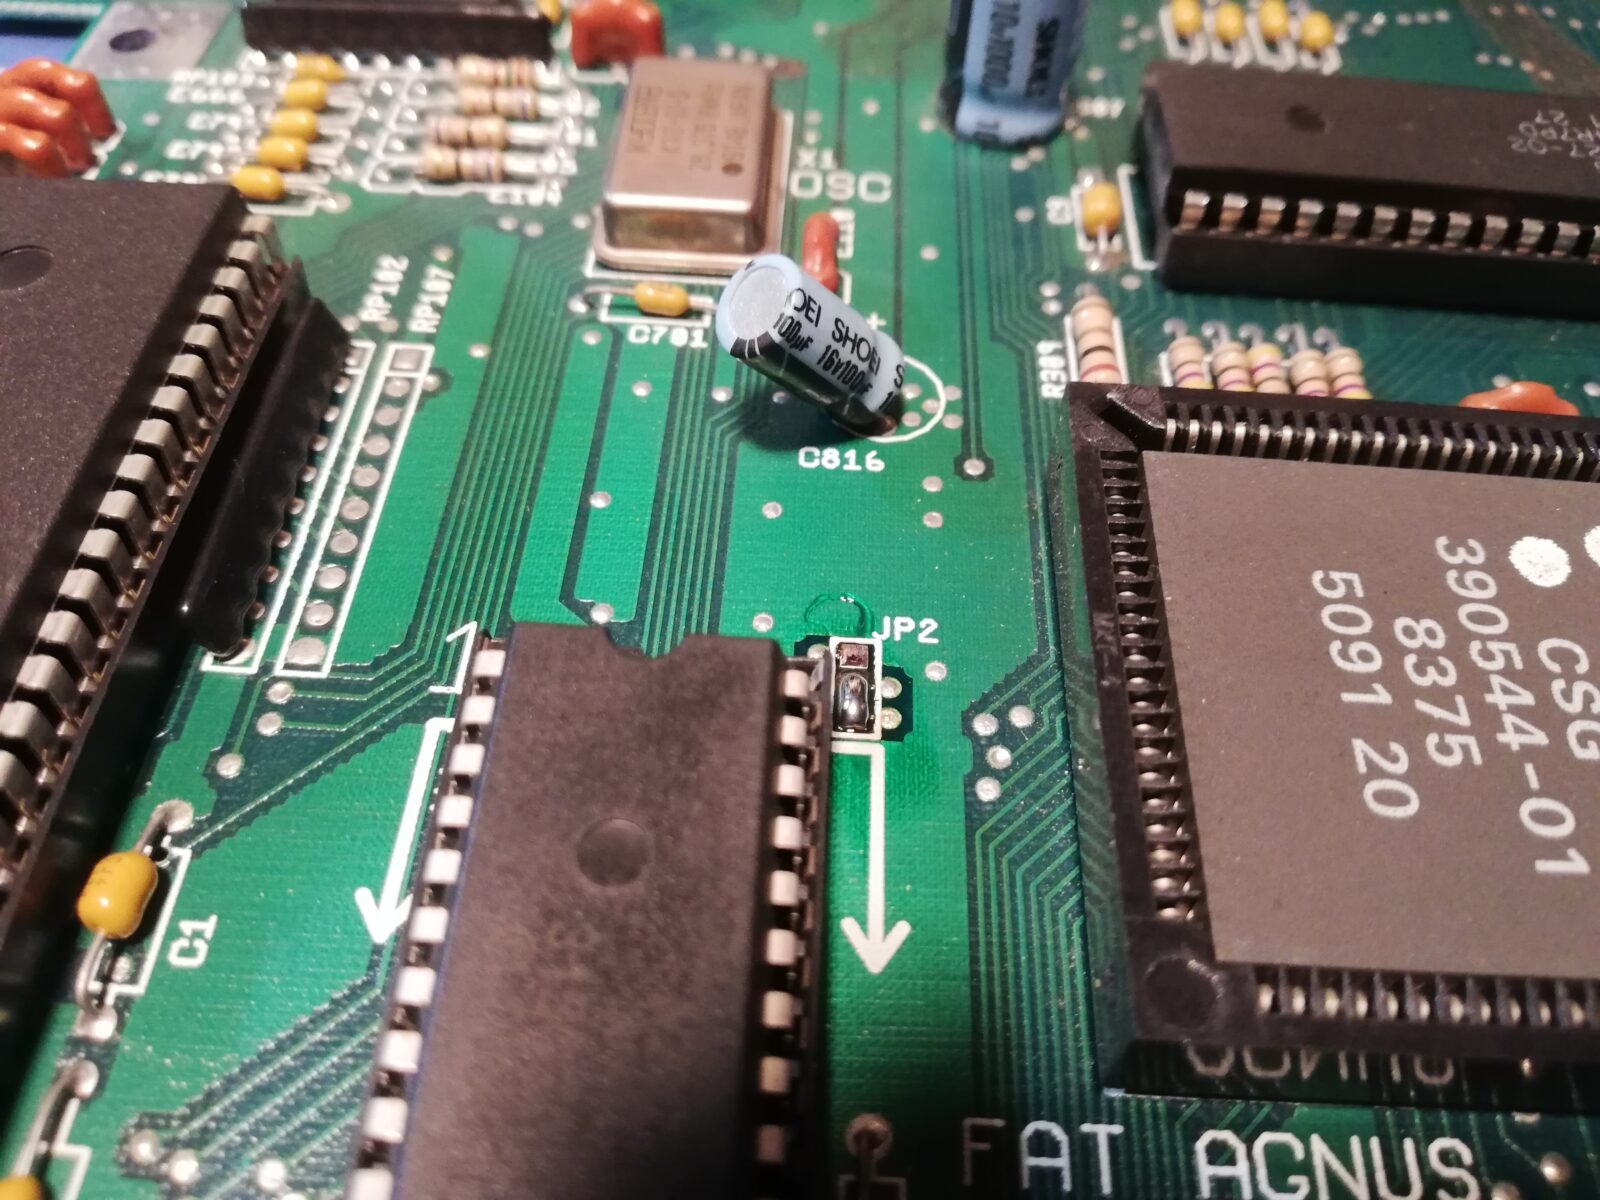
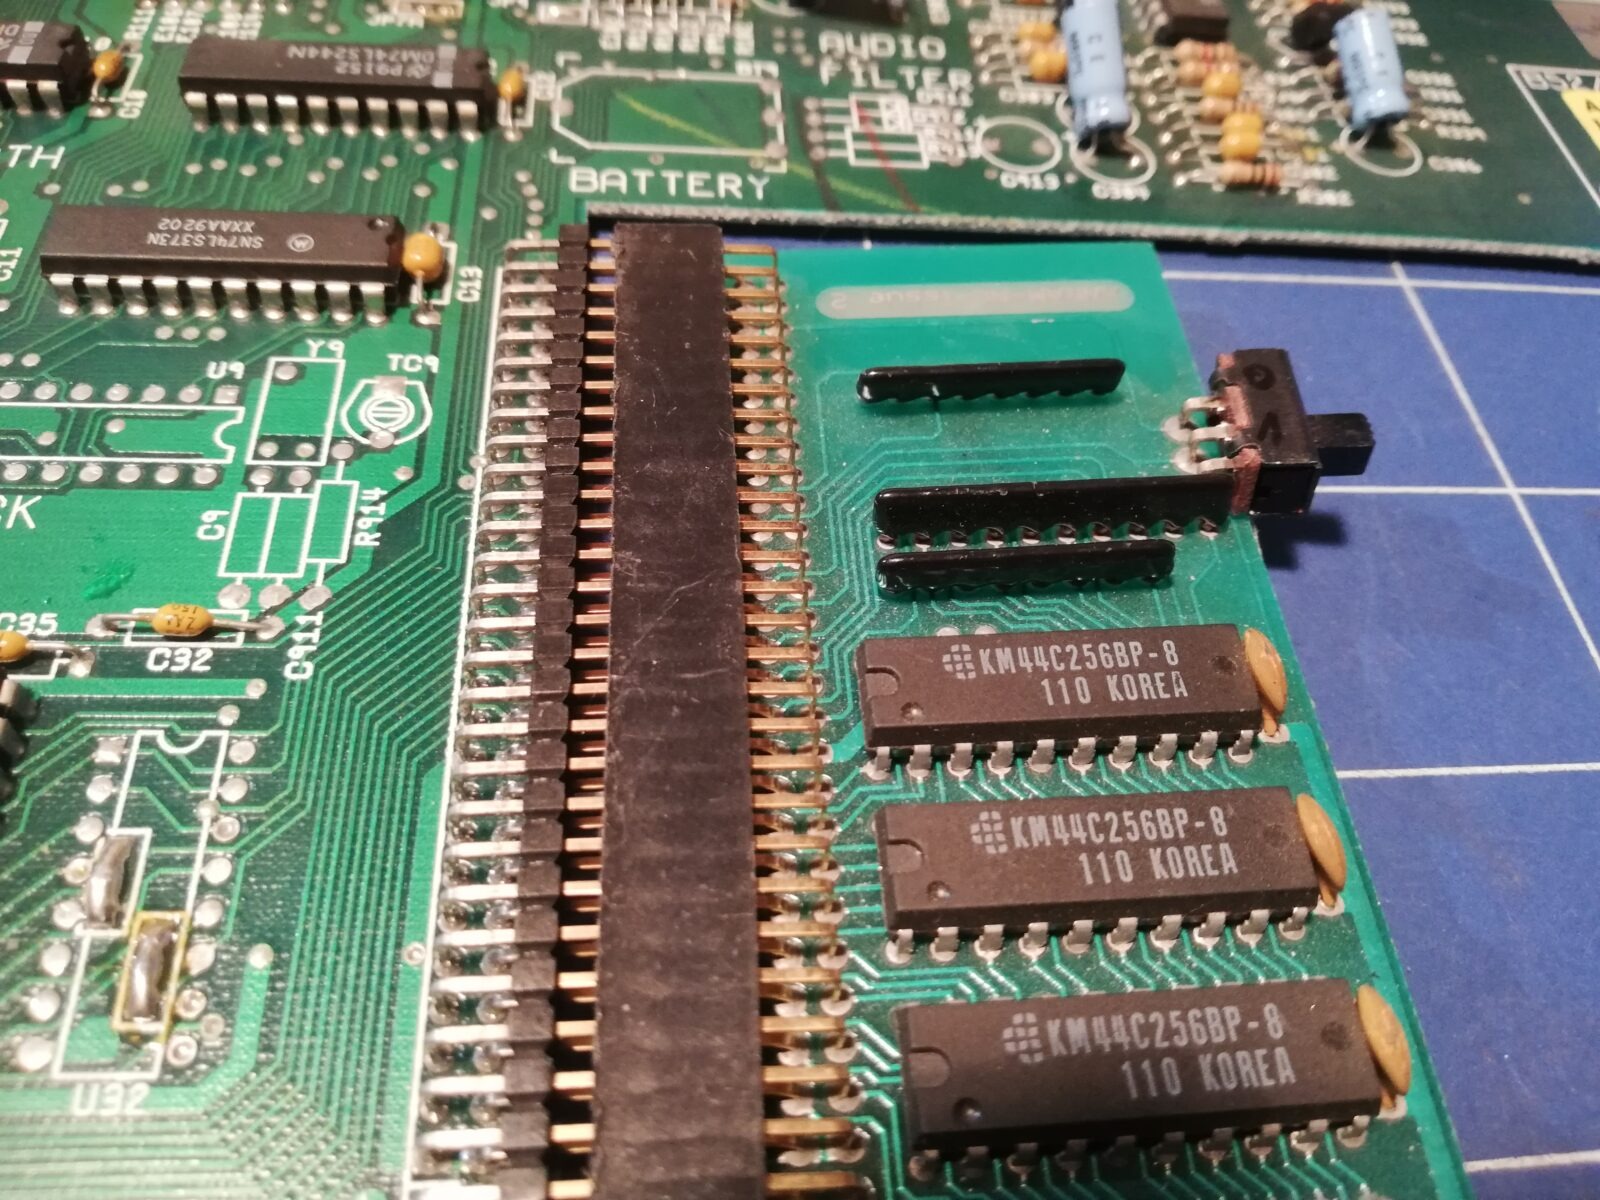
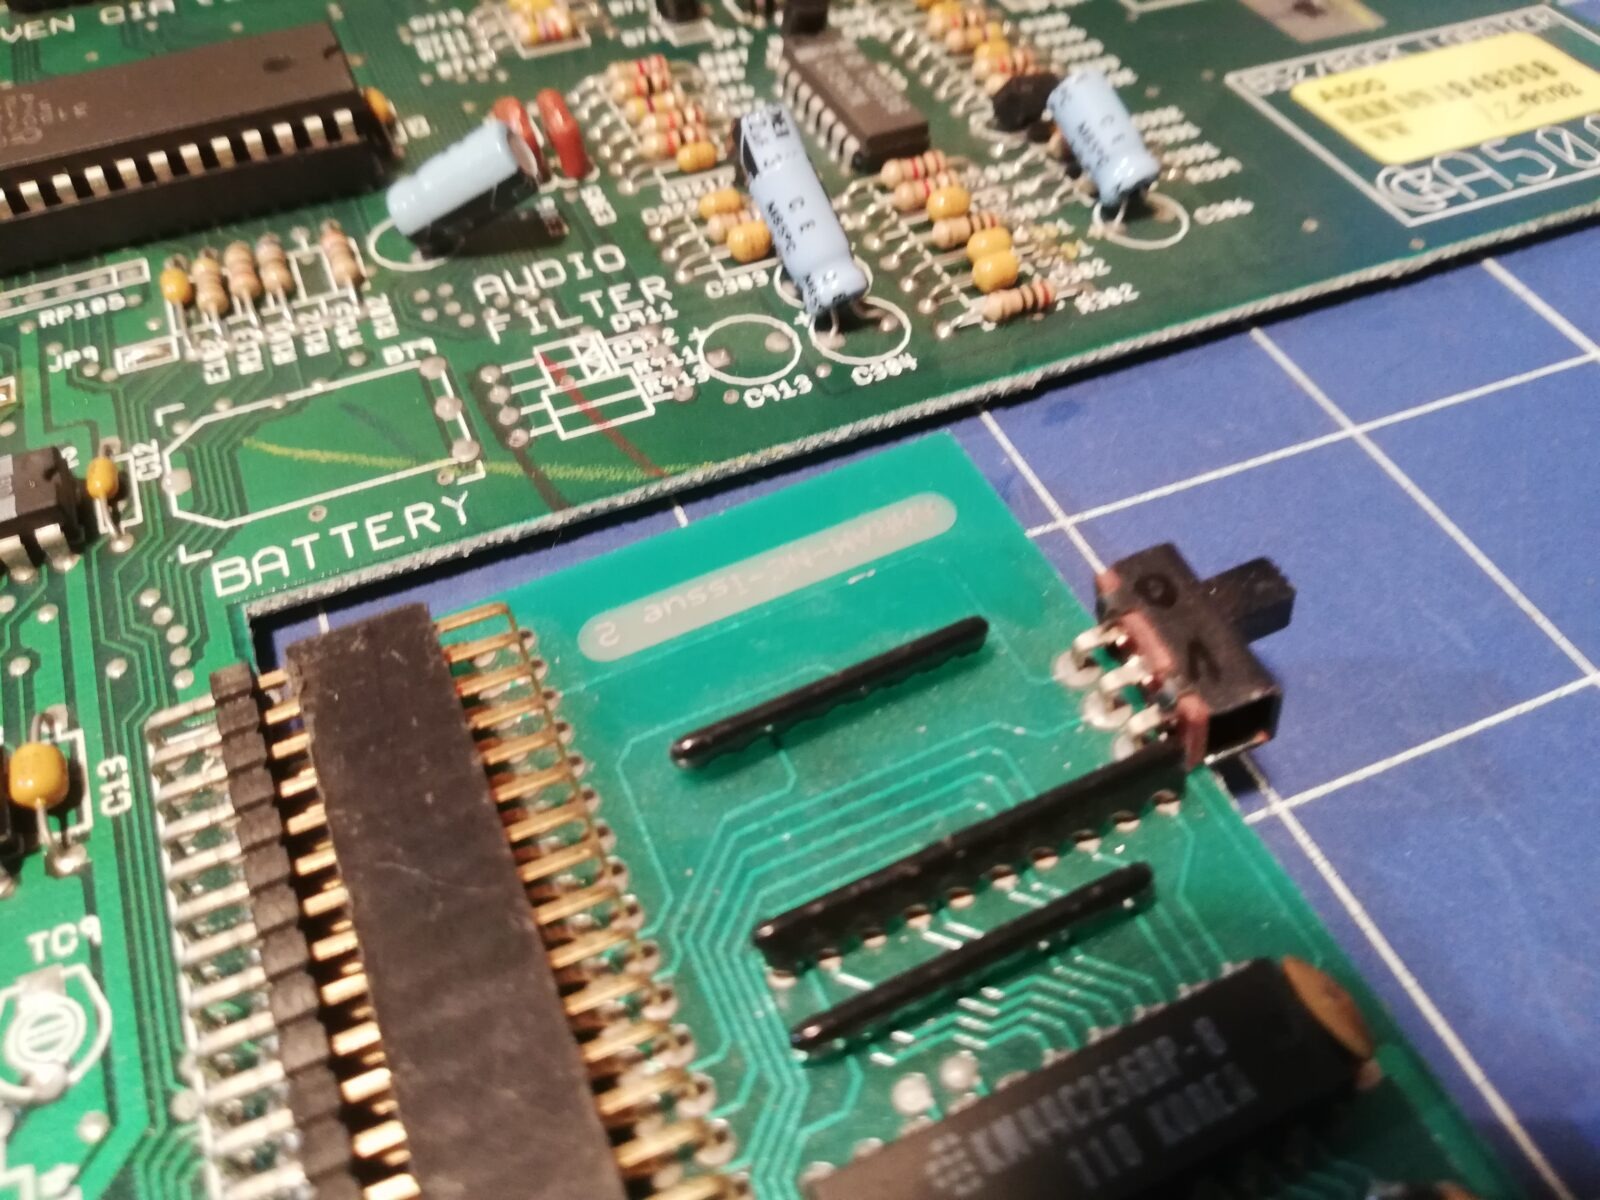
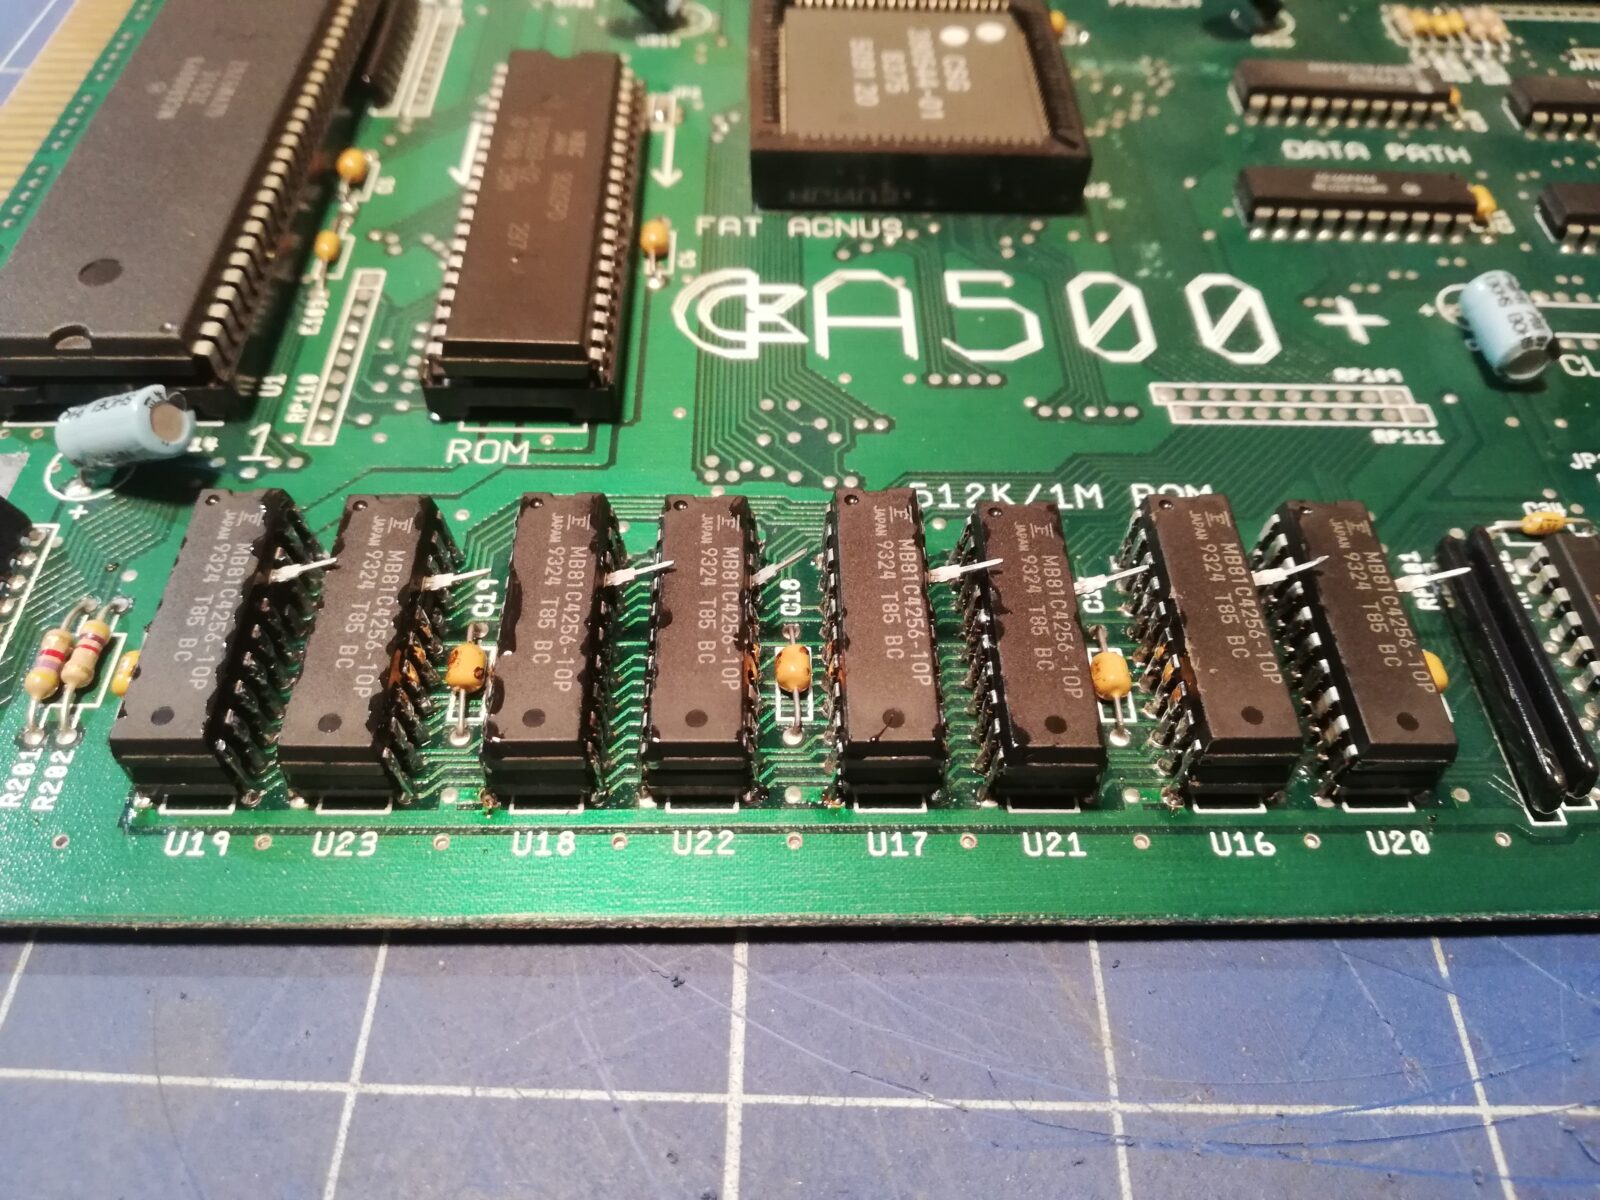
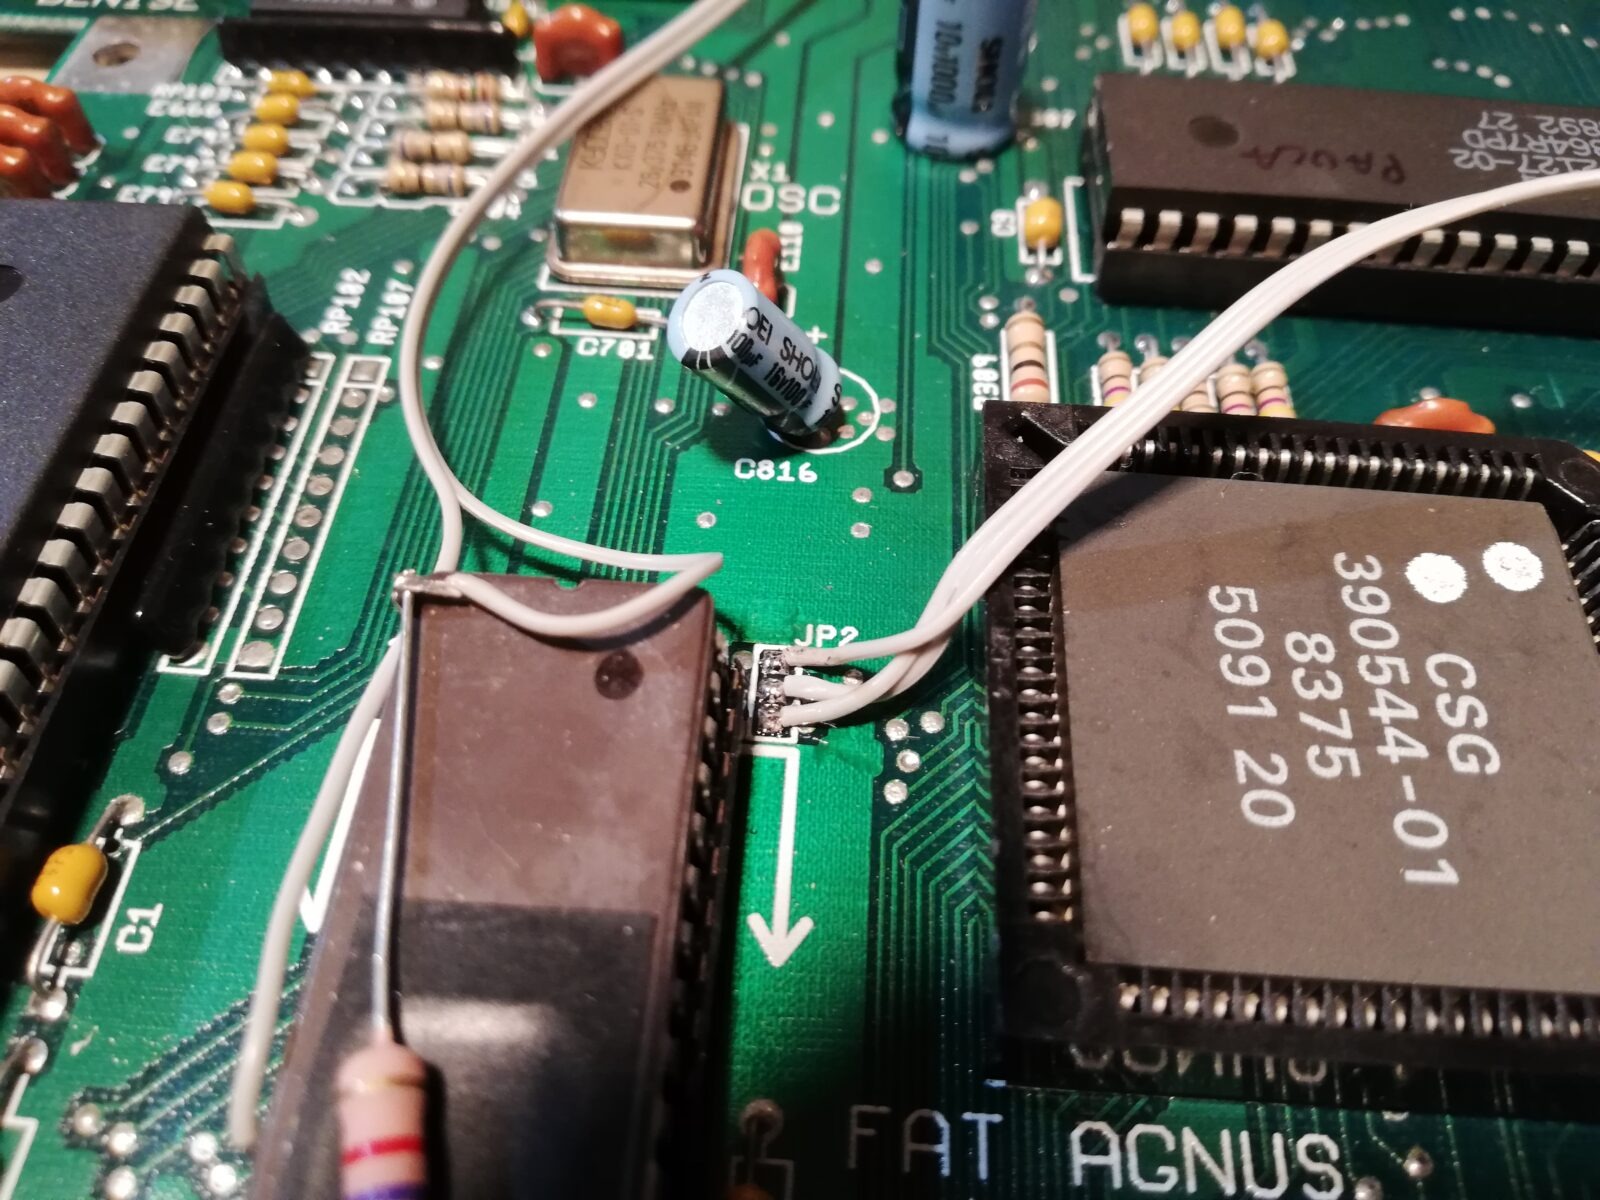
We are interested in jumpers – JP2, JP3, JP4A, and JP4B(solder blobs under U32) and JP7A.
As seen in pics, these jumpers are set in default config – 0.5MB of ChipRAM and trapdoor port enabled.
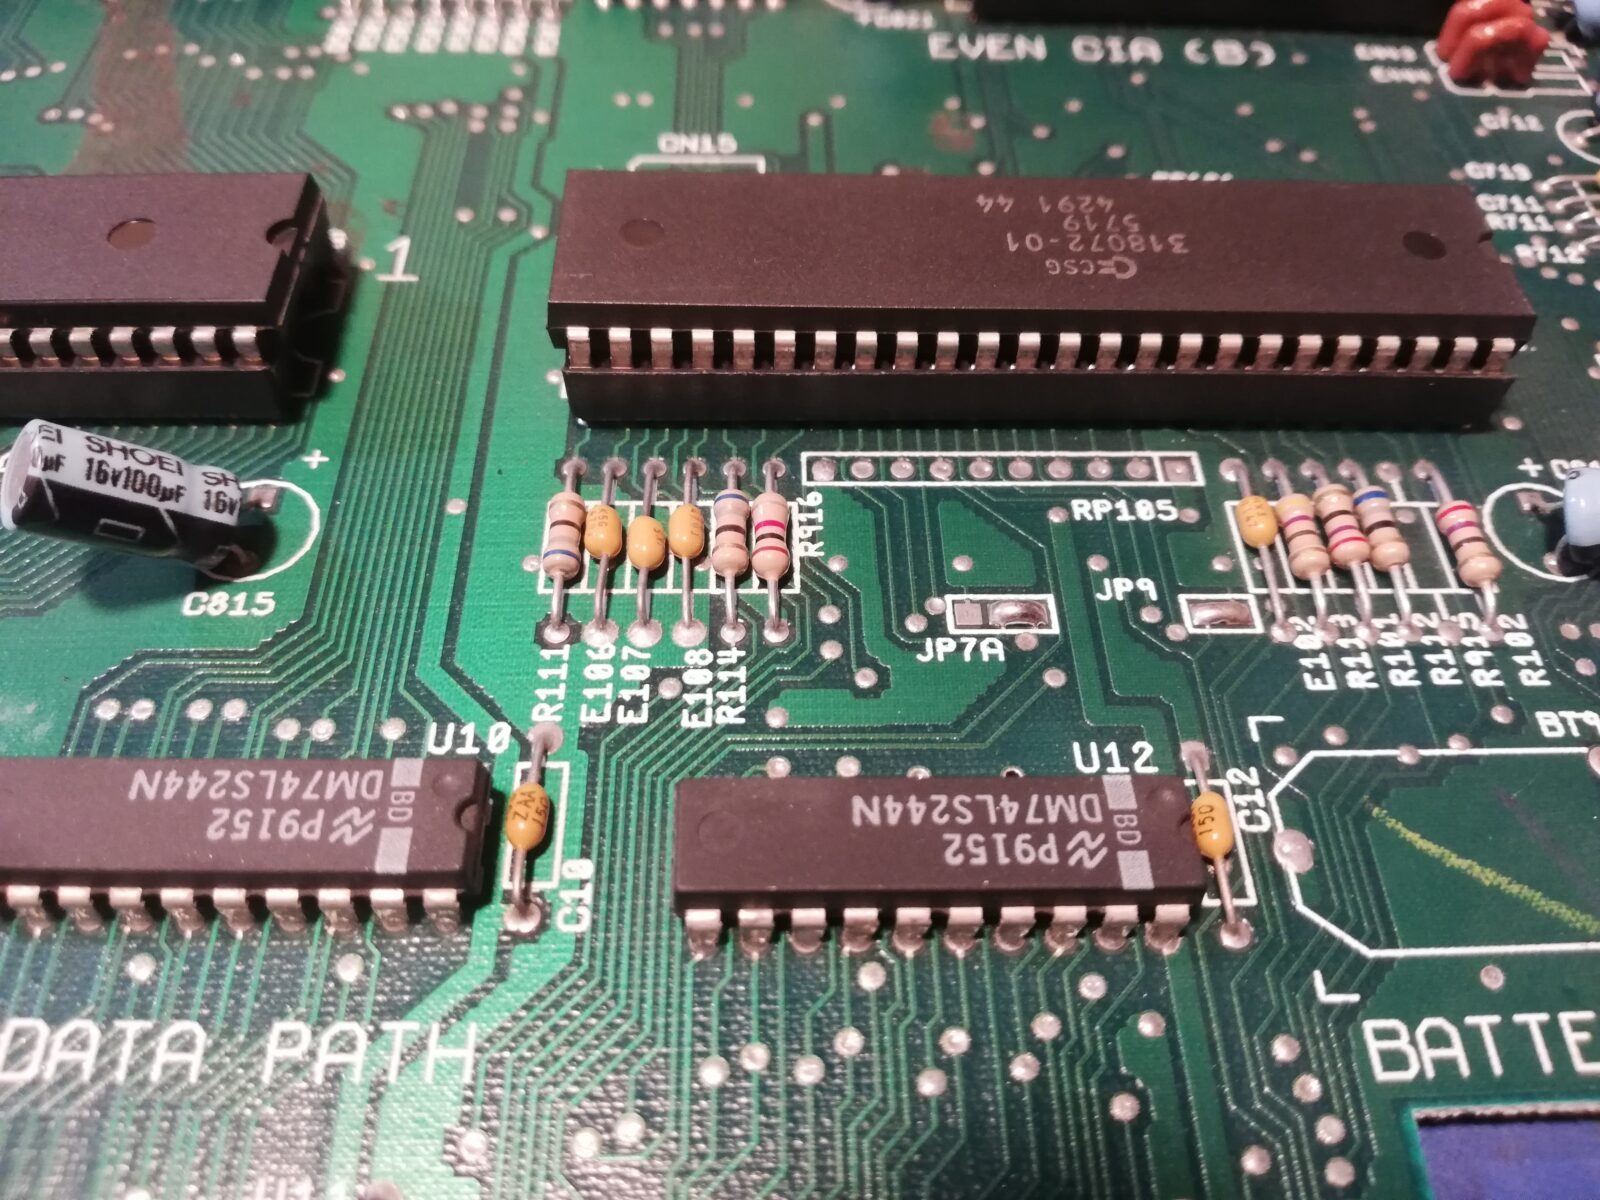
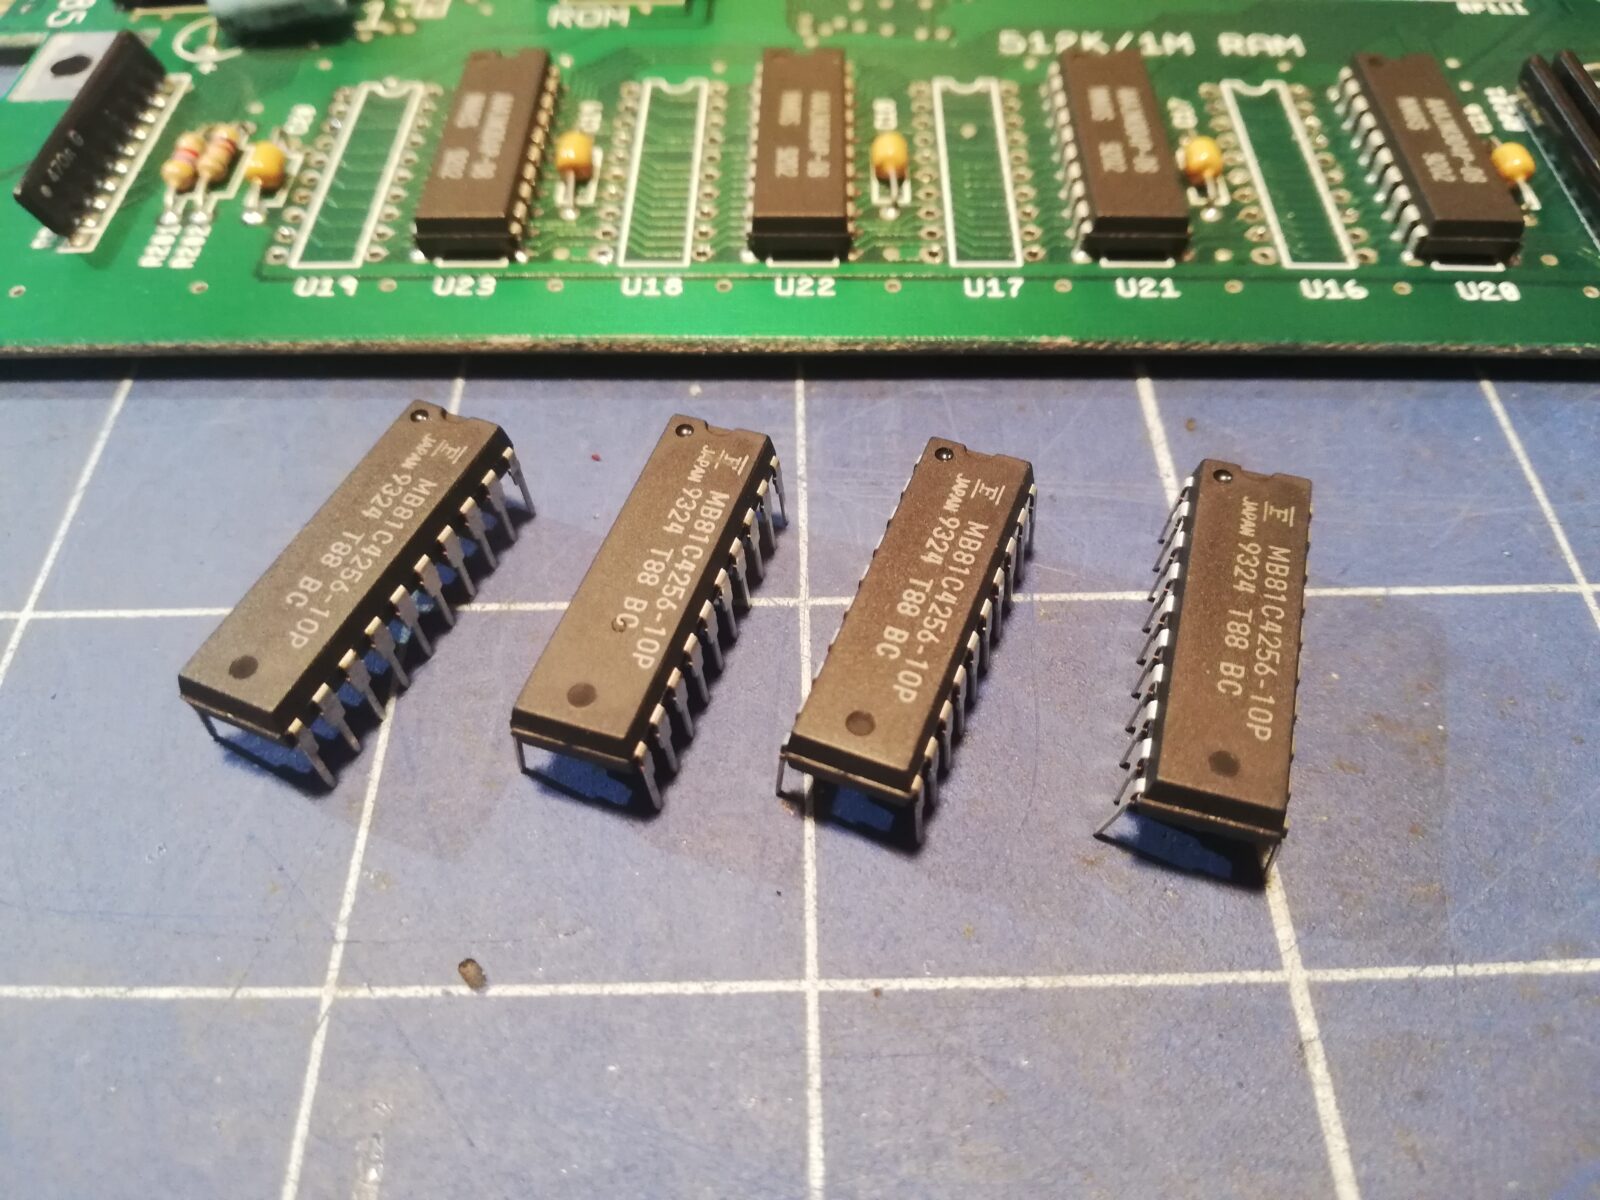
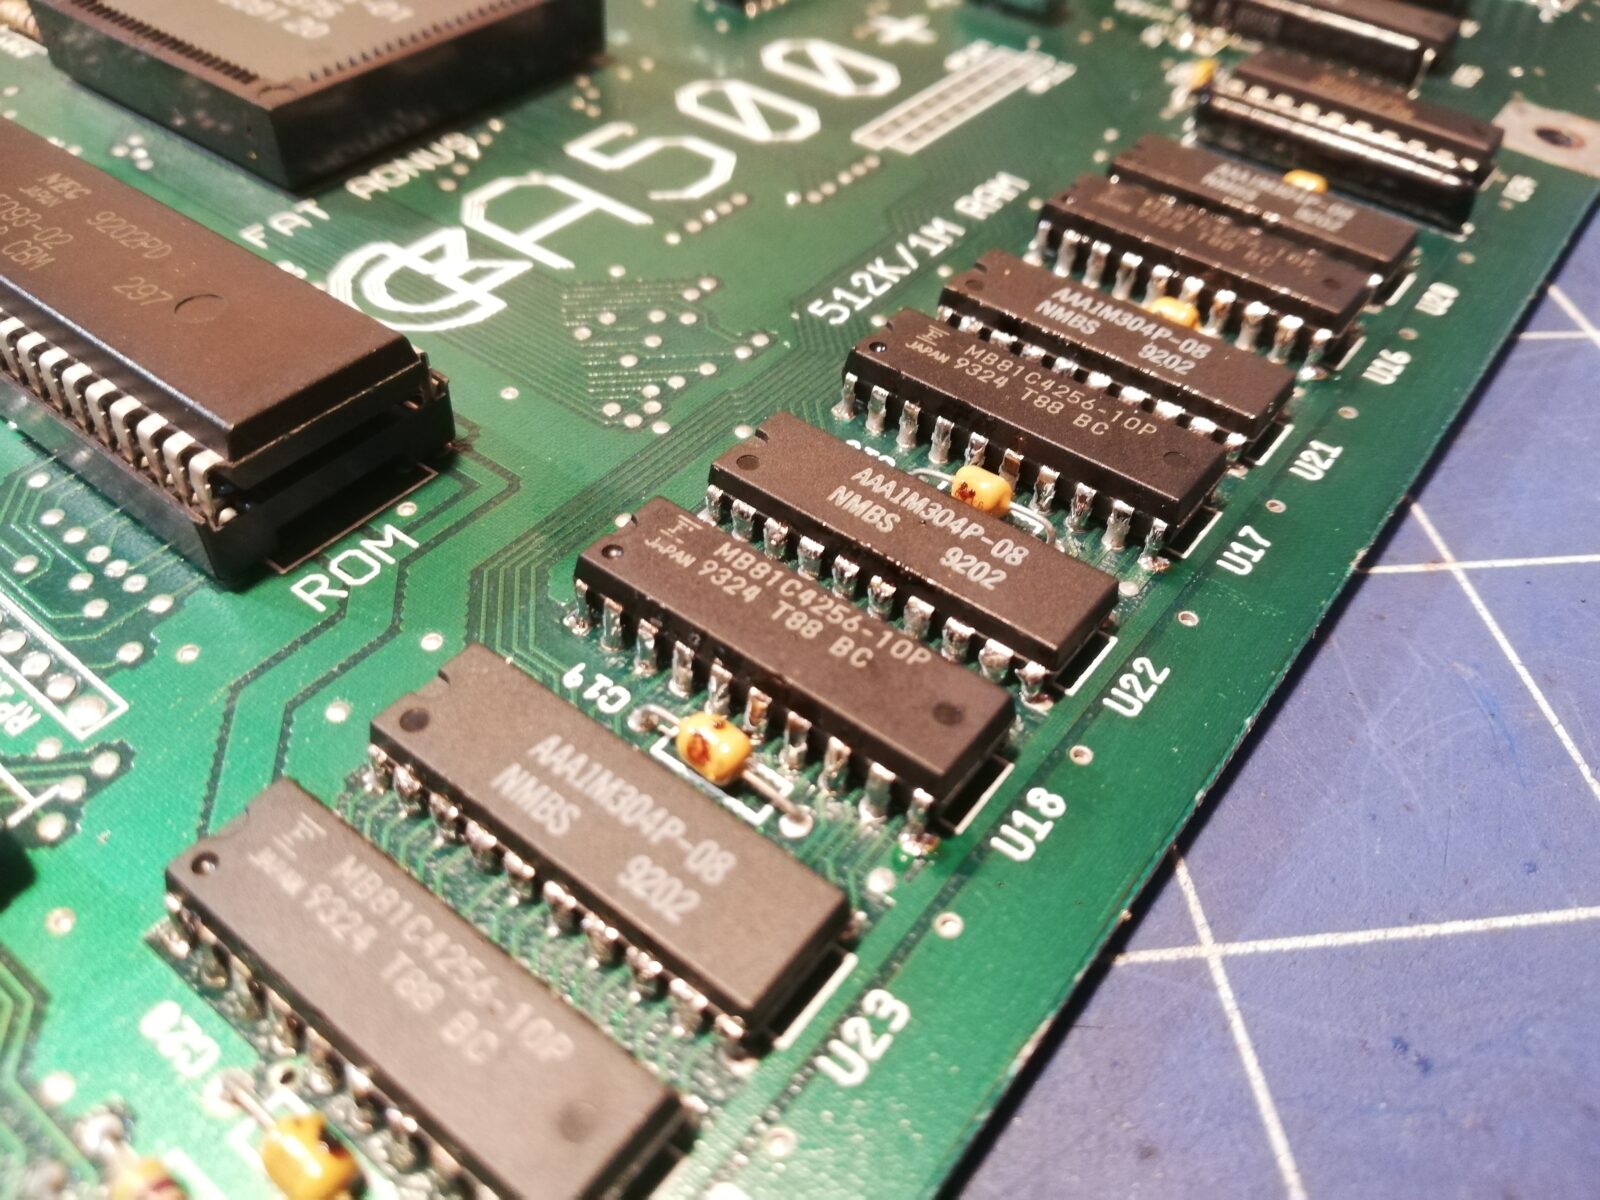
You can also see there are four spots with unpopulated RAM chips – U16, U17, U18, and U19
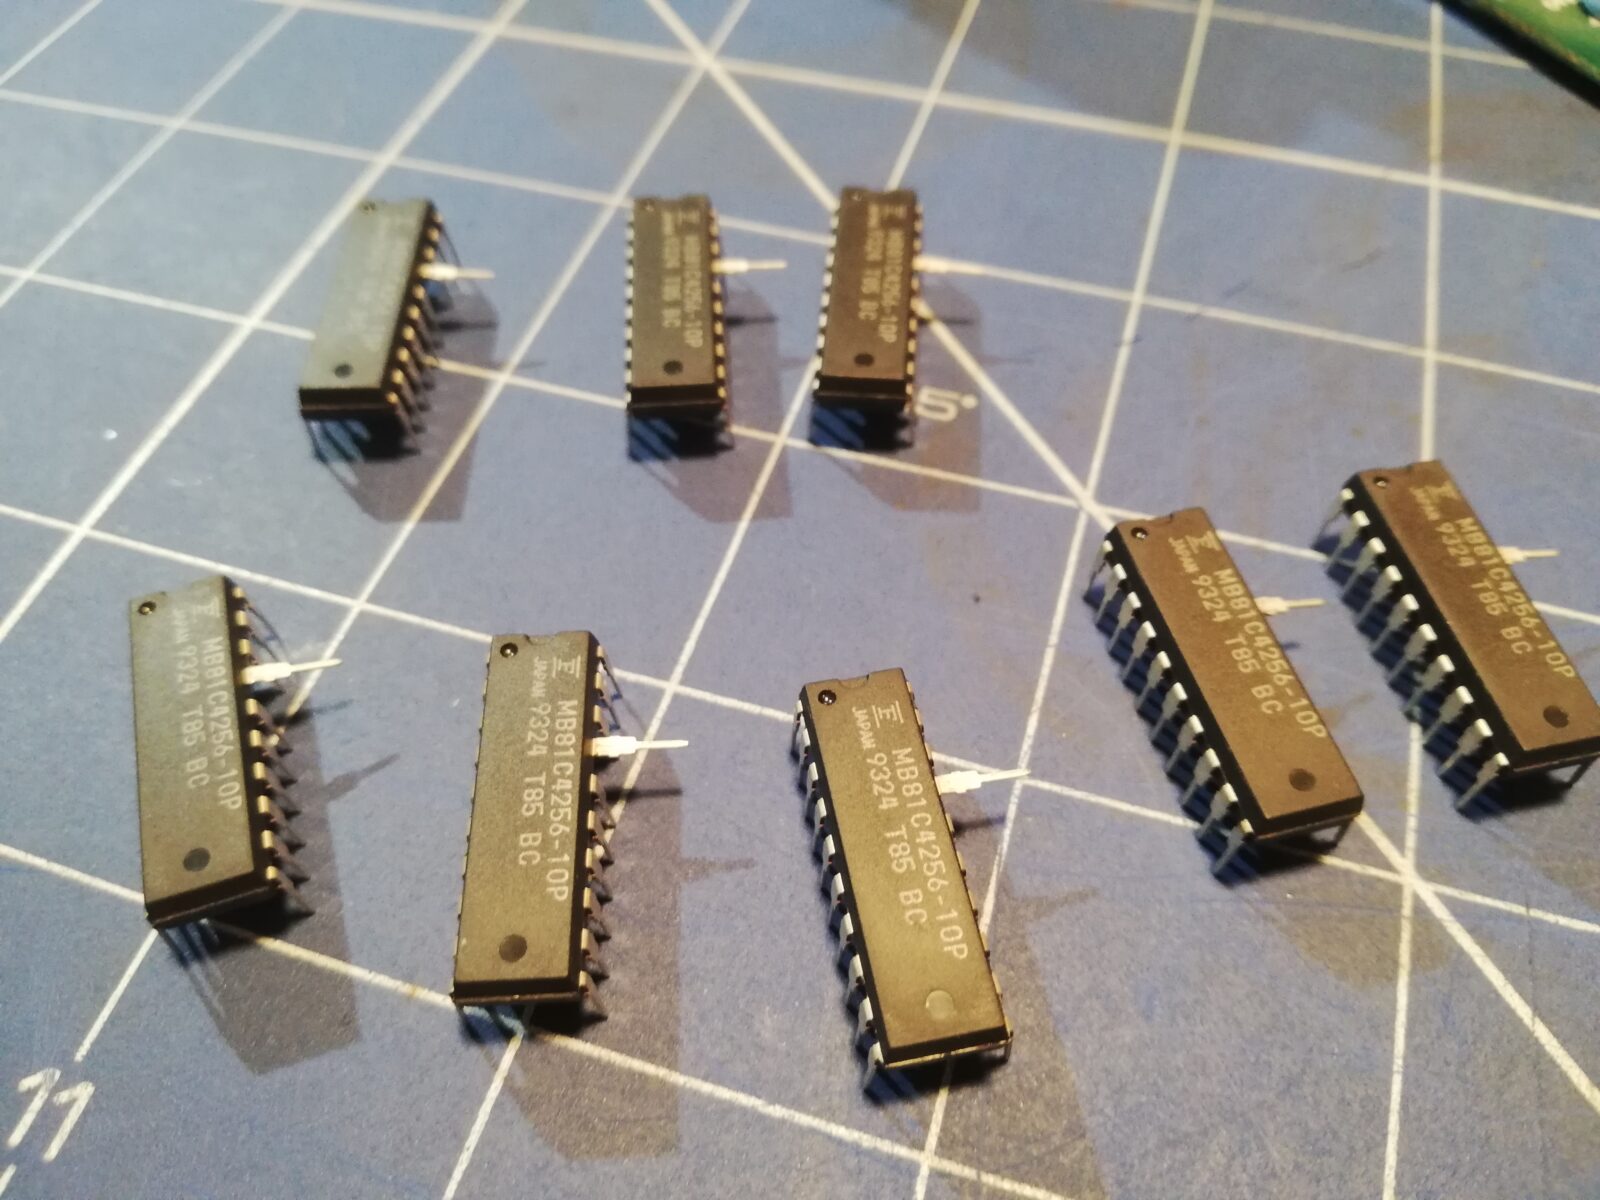
For upgrades, I will be using 265kx4 DRAM MB81C4256-10P chips by Fujitsu.
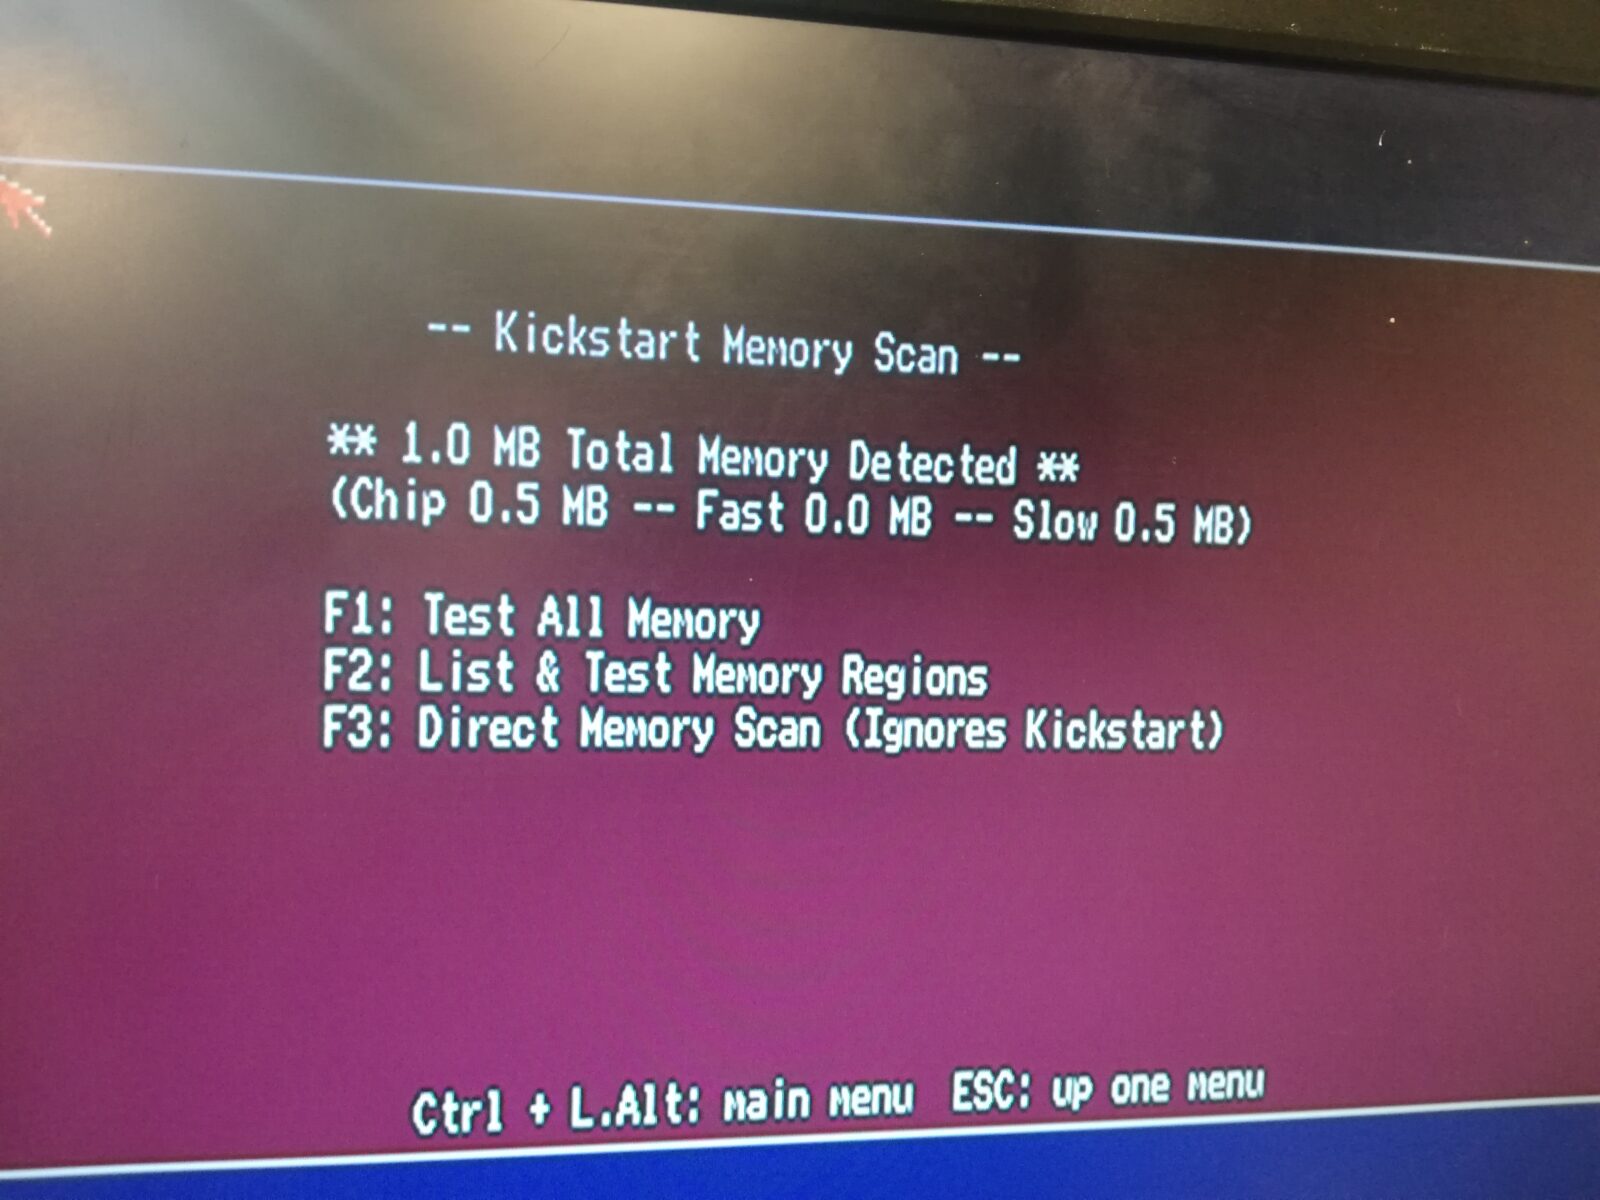
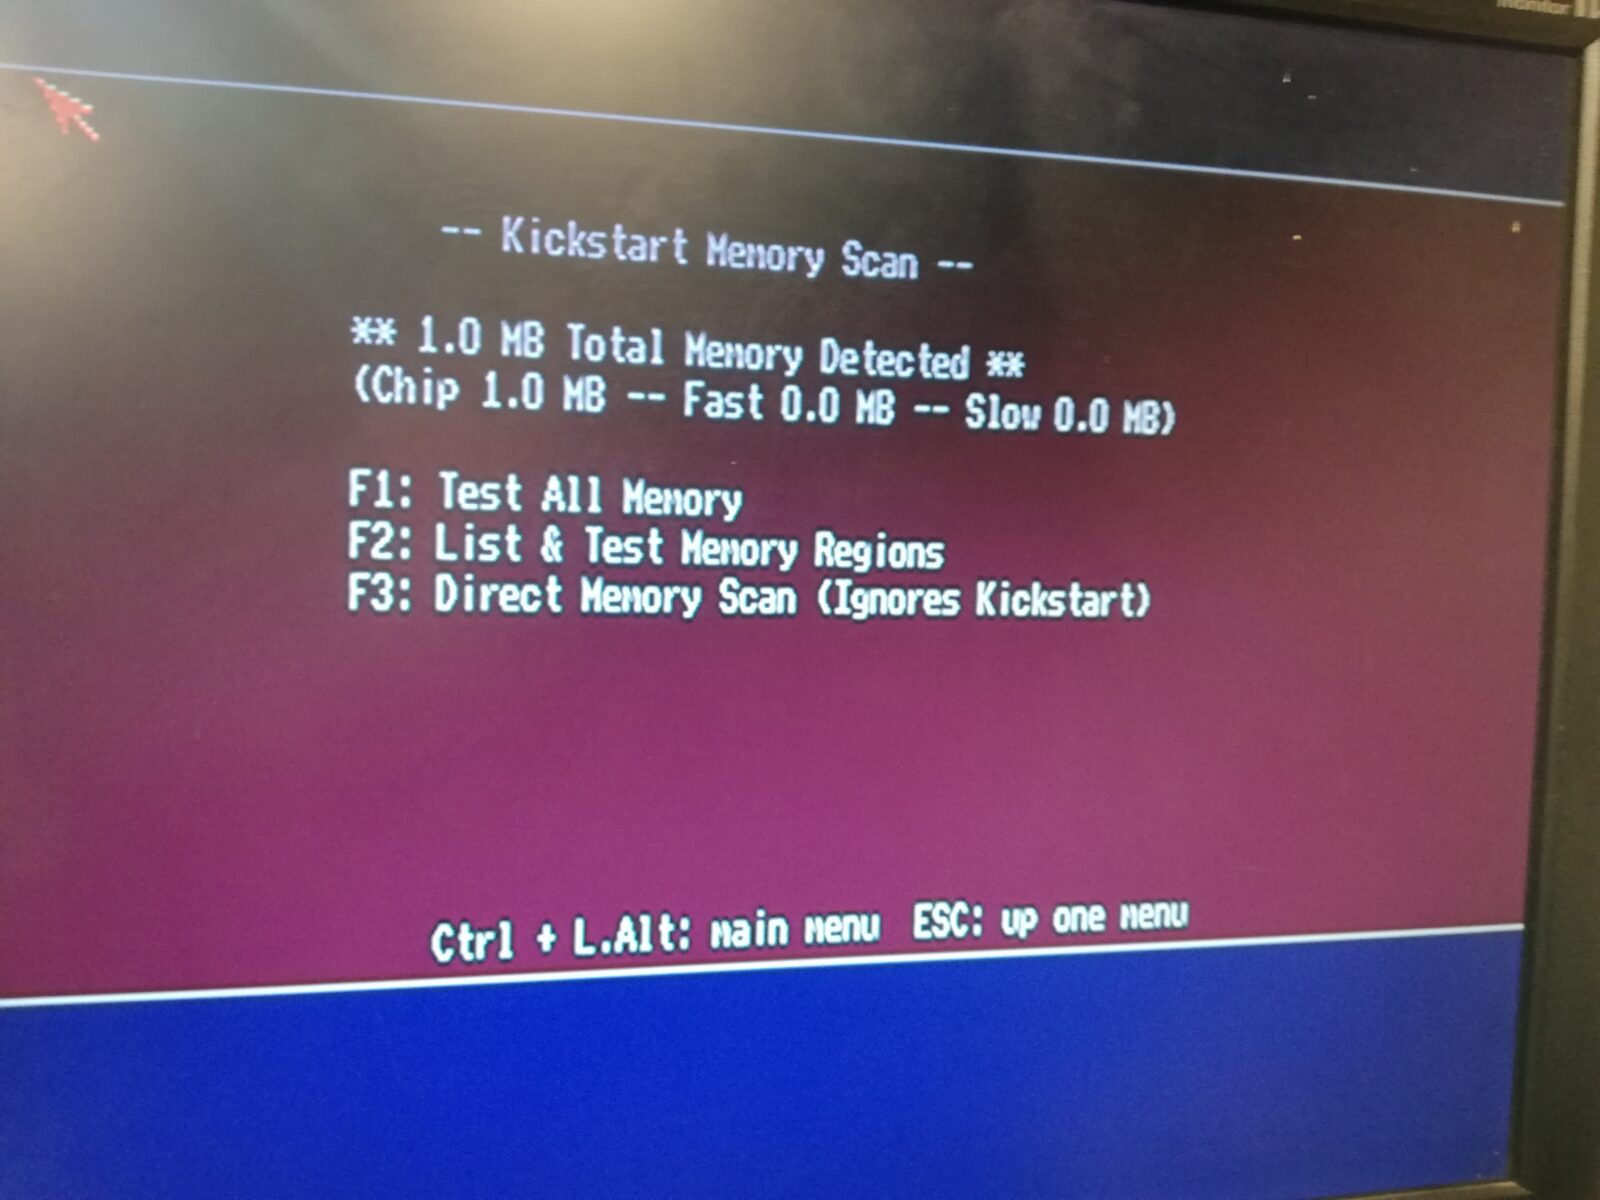
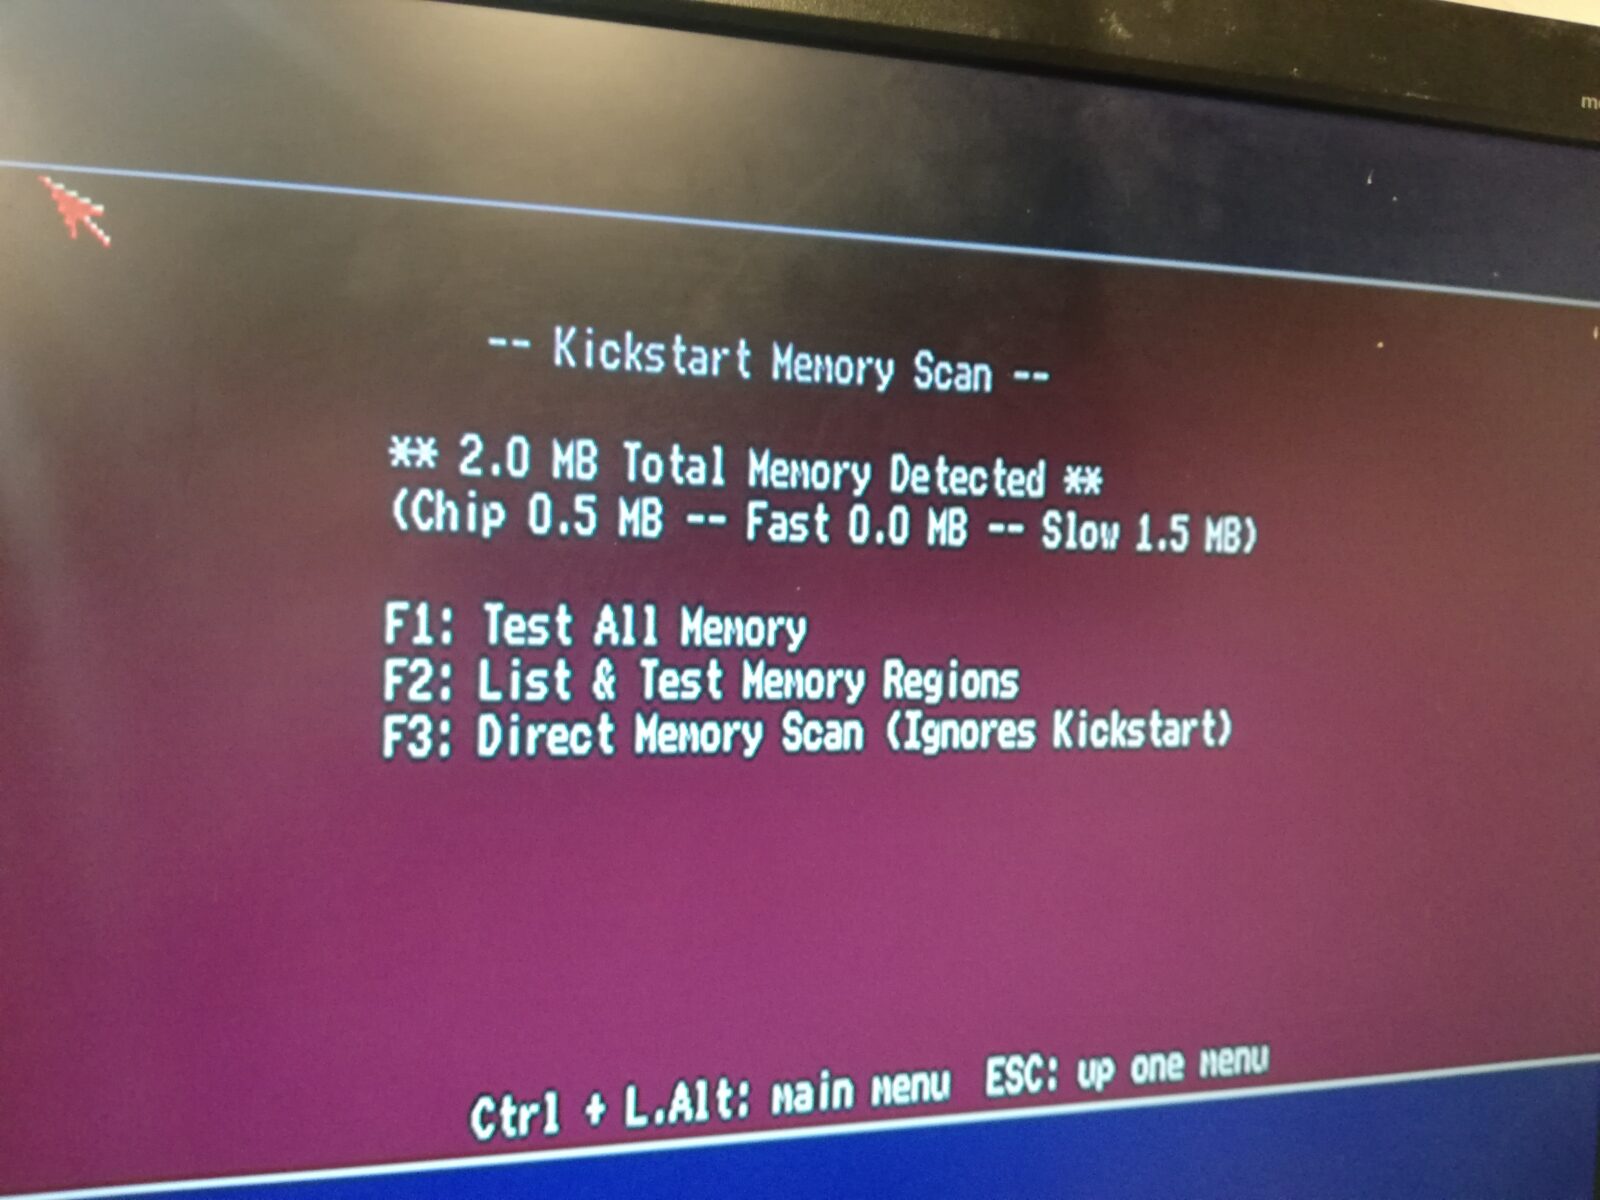
In the next step, I soldered these chips onto the motherboard and booted to Amiga Test Kit which by the way, is an awesome piece of software! Thank you Keirf 🙂
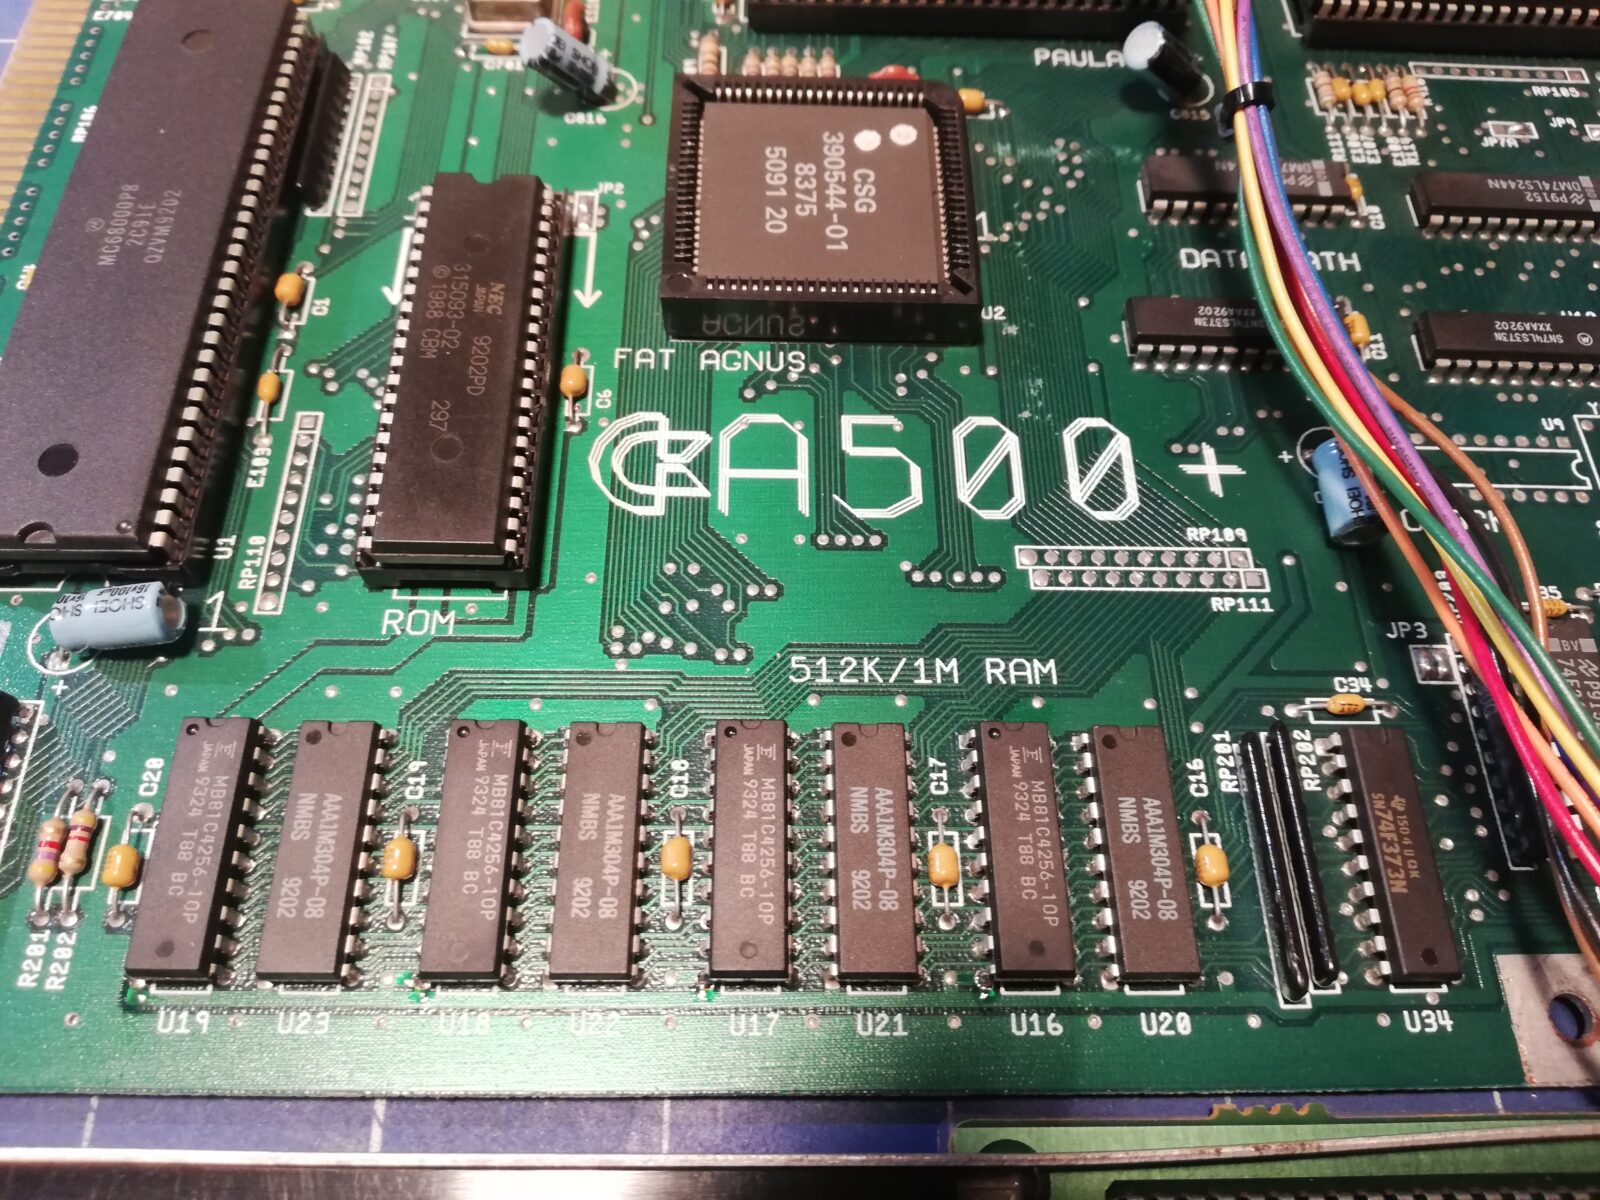
Soldering chips without changing the jumper config is not enough, so we are still in a default config with 0.5MB of ChipRAM and trapdoor port enabled.
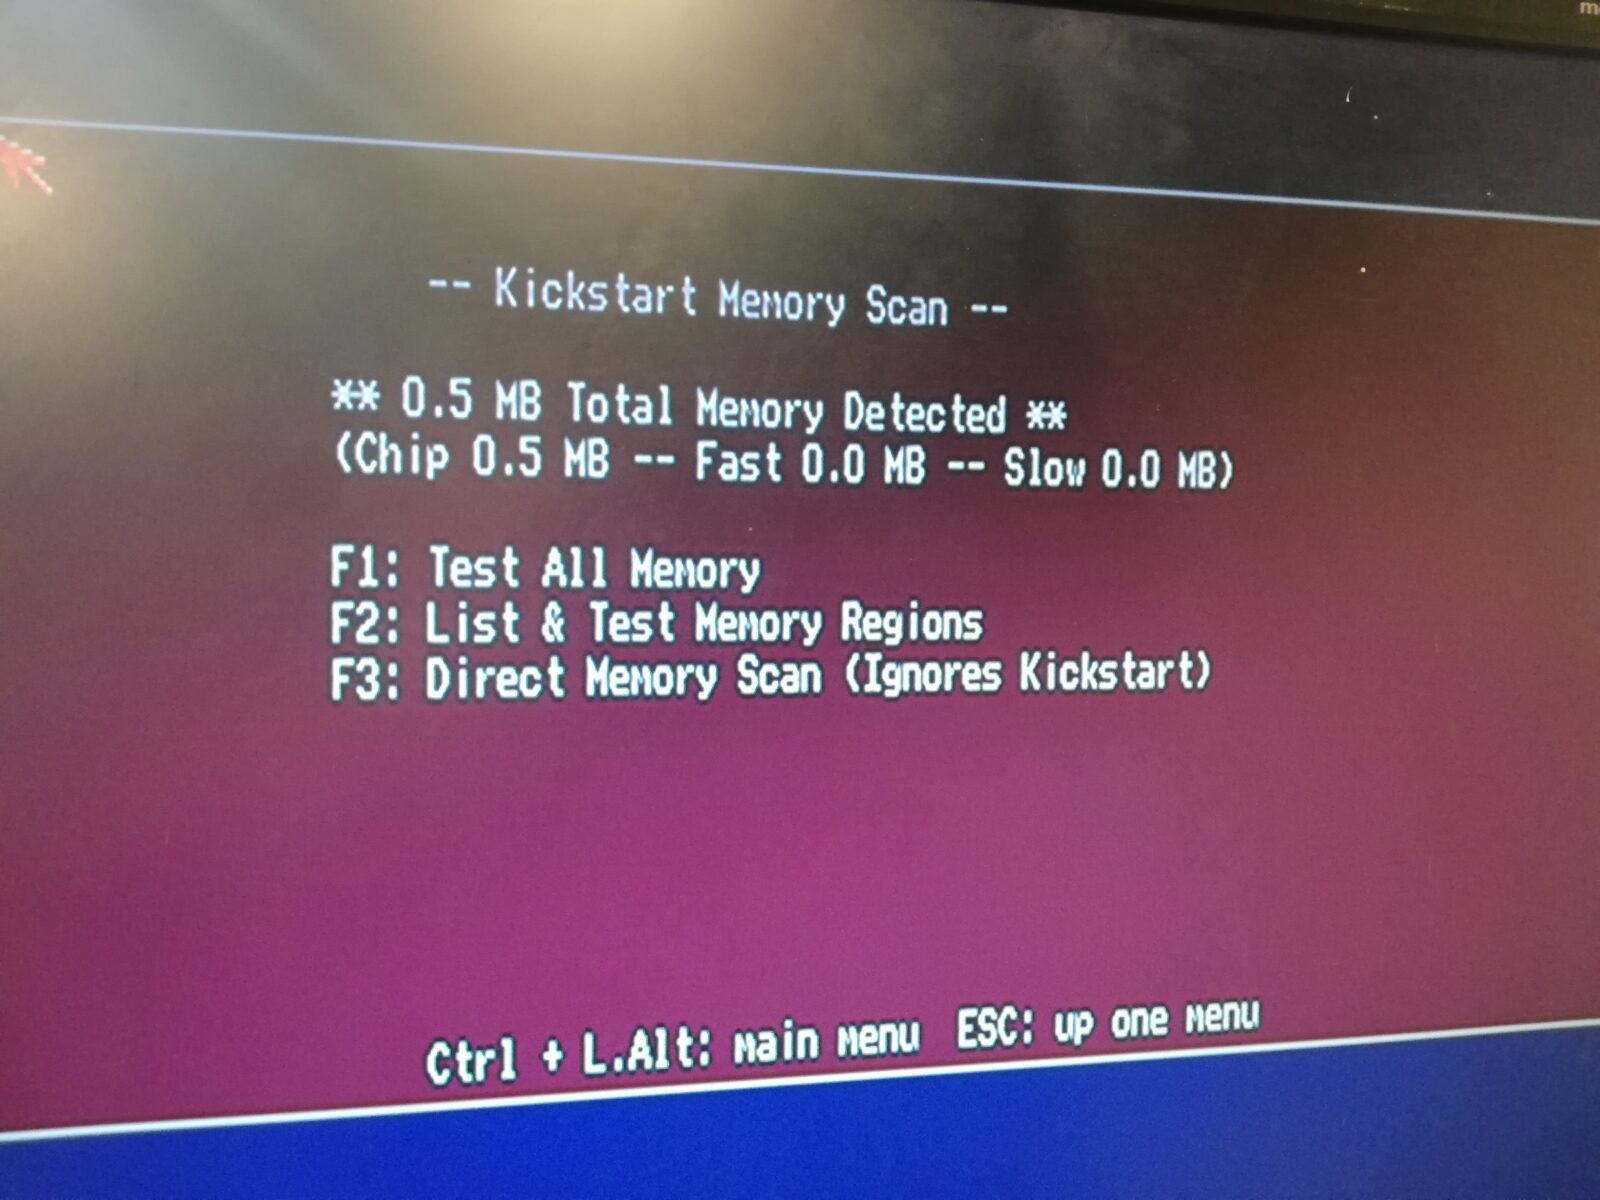
Below, are pics with 0.5MB trapdoor expansion plugged in which shows as 0.5MB SLOW – still default
Enabling 1MB ChipRAM
With chips soldered in place, now it is just a matter of setting a proper jumper config.
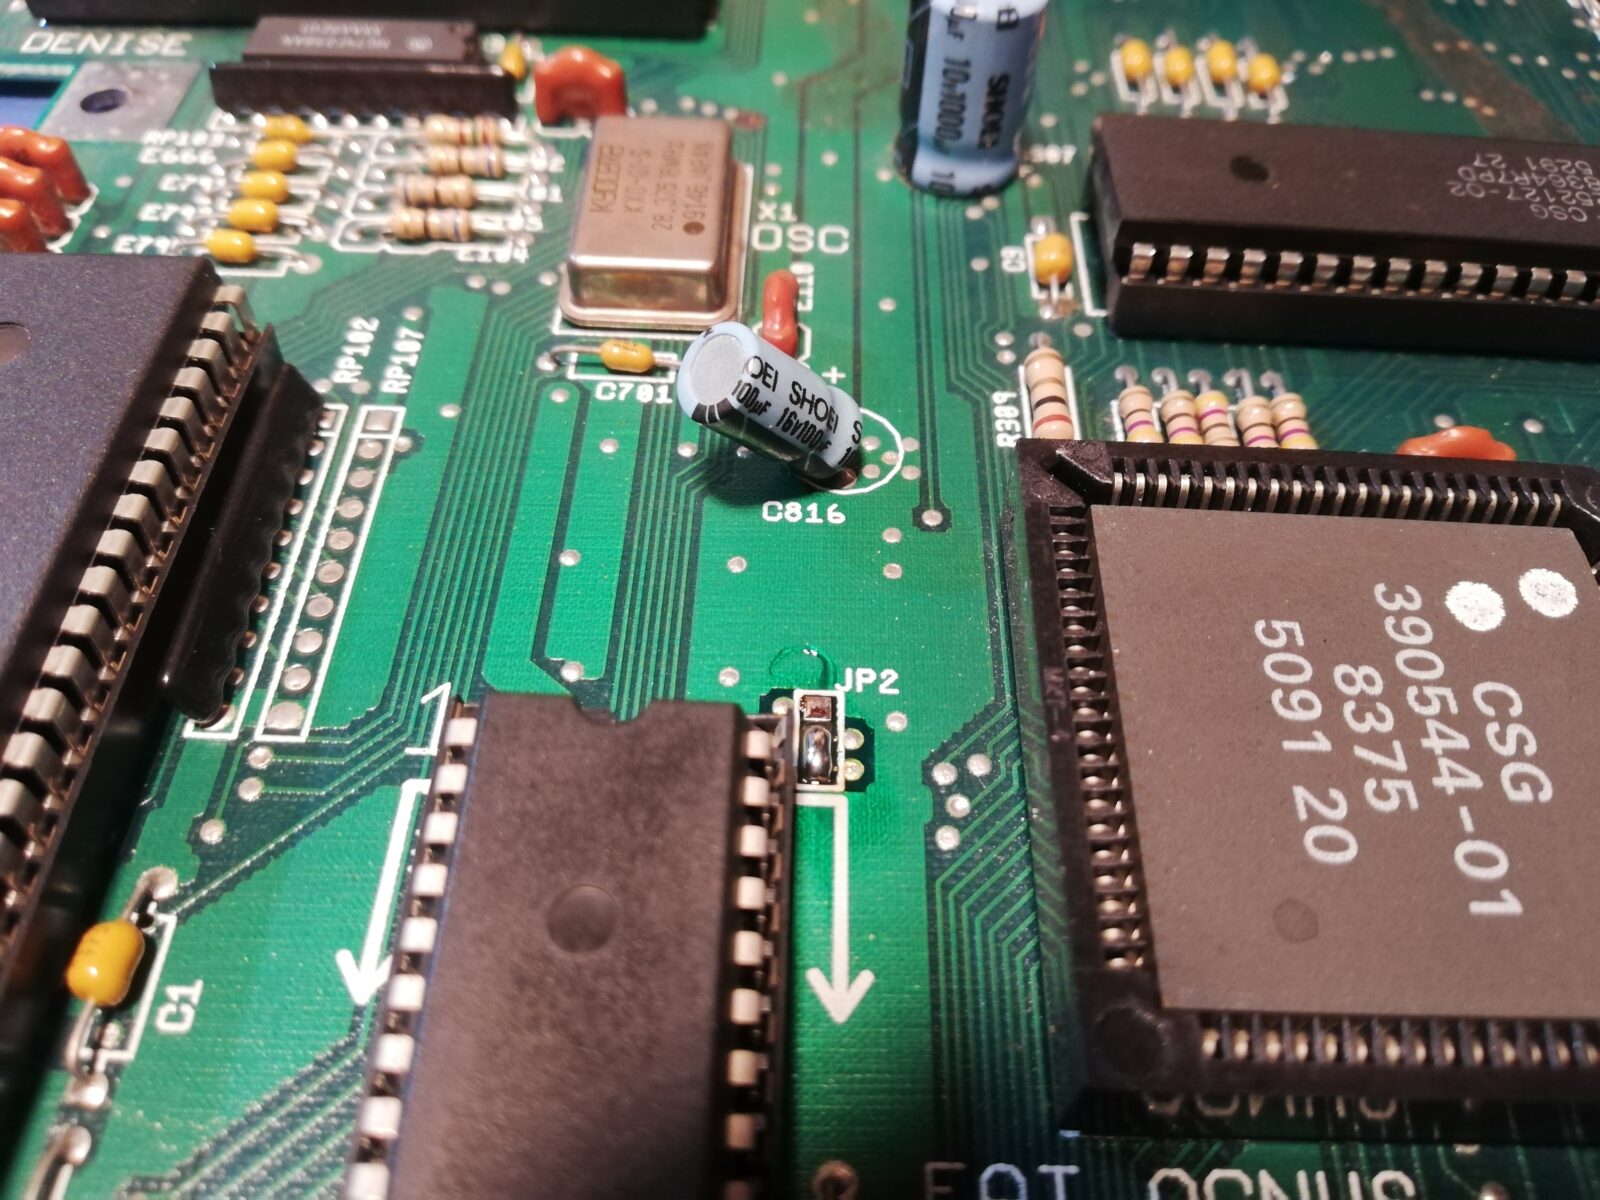
This is done by changing JP2(enable 1MB ChipRAM) and JP7A(disable trapdoor), the same as with Rev. 6.
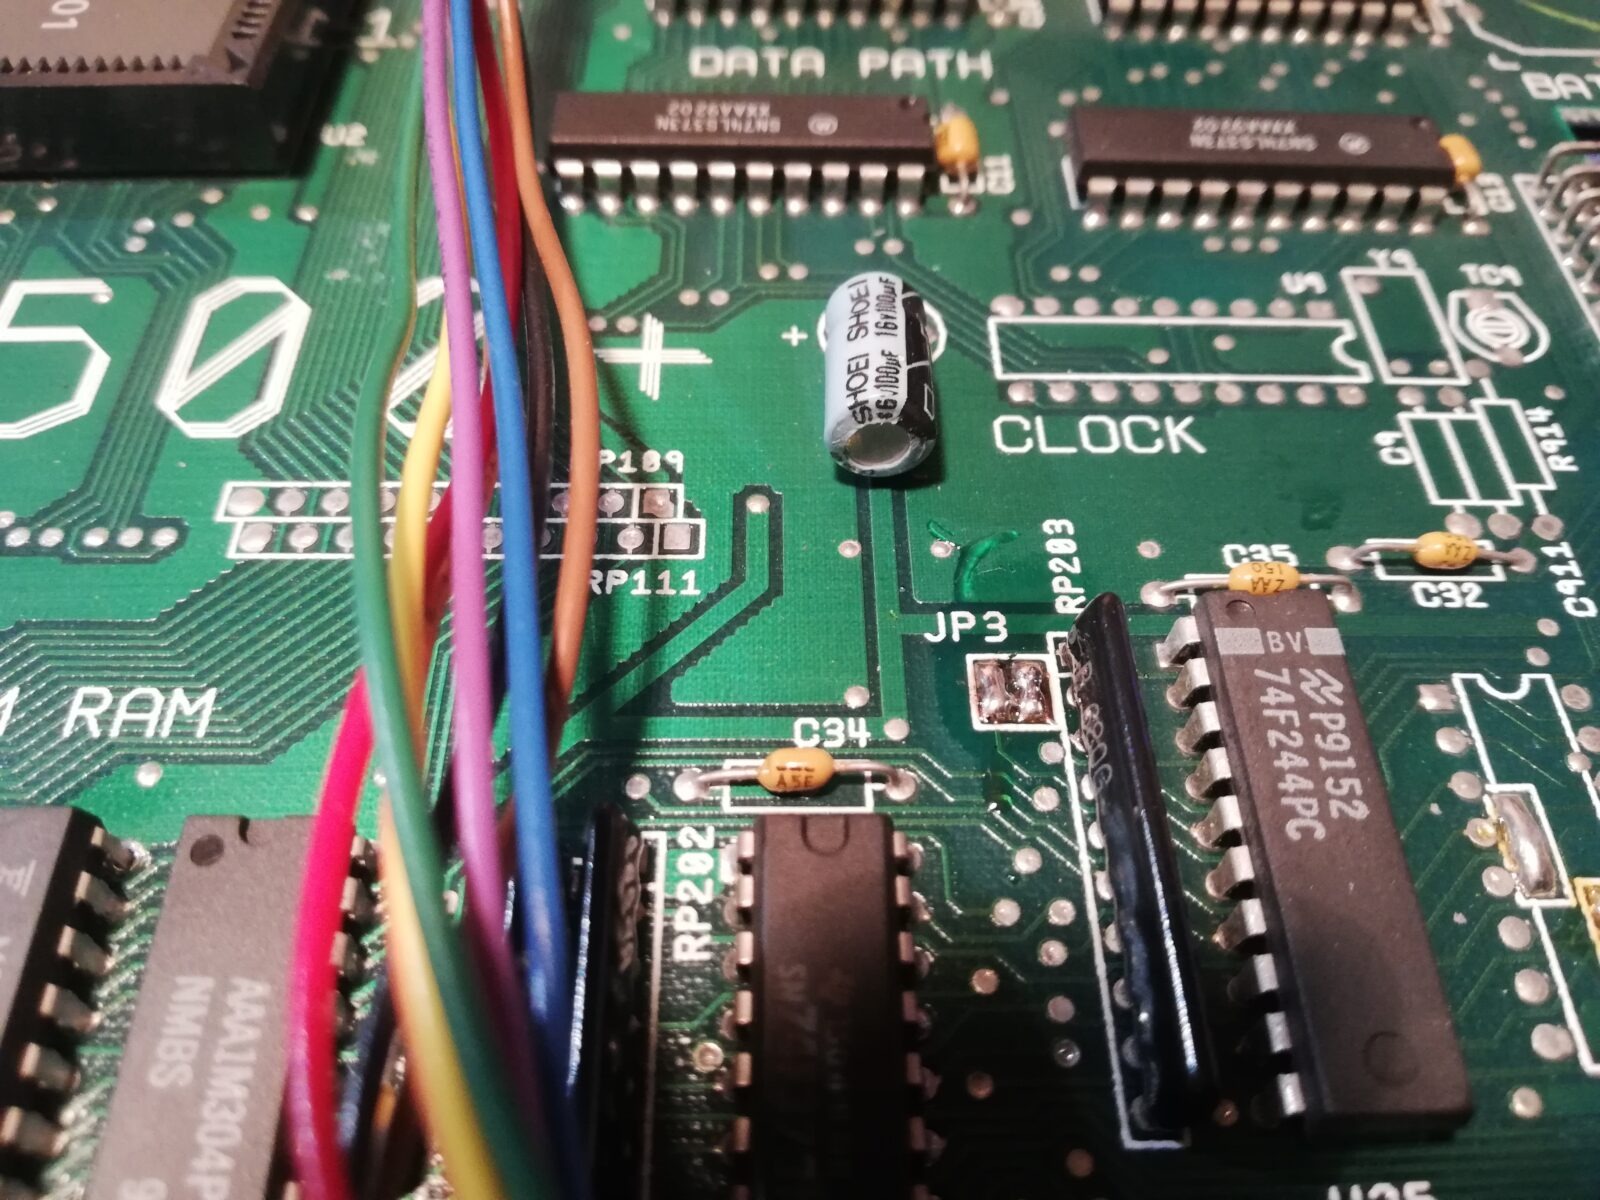
Below, I’ve changed JP3 to check what are the results and obviously, it didn’t boot.


1MB ChipRAM + trapdoor expansion
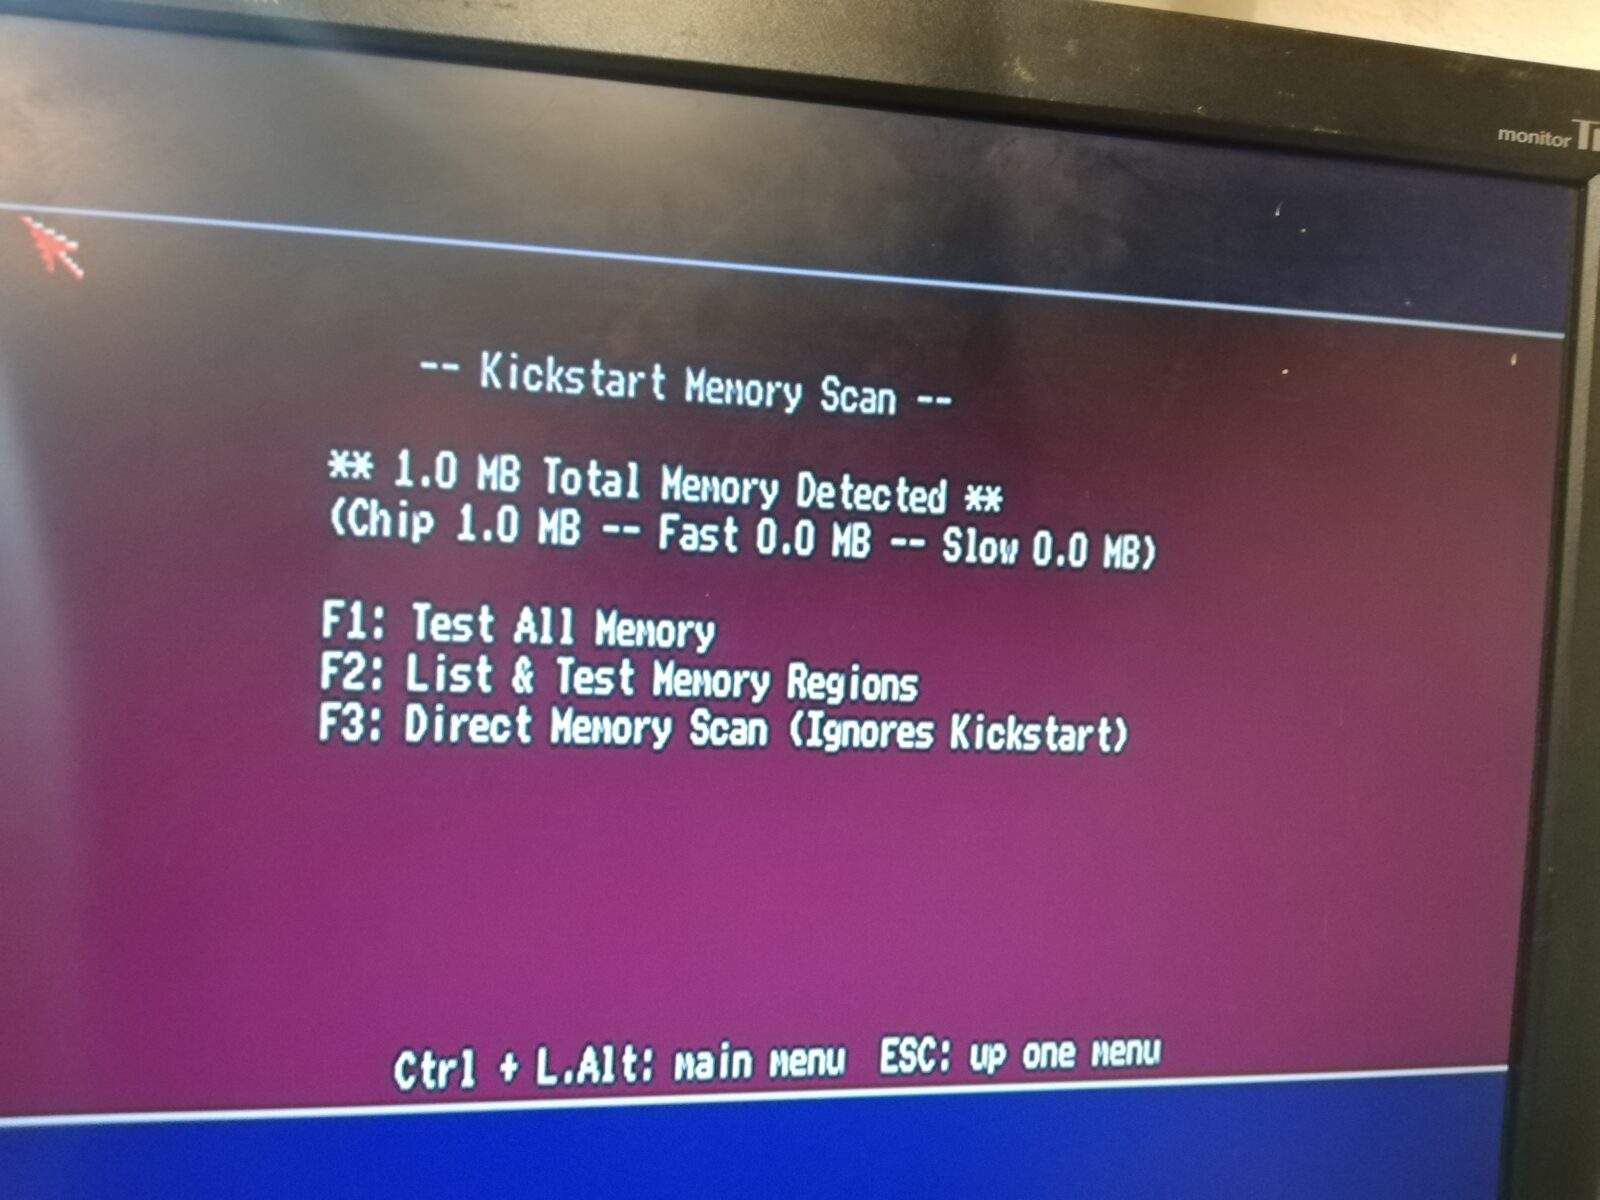
Now I will show some examples with the above config and 0.5MB trapdoor expansion.
The tricky bit is jumper JP7A. Below is an example with solder blobs removed on JP7A and without anything connected to the expansion port.
The results are the same as before – 1MB ChipRAM
Now, even if I connect a trapdoor 0.5MB expansion and set the jumper in the following way, it still stays the same as if the expansion didn’t work at all.
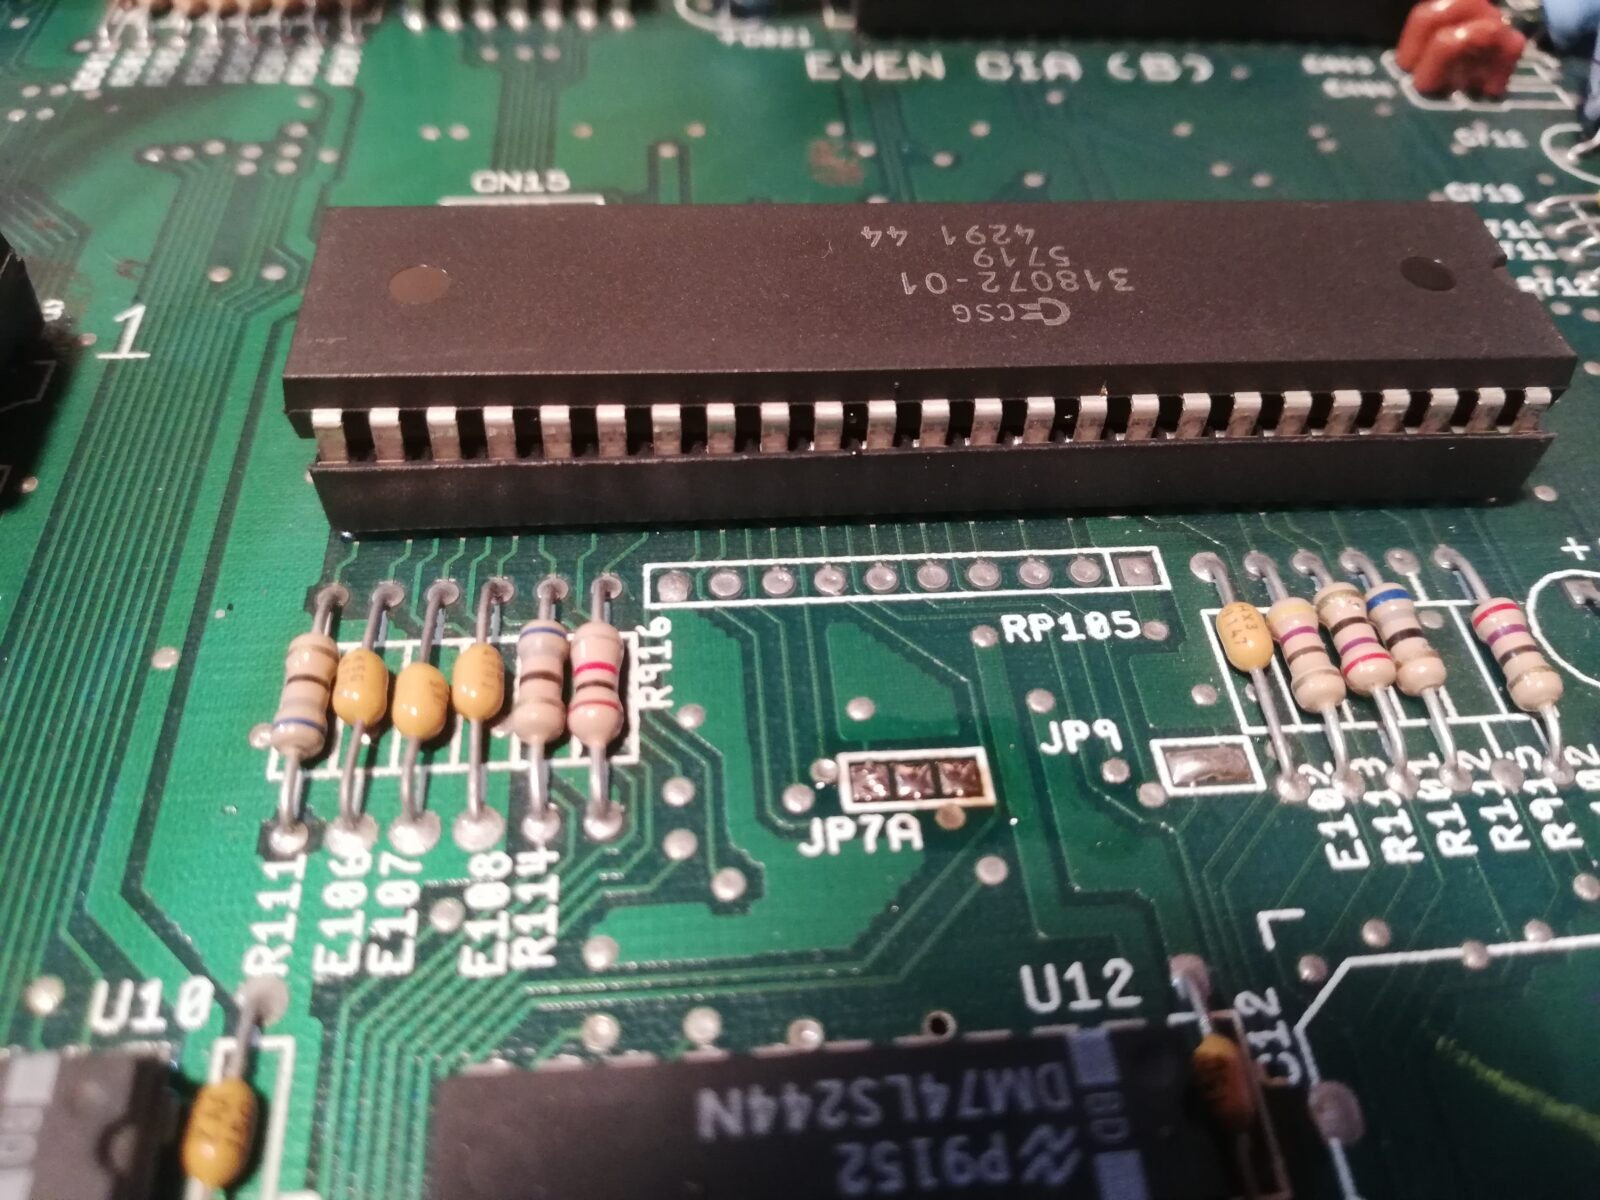
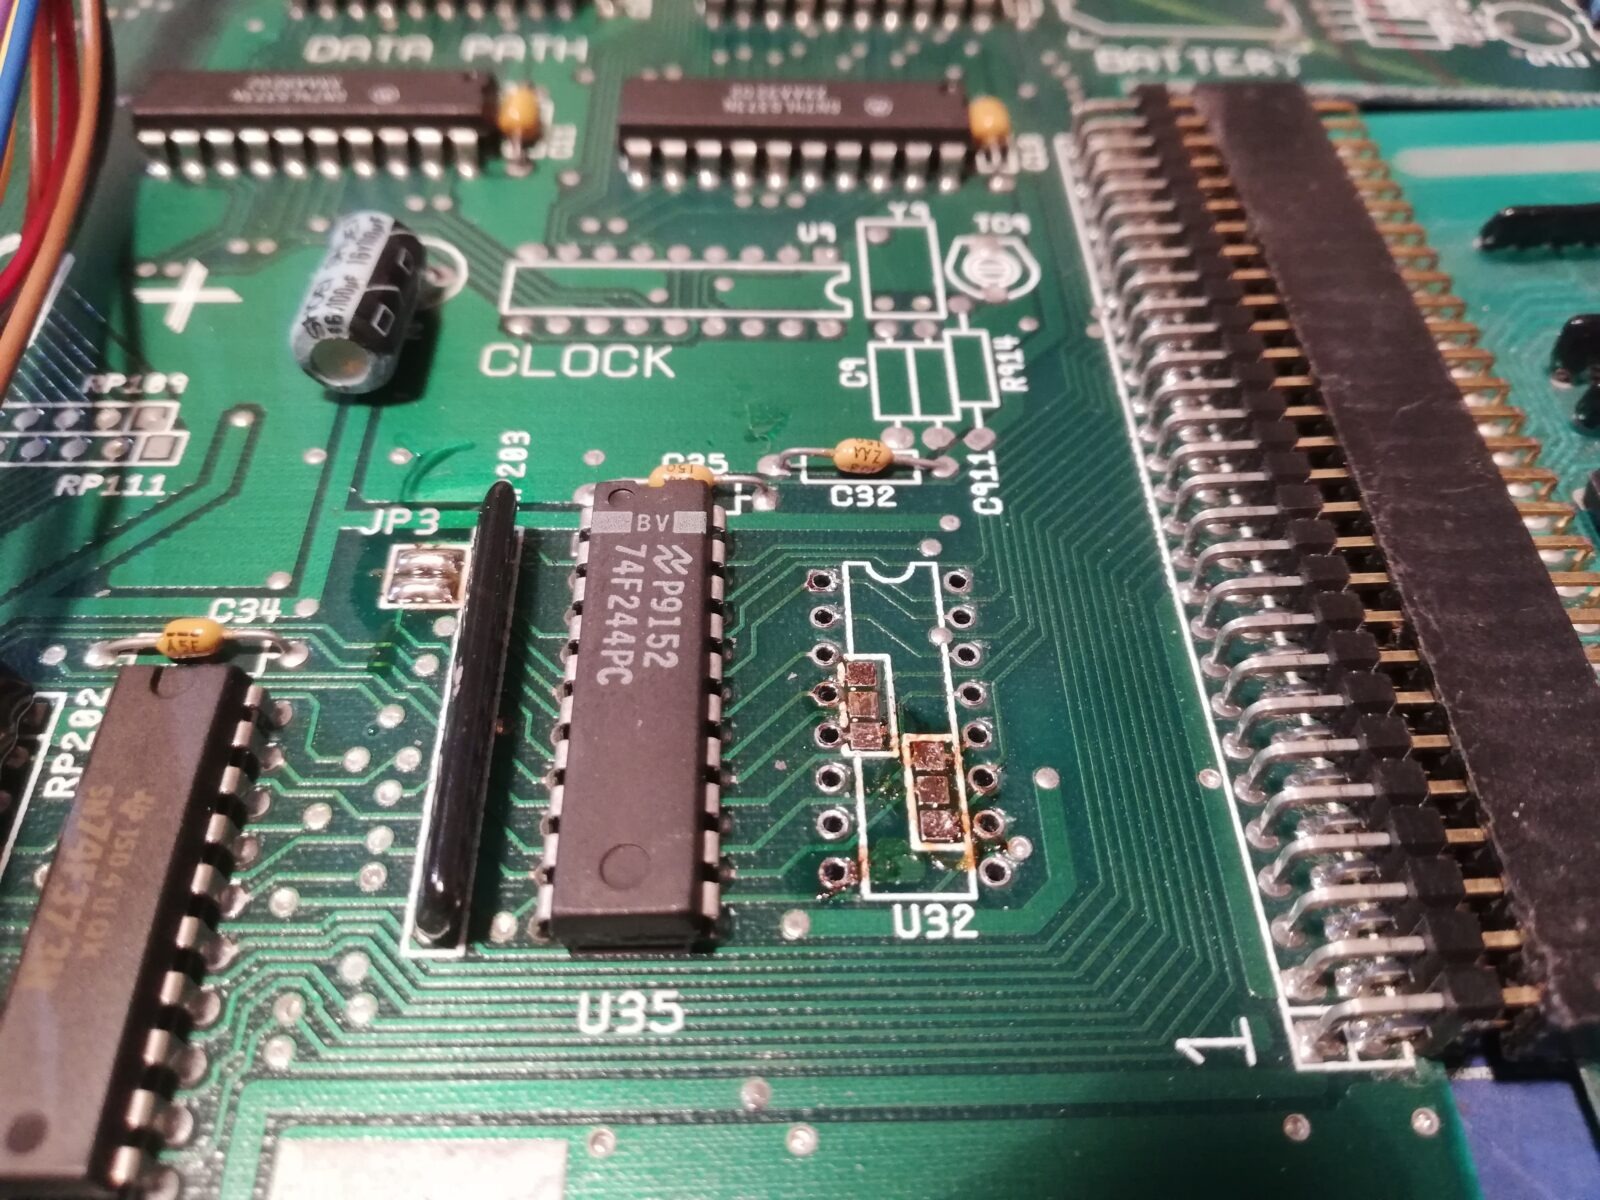
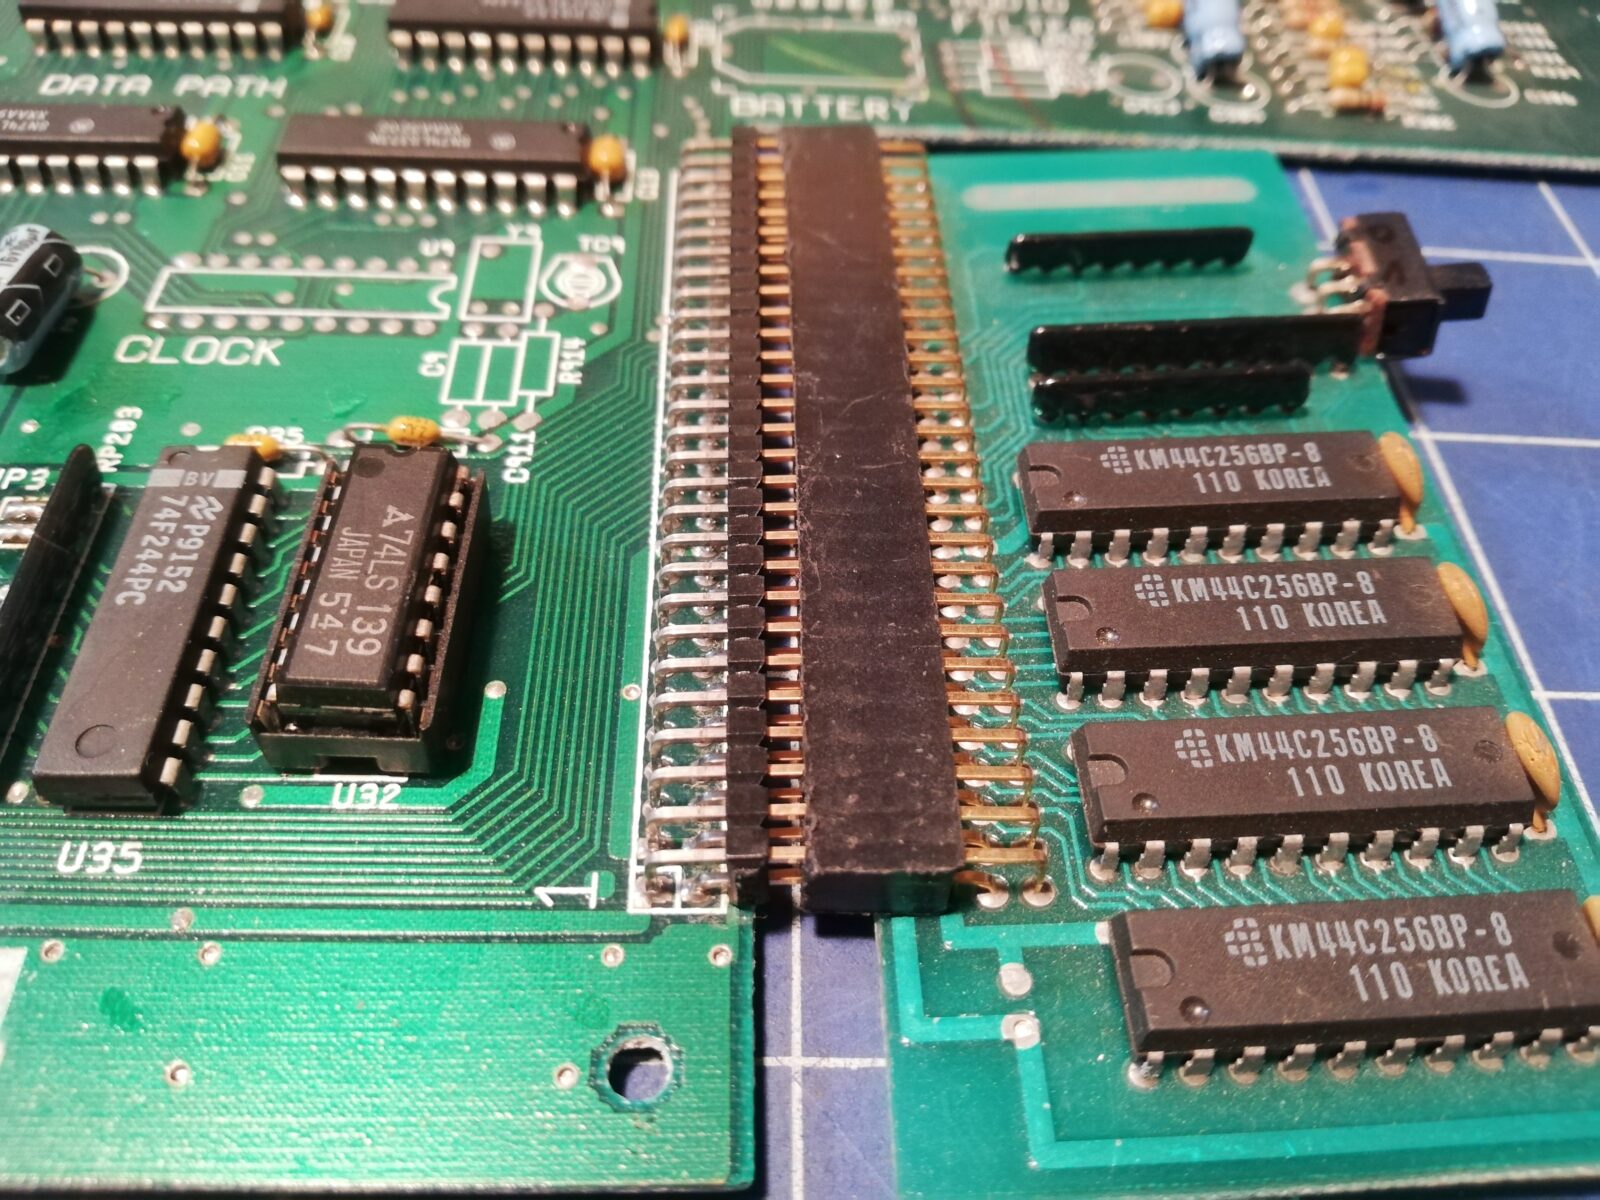
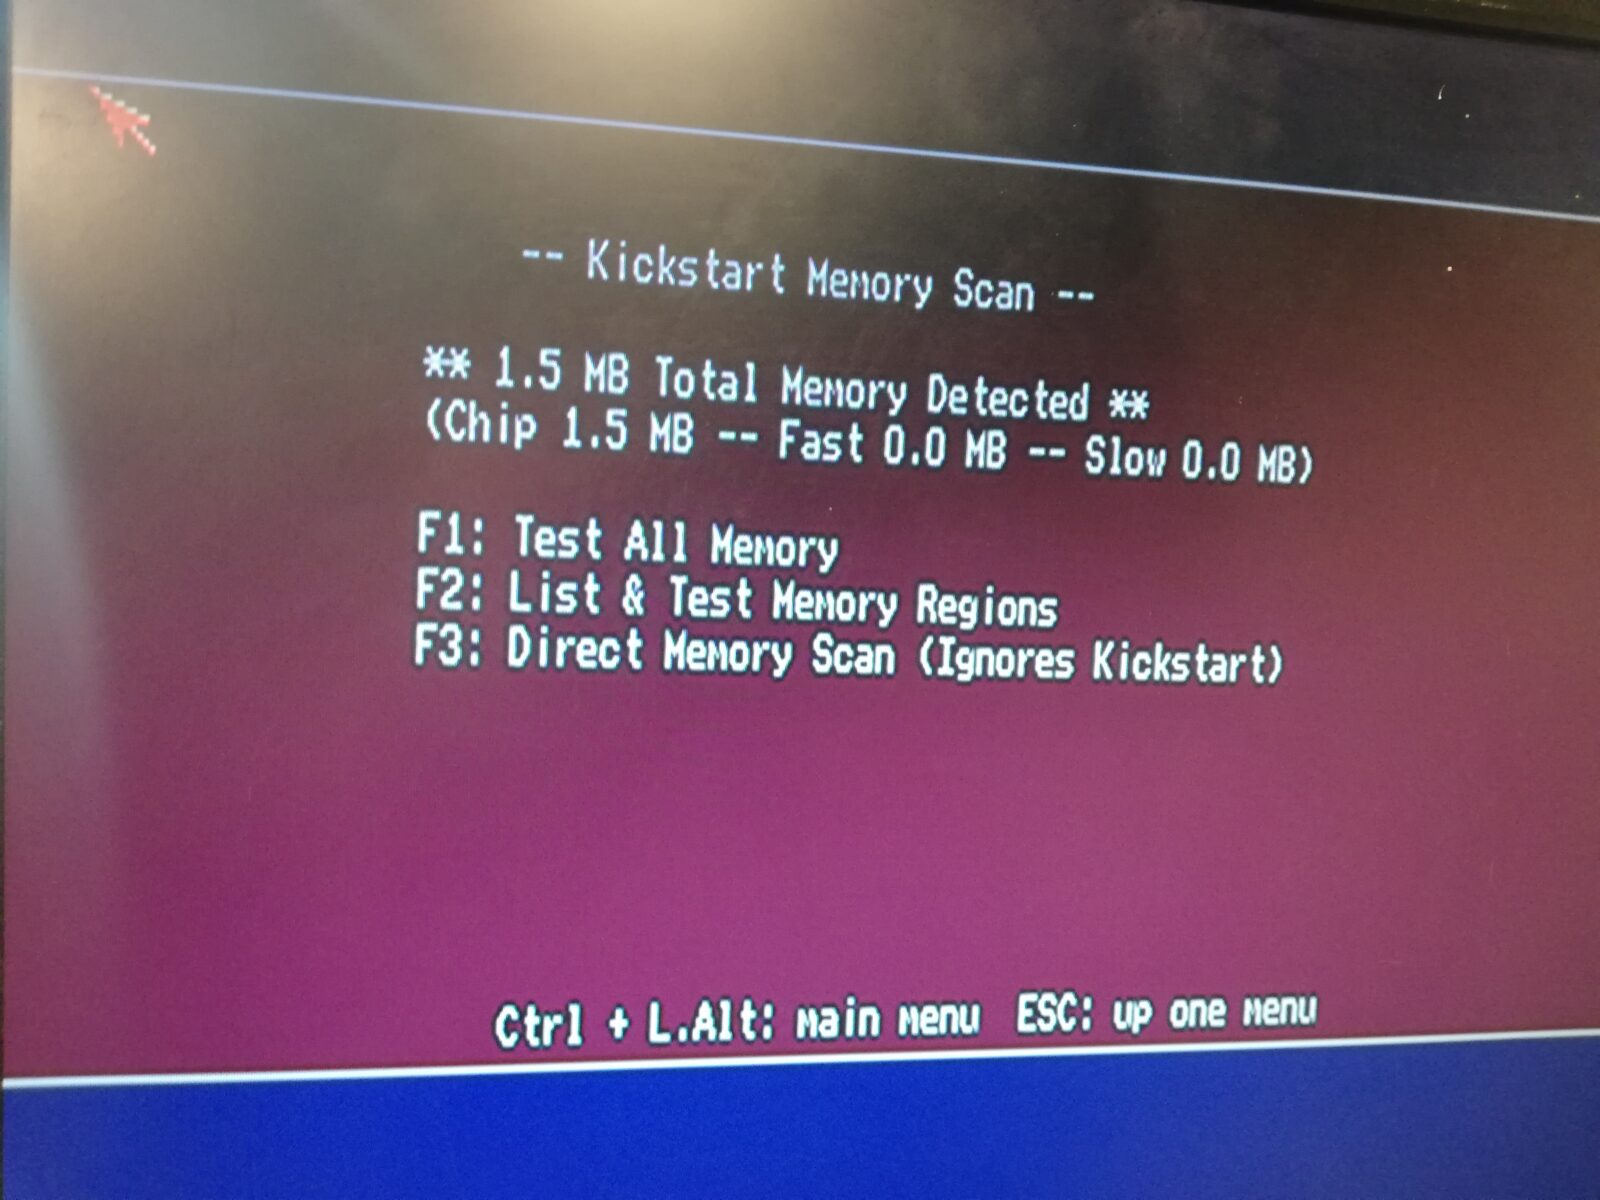
To get 1.5MB of ChipRAM (1MB of mobo RAM + 0.5MB via trapdoor expansion) we have to remove solder blobs on JP4A and JP4B under U32 and install a 74F139 which is a dual 2-line to 4-line decoder/demultiplexer.
In my example, I used 74LS139 and it worked perfectly fine for short tests but I didn’t test it in games.
This is how I did it.


Below are results with trapdoor expansion disabled via a switch – 1: ON 0: OFF

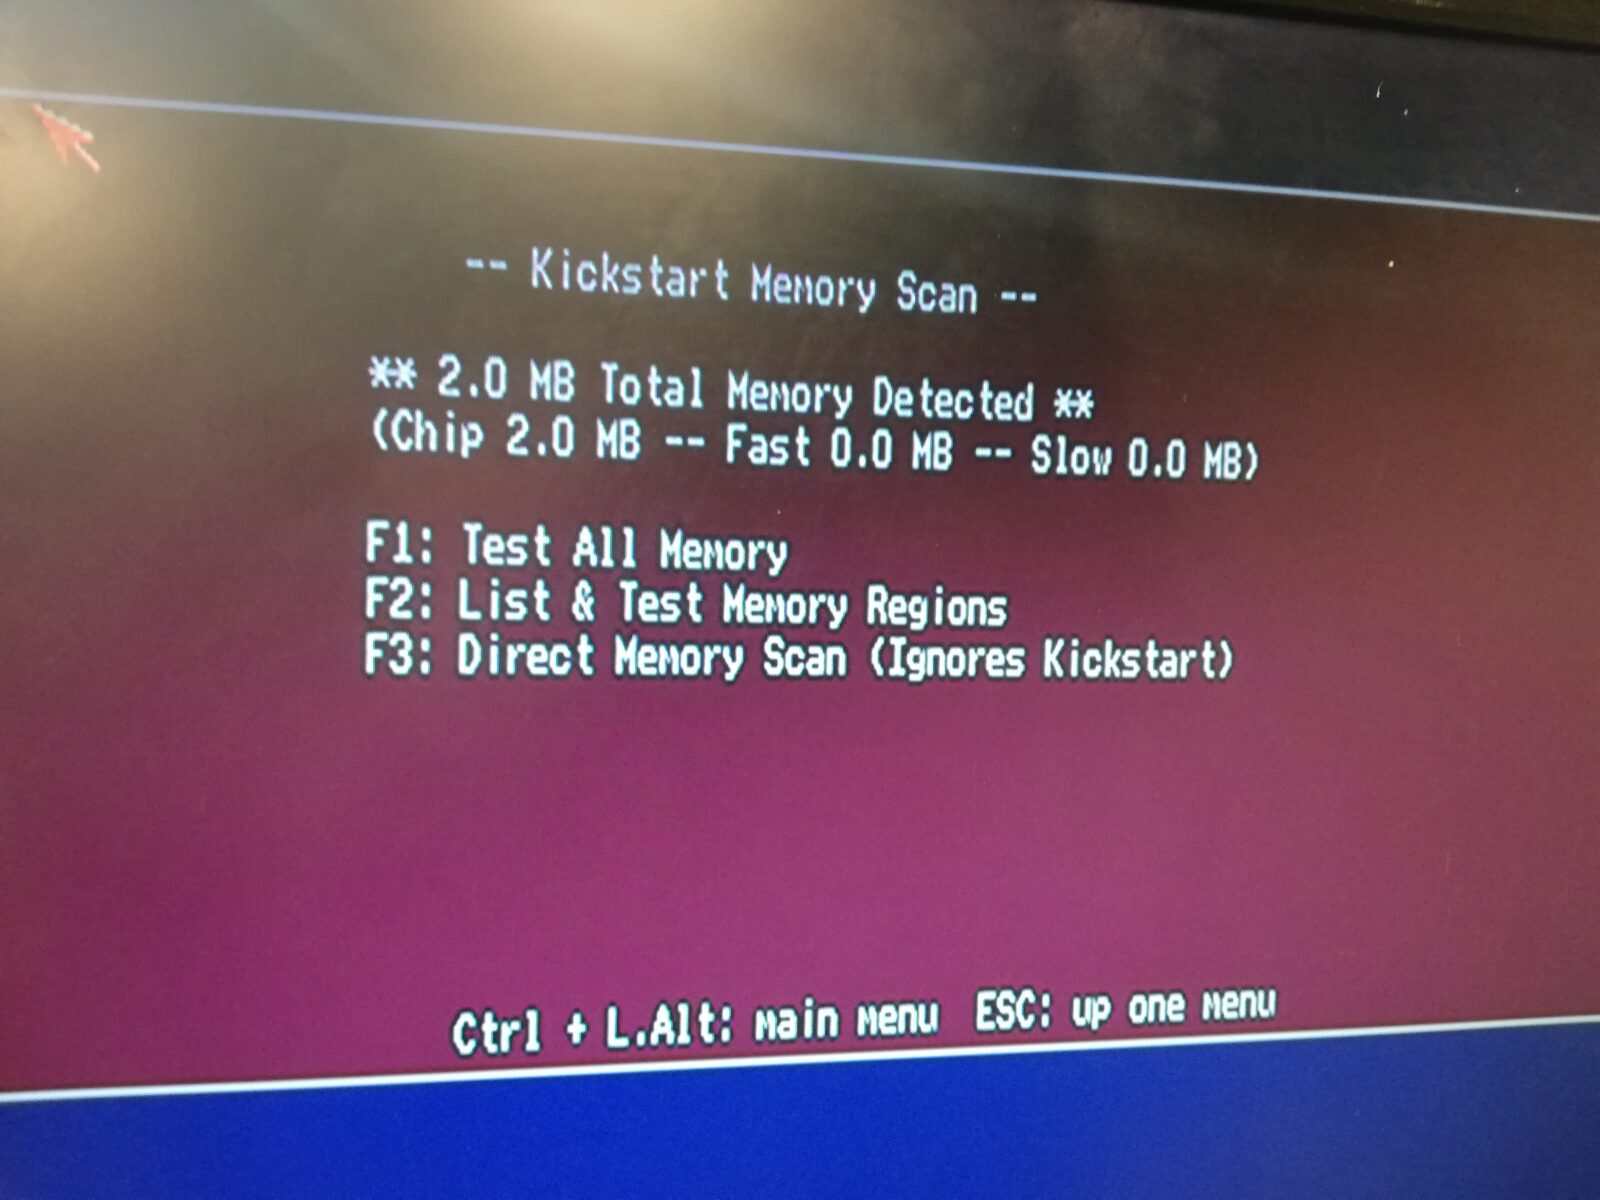
2MB onboard ChipRAM hack
Now, I just wanted to emphasize it, this hack is only possible on Rev. 8 mobo and with 8375 AGNUS.
The idea here is to add 1MB of RAM by soldering it on top of the chips that are on the PCB already, a.k.a. piggy-backing method. However, every PIN 17 (CAS) of four RAM chips on the left has to be soldered to PIN 11 of U32 and four RAM chips on the right have to be soldered to PIN 5 of U32.
This is how it looked with a proper jumper config.
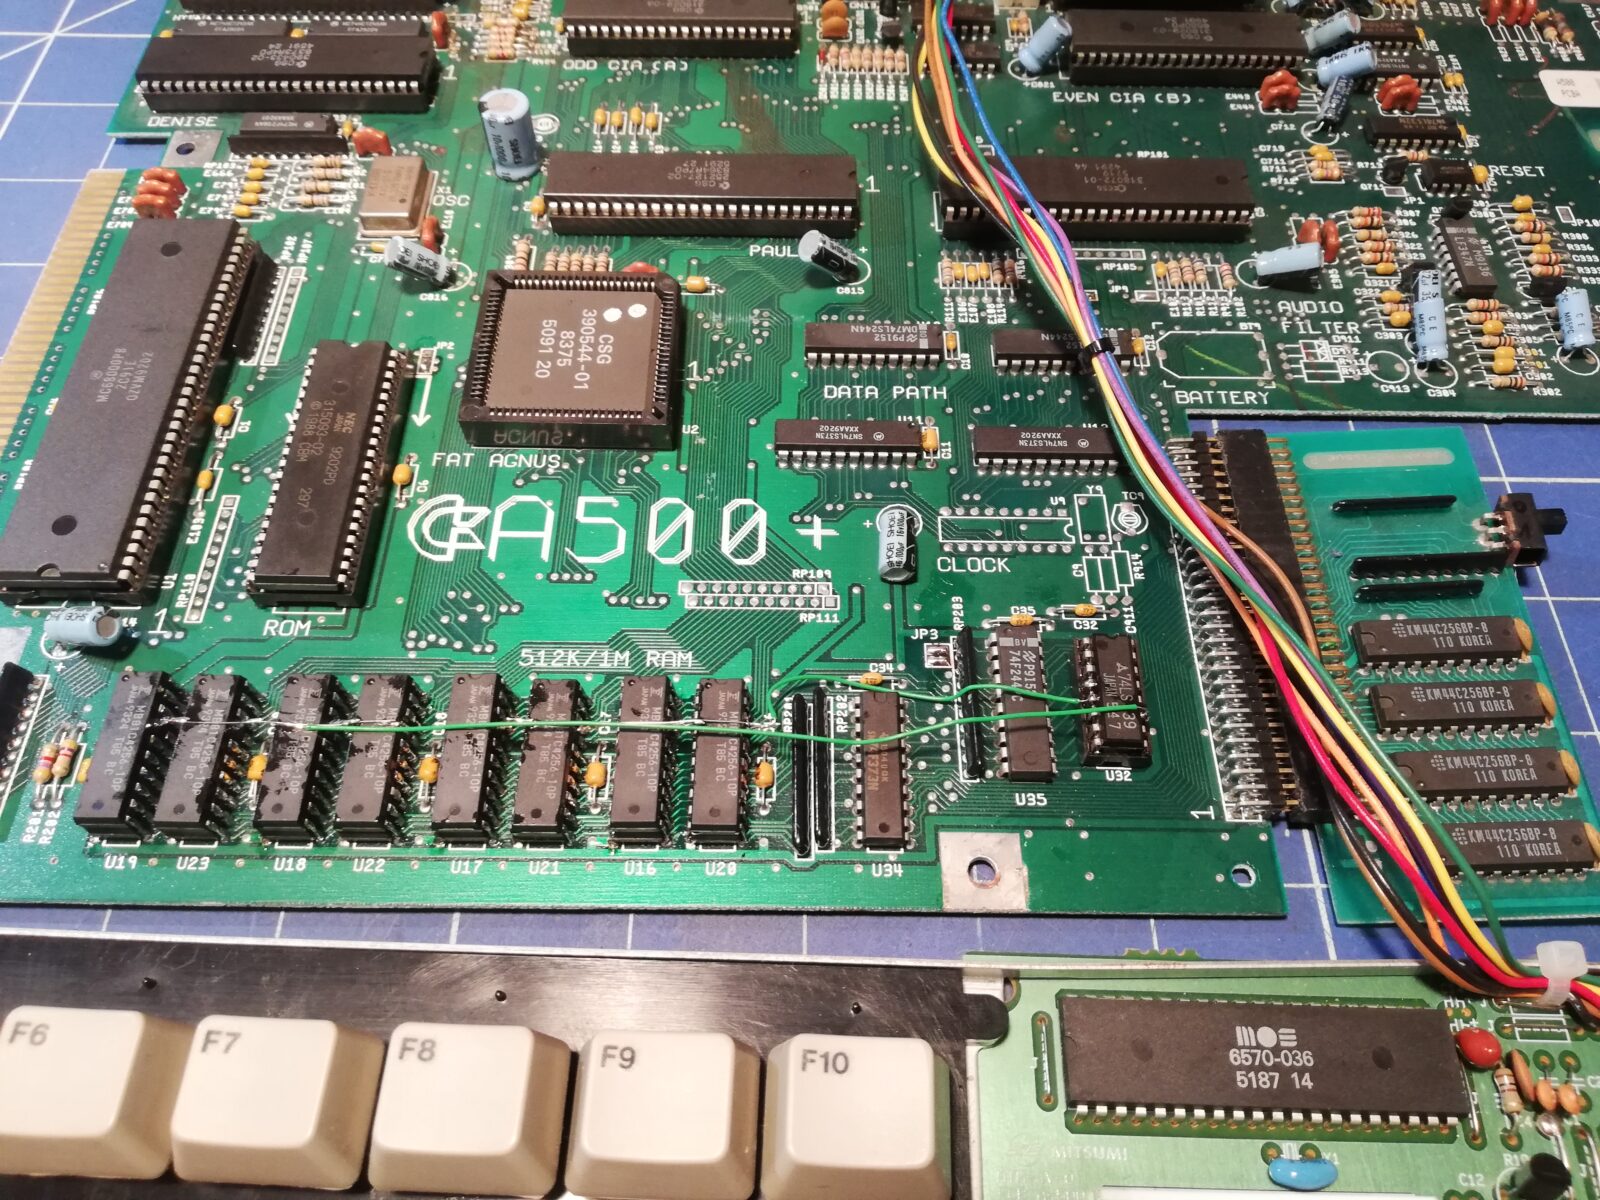
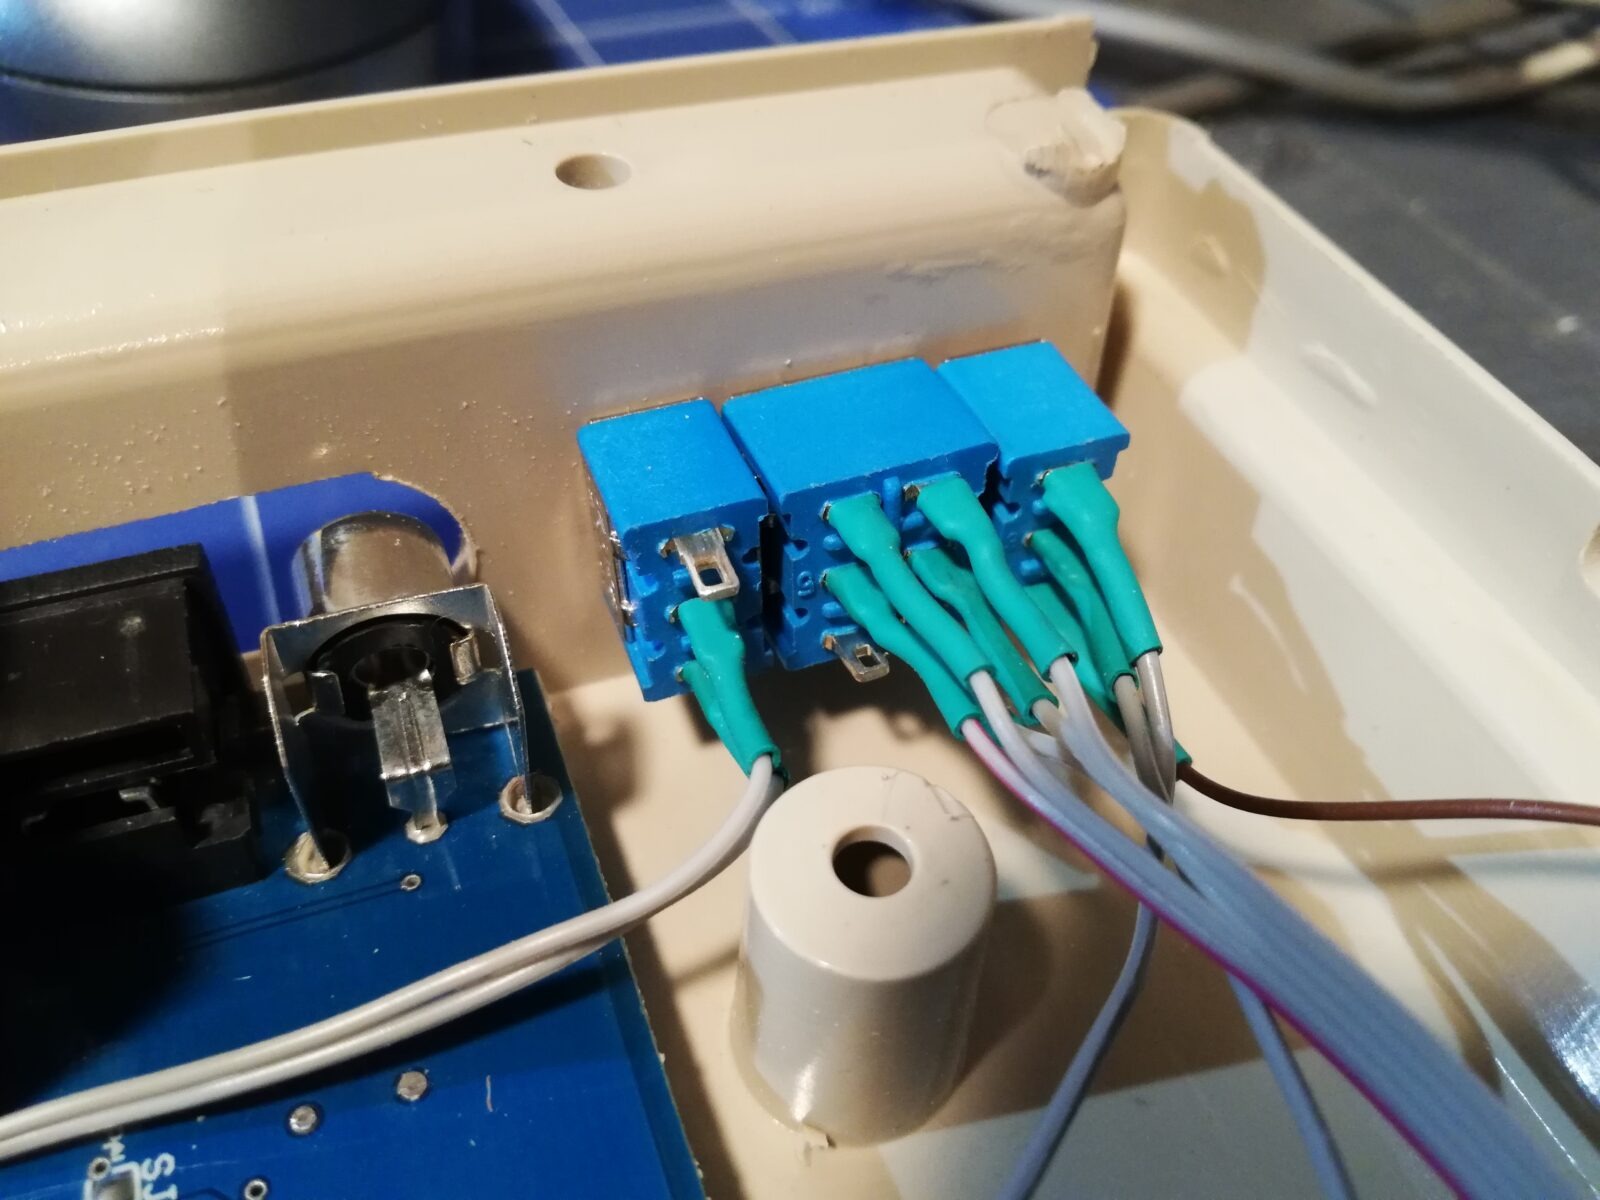
To make this a useful hack, I’ve added a switch on the1 back which would run two modes:
- 0.5MB onboard ChipRAM + 0.5MB trapdoor expansion
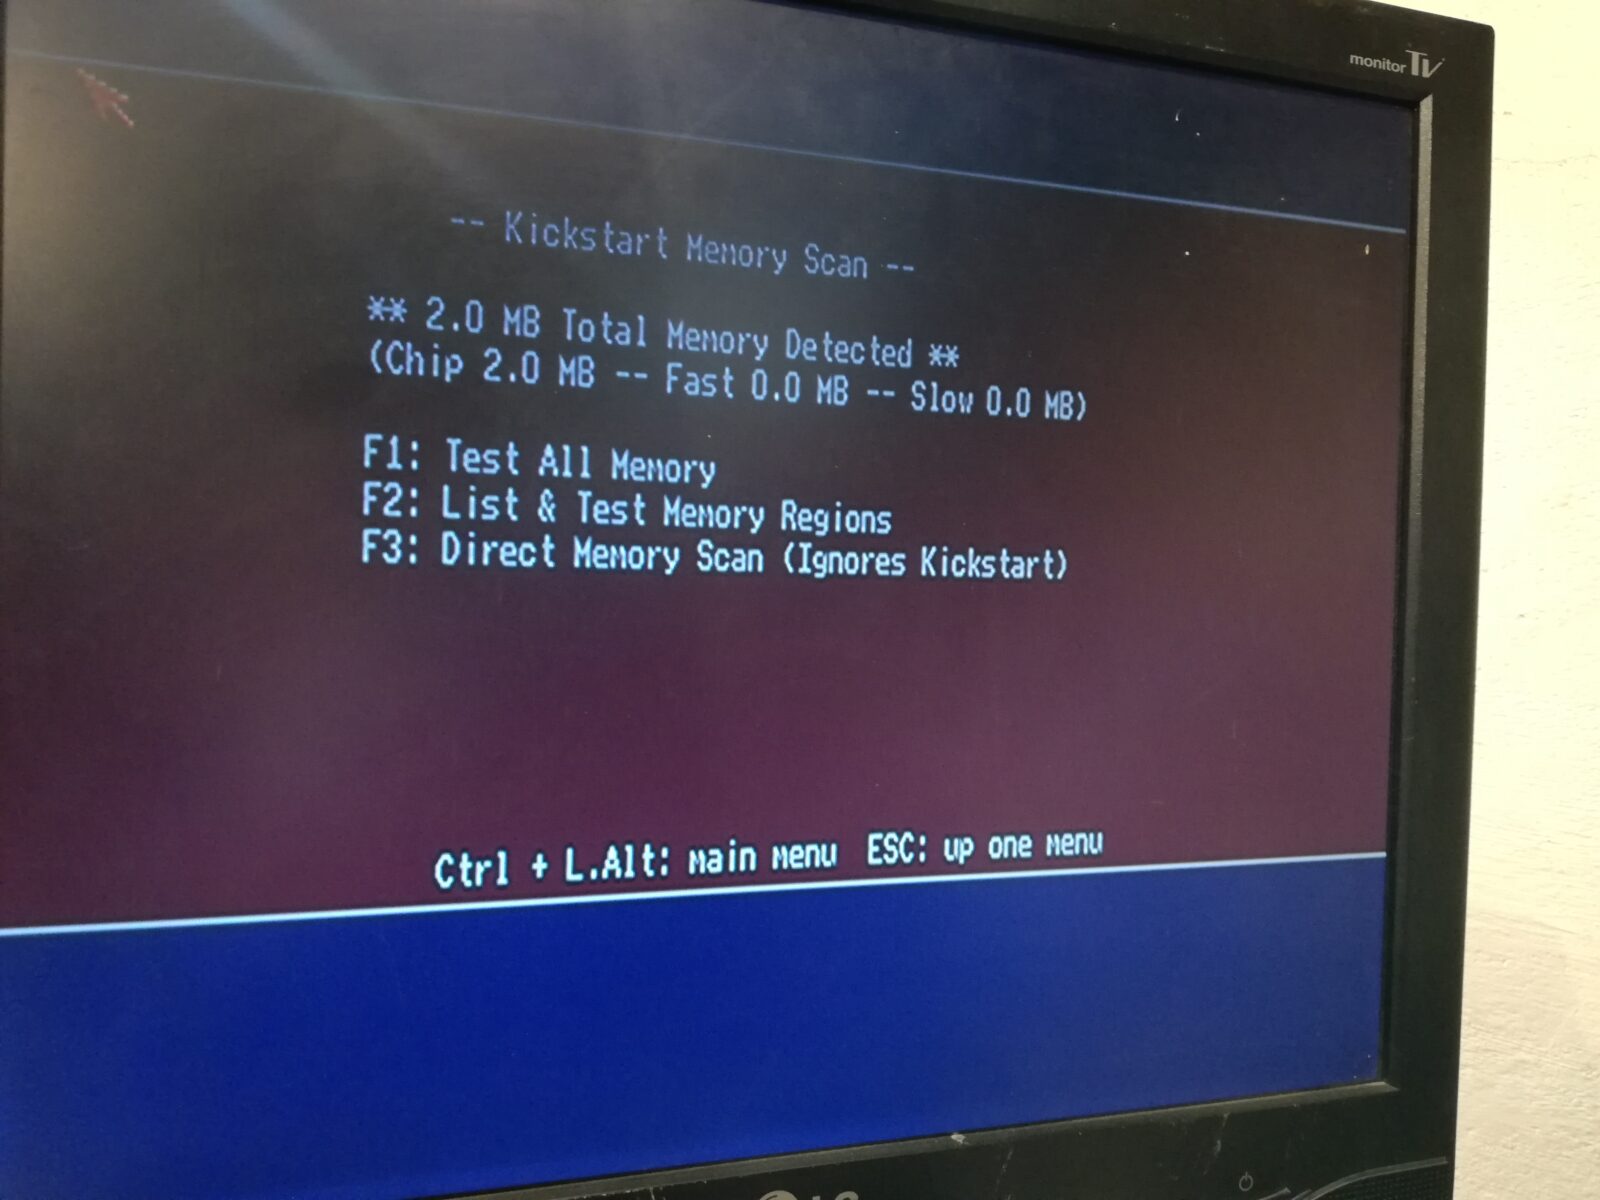
- 2MB onboard ChipRAM
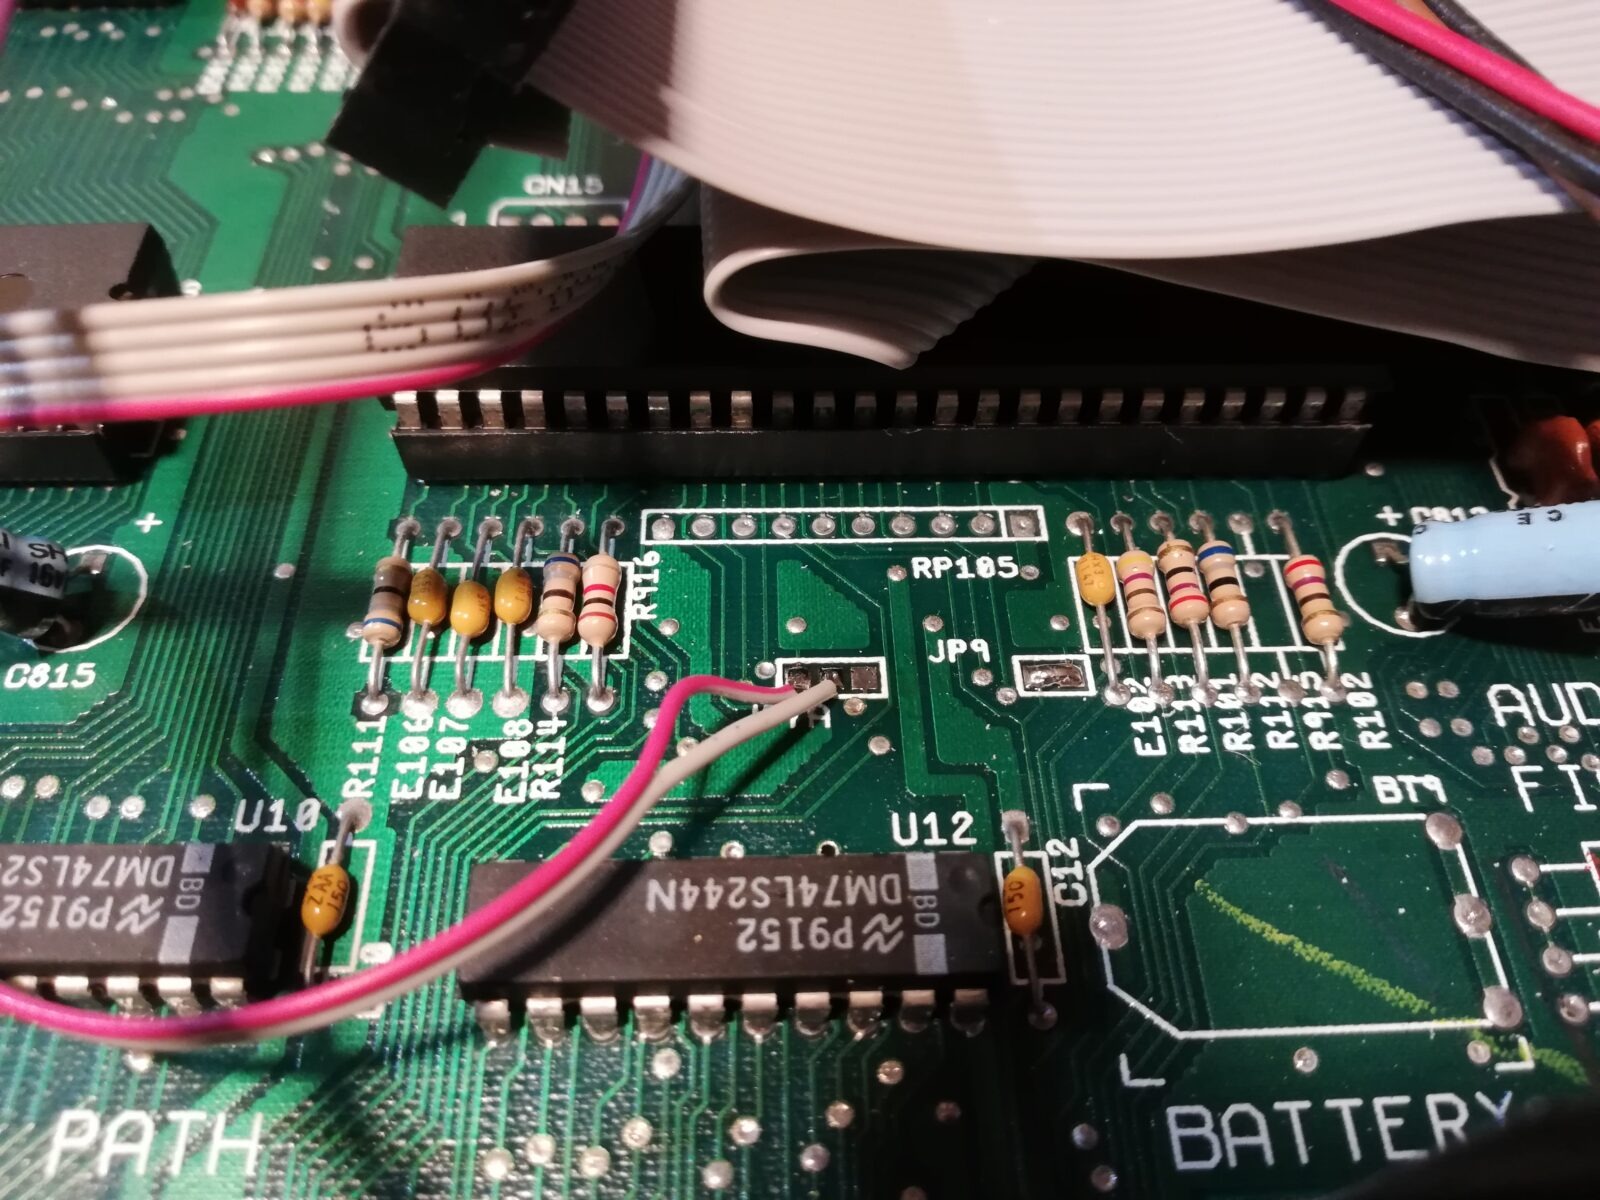
I did this by soldering signals from JP7A and JP2 to the dual switch
Mode 1
Mode 2
Bonus config
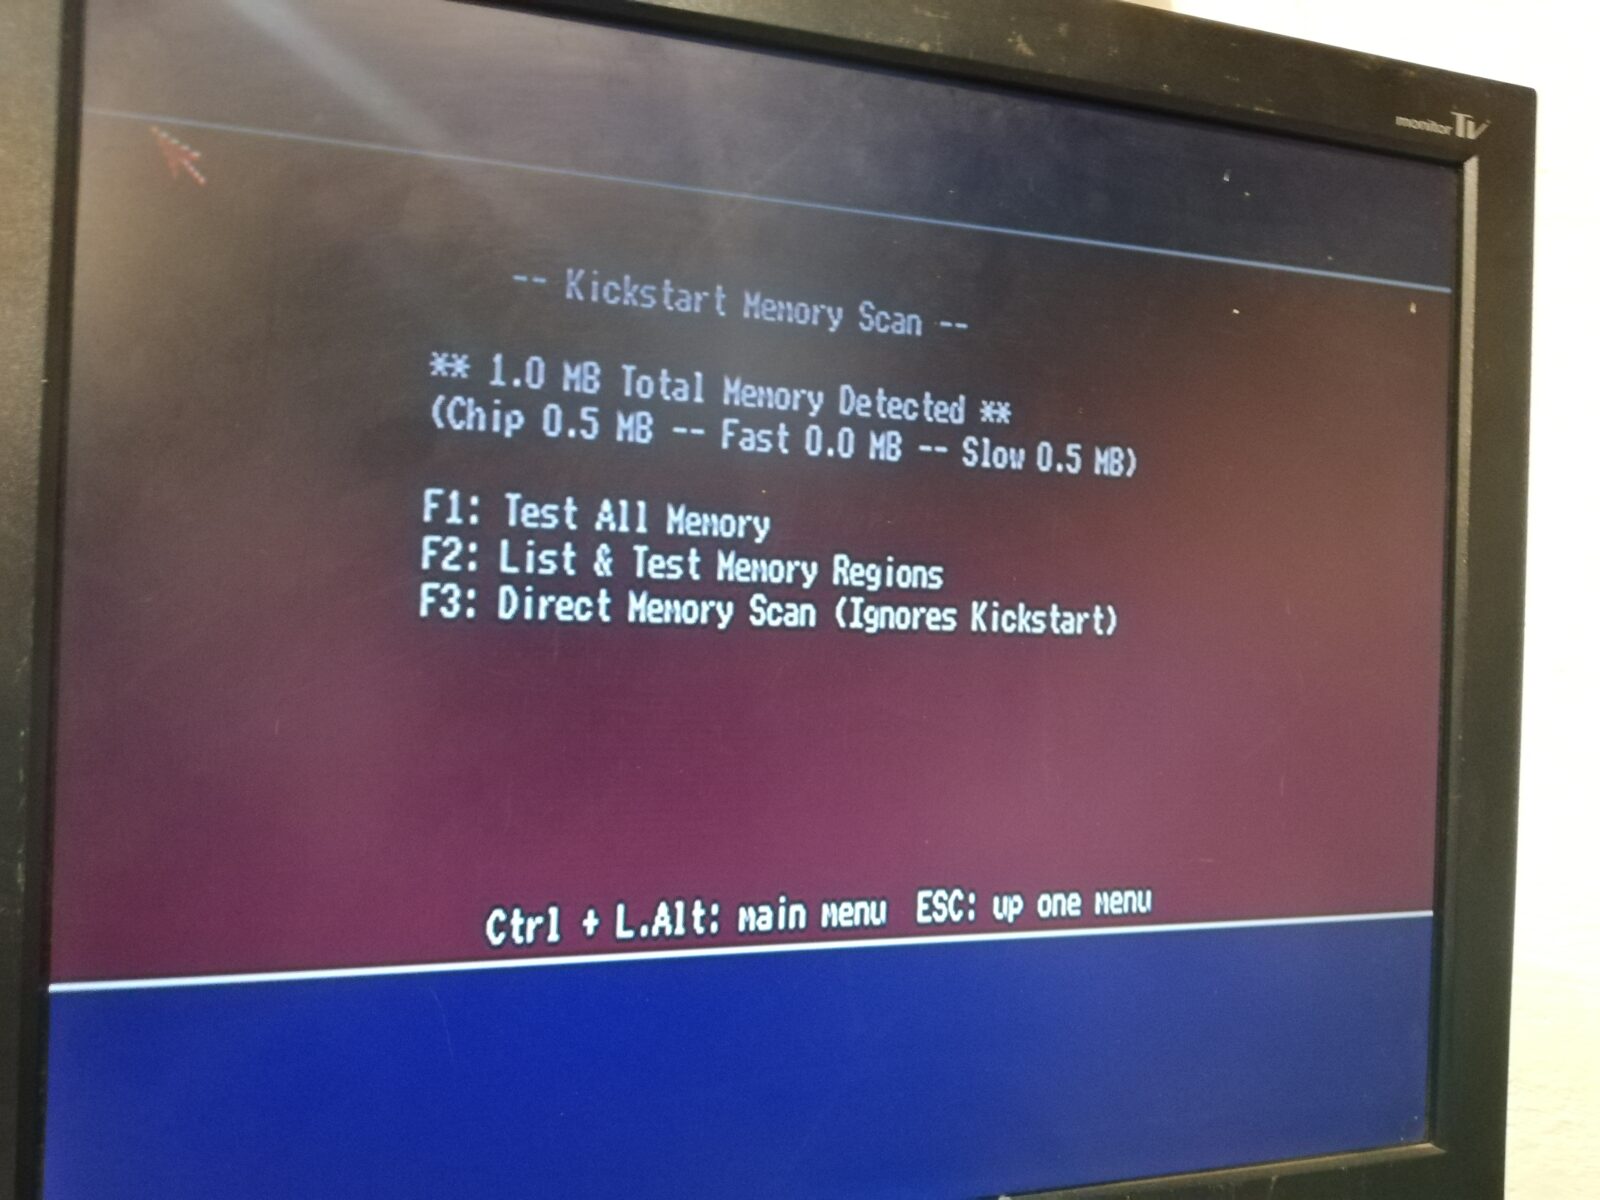
There is one more config that I’ve tested which I think is interesting. It is a 1.5MB expansion that goes under the trapdoor and uses an add-on board that goes between GARY and Mobo. For this test, I had to temporarily remove the U32 hack.
This config results in 0.5MB onboard ChipRAM and 1.5MB SlowRAM.
Final words
As I’ve written at the beginning of the post, these pics are over 3 years old and I am writing it all from the top of my head so I may have messed something up. If so, please correct me in the comments section 🙂
Now you can safely watch our(Lamers) Demo 😉
Outro
If you want to get the retro gear I am manufacturing or hardware modules, please visit shop -> https://retrohax.net/shop/
Please support my work by commenting here, and on my Facebook, Twitter, Reddit, and other social media platforms.


Hi. For sure it is possible to get 2MB chip RAM with only piggy-backing method and without any trapdoor RAM connected ??
Hi, I am not fully sure what do you mean. Are you asking me if it is possible? If yes, then as you can see on pics it is possible with rev 8A.
I have rev 8A and Agnus 8375 and I don’t have any trapdoor RAM installed. I wonder if I will soldier missing RAM onboard to get 1MB CHIP and I will soldier additional 1MB RAM with piggy-backing method I get 2MB chip RAM?
Yes, this is possible, although, trapdoor expansion will be disabled then, so you will have 2MB of CHIP RAM only.
Hello, is it possible to modify my 500 plus to switch the installed 1MB onboard with the 1MB Trapdoor (2MB Chipmem together) to 512kb Chip and 1MB/1,5MB Slowram for compatibility for some games?
Hi,
Hard to answer as I worked on it quite a while ago … like a year++ ago lolol.
I don’t know how it is set in your particular machine but, I think, the easiest way to test it would be to change the JP2 as it manages onboard CHIP.
This will definitely work without trapdoor expansion leaving you with 0.5MB CHIP. If then the trapdoor works then you are golden, if not, then you have to address JP7A too.
I remember this mod in fact when I got my Amiga 500 the dealer was nice enough to open up the machines and sell me one with a Rev 8 MB
!!!super mod. Thanks to this, you can choose a config for everything. Sir, great job!
Cool and useful mod!
Thank you sir 😉