… or how to keep on learning new stuff
Background story
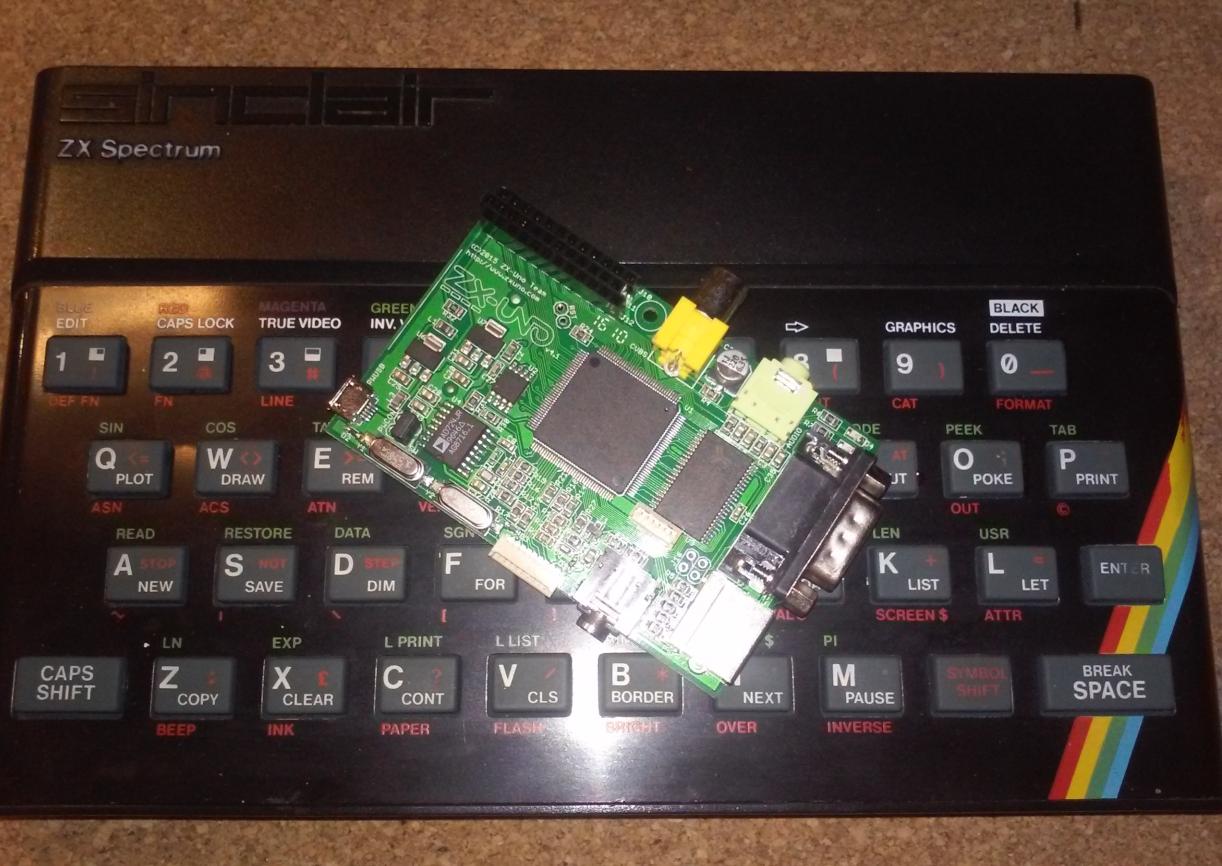
A few days ago, I was visiting my friend Bart030. Bart received a bricked ZX-Uno board for repairs. However, he didn’t have a working Raspberry PI unit so he asked me to work on this broken puppy.
ZX-Uno is an awesome project by a Spanish team of guys.
- McLeod – Reviews and proposes, is a de facto partner.
- Superfo – Router, which is responsible for designing the PCB.
- AntonioVillena – Initial idea, scheme design, and prototype distribution.
- Quest – Ports of secondary cores. Multiboot system. Firmware and prototypes collaboration
- Hark0 – Graphic and web designer.
They did a great job with this project. Bringing this kind of device nowadays is IMO super cool and I wish those guys the best of luck in future upgrades and projects.
Why I wrote this post?
Well, I was trying to fix this lil machine and after a while of googling, I figured that most of the important information is written in Spanish. I agree that a lot of people speak and understand Spanish but I am not one of them … even after having 0.7L of whiskey, all I can say in Spanish is “Cerveza porfavor” … and I am not even sure if it is correct 😀
The juice
Riiiiighty!
So this little puppy was not booting at all – a blank screen after supplying power to it. The owner of ZX-Uno said that it happened after he tried to upgrade firmware. I started to google stuff and I’ve found a few interesting topics.
So it turns out that it is possible to make a JTAG programmer out of RaspPI!
I completely wasn’t aware of that!
There is a fully working software that does the job – URJTAG
So YEAH, Xilinx chips can be programmed using a simple cable connected to Raspberry PI GPIOs.
According to one of ZX-Uno’s creators, that was enough to recover dead ZX-Uno from the dark abyss. Antonio Villena put a great tutorial online on forums … unfortunately in Spanish. However, that wasn’t much of a problem – google translate FTW!one!eleven111!11!
There are a few ways to recover the bricked device from a “lost” state and I’ll focus on JTAG using RPIs GPIO today.
Preparing RPI OS
A fresh install of Raspbian had to be deployed on my RPI 1 B+. I had one already but it was kinda outdated so quick download and install and fixed it.
Next, I had to download and install urjtag from GIT
sudo apt-get update
sudo apt-get install autoconf autopoint libtool
sudo apt-get install libreadline-dev python-dev git
git clone git://git.code.sf.net/p/urjtag/git urjtag-git
cd urjtag-git/urjtag
A file in src/cmd/cmd_bfin.c had to be edited by simply adding a line: #define _SYS_UCONTEXT_H
Everything was ready for compilation.
./autogen.sh
make
sudo make install
sudo ldconfig
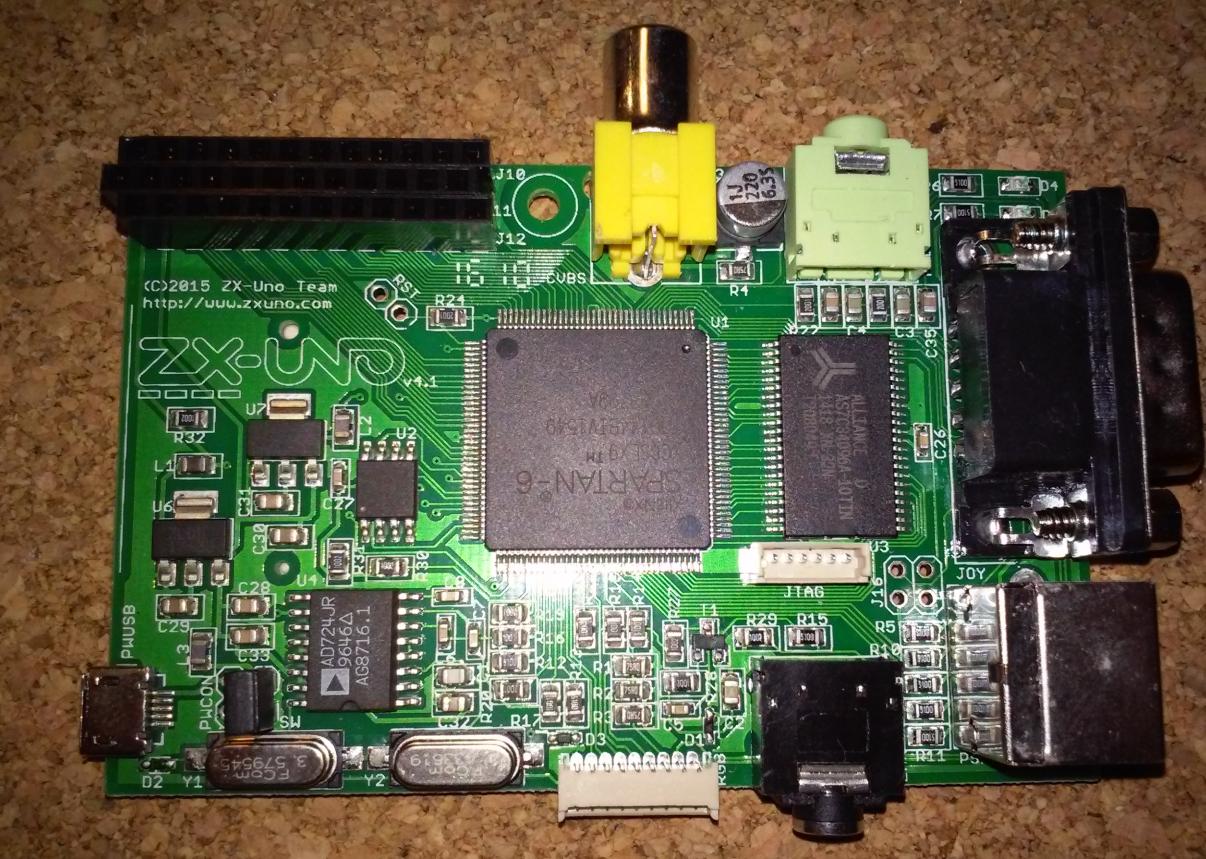
JTAG cable
Ok, with the software ready and waiting, I could start to prepare the cable. I didn’t have a proper 6-pin connector so I had to solder the cable directly to JTAG pins on Zx-Uno.


Only five out of six wires are needed because I do not need to supply power (3.3V) to the FPGA chip via JTAG, it will be powered by the original Zx-Uno PSU.
Here is a PDF with details
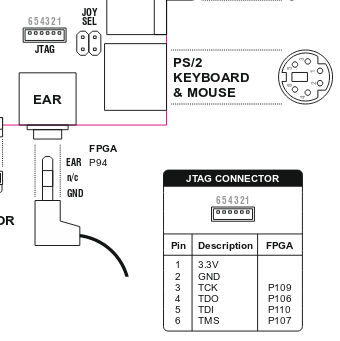
Connecting it to RPI is quite straightforward.
Zx-Uno Raspberry pi JTAG Pin GPIO Pin TMS 6 ------ GPIO6 31 TDI 5 ------ GPIO13 33 TDO 4 ------ GPIO19 35 TCK 3 ------ GPIO26 37 GND 2 ------ GND 39
Recovering
There are two files needed for recovery.
First, is recovery.bit provided by Antonio and which will be uploaded to FPGA through JTAG straight from Raspberry PI and a second FLASH.ZX1 which has to be uploaded to the root directory of the SD card and plugged into Zx-Uno to reflash its firmware from the BIOS menu.
Everything was connected and ready but it was Saturday evening … aaaaand…
… and I had to leave this project for another day.
Another day came and as usual, I had to recover myself first. Quick recovery.beer was uploaded and right after that, I was ready for recovery.bit upload. I’ve launched urjtag, configured GPIO, and tried to detect the FPGA chip.
sudo jtag
config of GPIOs inside urjtag
cable gpio tdi=13 tdo=19 tck=26 tms=6
detect
SUCCESS!

So, I could start to load a recovery.bit with the following command inside urjtag.
pld load recovery.bit
Here is how it looked … feat. my new Lamers scarf ;P
Zx-UNO Recovery – Loading recovery.bit through RPI (JTAG) from pit on Vimeo.
After a while, I was greeted with Zx-Uno limited BIOS menu.

With the SD card plugged in I wanted to re-flash software however, I’ve encountered the following FAIL ;P
Zx-UNO Recovery – SD Card FS Fail :> from pit on Vimeo.
It turned out that FAT32 wasn’t cleanly unmounted and a dirty bit was set on it so I moved the SD card to my Linux box and did a quick:
fsck.fat /dev/sdb1
Back to UNO = Mission complete 😉
Zx-UNO Recovery – SD Card burn successful ! from pit on Vimeo.
With new FLASH.ZX1 uploaded for FPGA there was nothing left except testing.
Zx-UNO Recovery – Final test run! Works !!!11oneone!1eleven1 from pit on Vimeo.
YAY! It’s ALIVE!
Also FYI there is a nice case model for all of you 3D printing fans 😉
Greetz
- Zx-Uno team – for awesome project
- Bart030 – for repair opportunity
- Owner – for bricking the device 😉
- Lamers – for an awesome scarf. lol 😀
OUTRO
If you want to get retro gear or hardware modules, please visit our shop
New products are being added every month.
Also, please support our work by spreading info about it.
Without your support, we simply cannot grow and we have a lot of new cool retro hardware (and more) products to come 
Thanks for this! I was able to unbrick our 512k ZX Uno using this guide 🙂
Some notes:
you have to compile the latest URJTAG from git, the one in APT repo will not work (will not recognize stepping)
I got error “fatal error: Python.h: No such file or directory” during compilation which was fixed by installing python3-dev
to flash, I had to use a 128 MB SD card – bigger ones didn’t work (flash progress bar never starts to move) even though a 1 GB card worked happily with ZX Uno when not flashing stuff
Lacking a proper JTAG cable and not wanting to solder, I resorted to a “crazy” solution of using 5 dupont jumper wires (female-female), where I removed the plastic connector case on ZX Uno side, compressed the “hole” into an oval using pliers and wrapped the end in kapton tape to prevent the pins from shorting. It’s quite a hack, but worked for me 🙂
Great to hear that!
This is an old post so I am not surprised there are issues with the software.
There is a bit newer version of this post here -> https://retrohax.net/debricking-zx-uno-revolutions/
bloody legend m8! thank you heaps fixed my zx-uno
No probs sir! 😀