… or how to figure something out while figuring something out
Intro
Party lulz
The problem
A few days ago, Mccnex/WantedTeam asked me to fix his spare Amiga 600 keyboards. I was like “Why not?! Send’em in.”
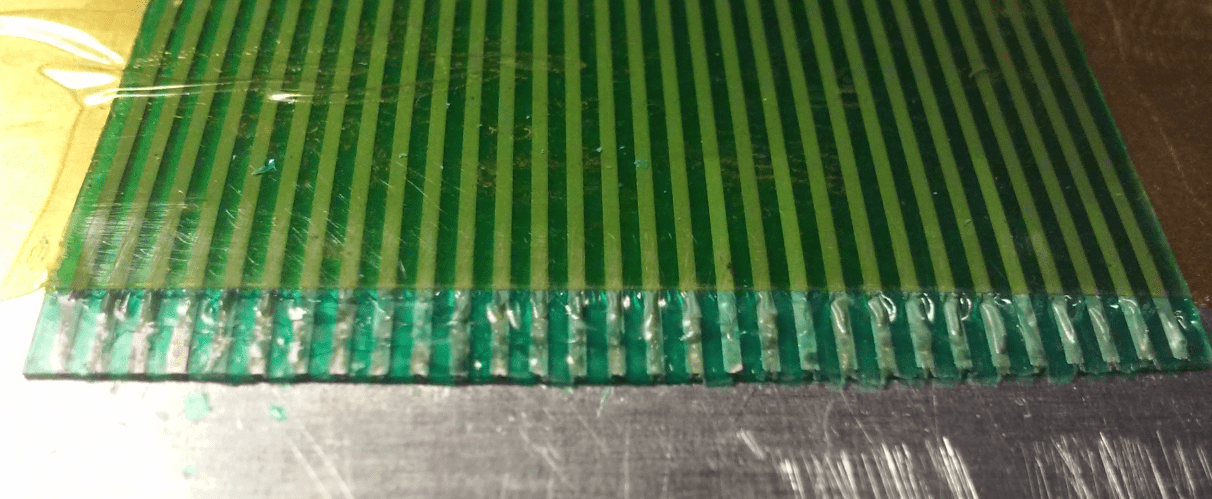
Keyboards came in a package after a few days. It was quite obvious why none is working … at least at the beginning.
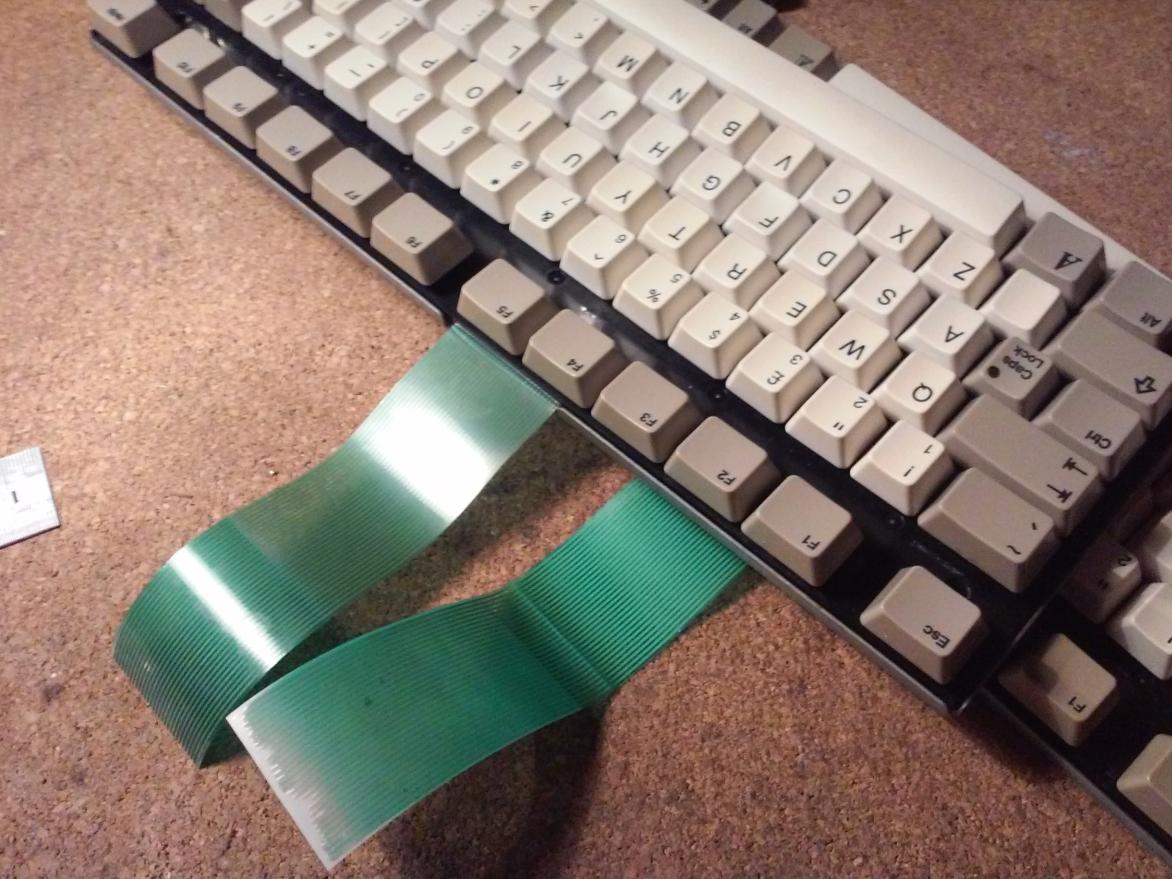

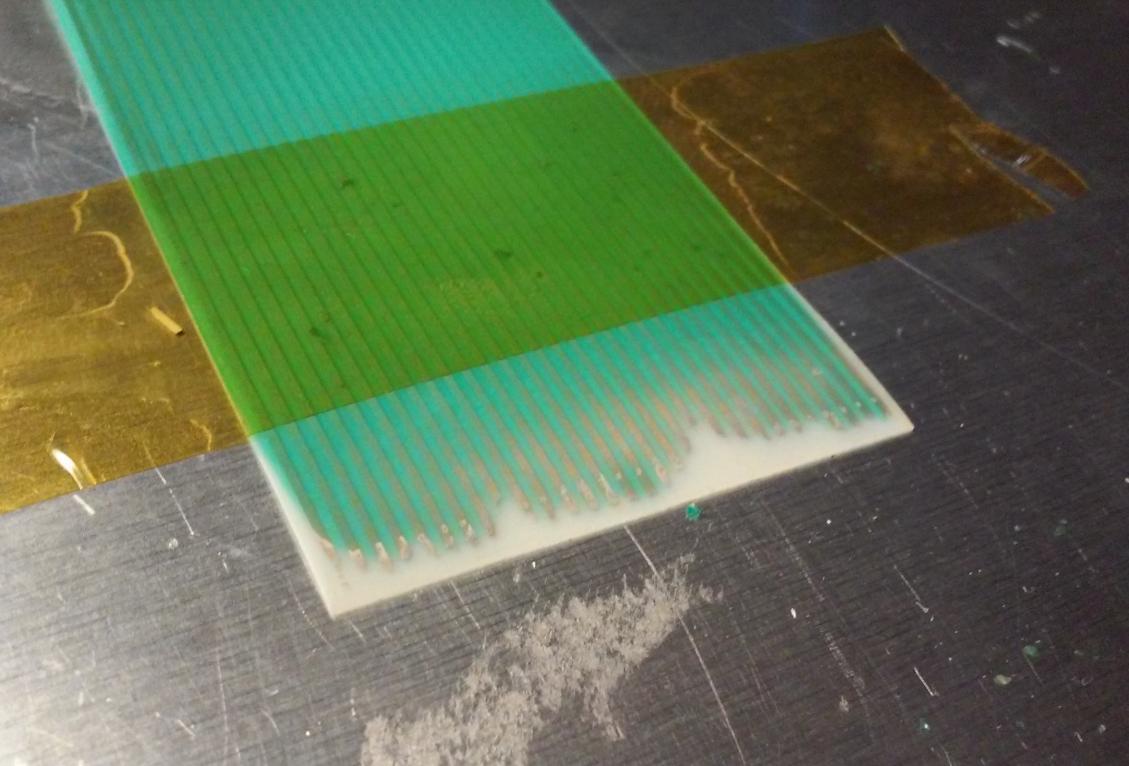
The problem with this ZIF membrane connector is that it is covered with a very thin, green foil layer. As seen in the photos, someone already tried to remove this layer by sanding it off, however, failed miserably because underlying silver traces are super fragile. My first idea was to chemically remove that green foil. I’ve gently cut a small grove to remove foil easier while it’s softened by chemicals.

At first, I tried Methanol but it only worked partially
Then another idea came – epoxy solvent.
It contains various hydrocarbons like Xylene for example.
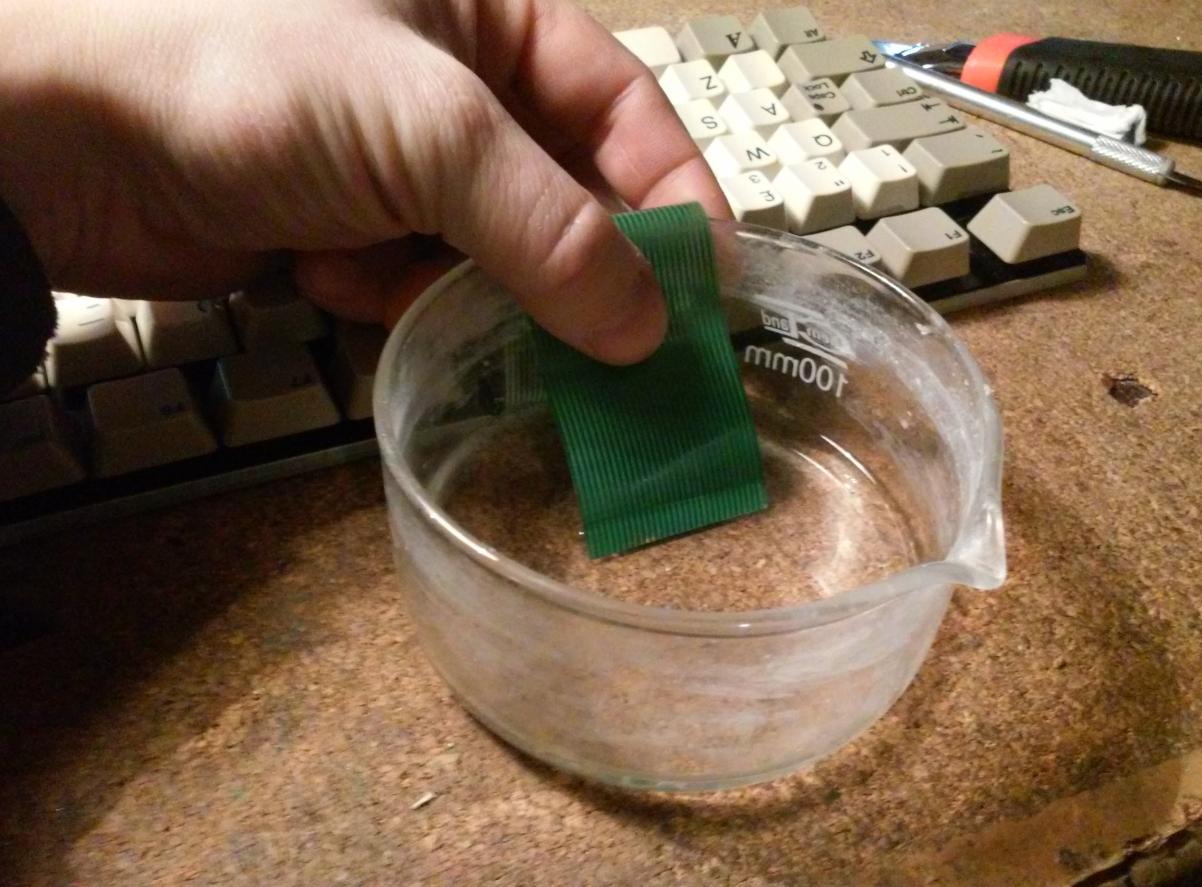
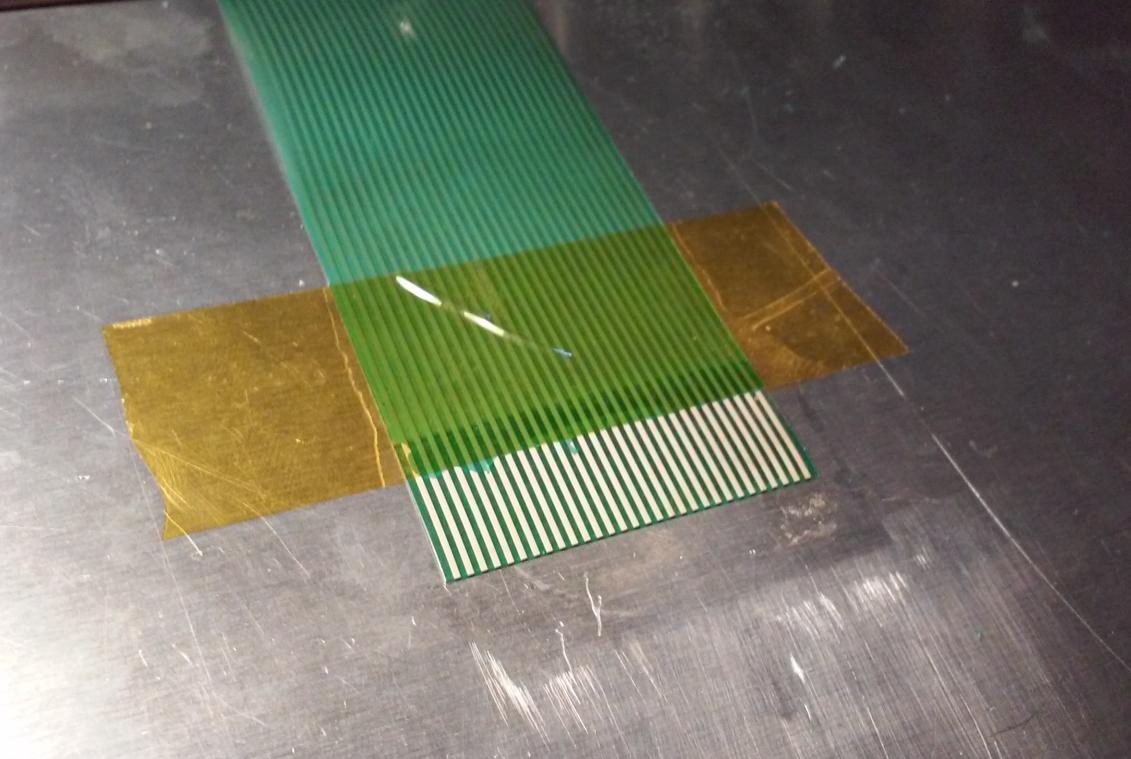
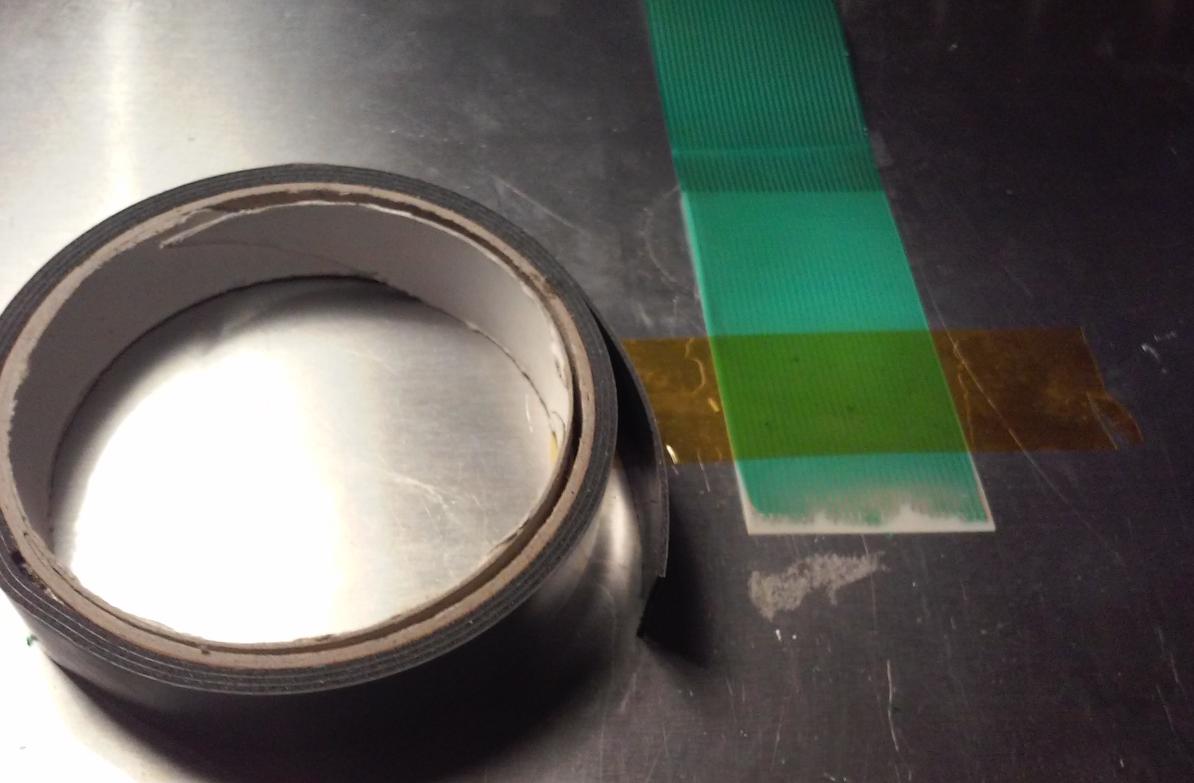
This time, I’ve used Kapton tape to hold the membrane in place and to make sure that the solvent will evenly cover the treated area.

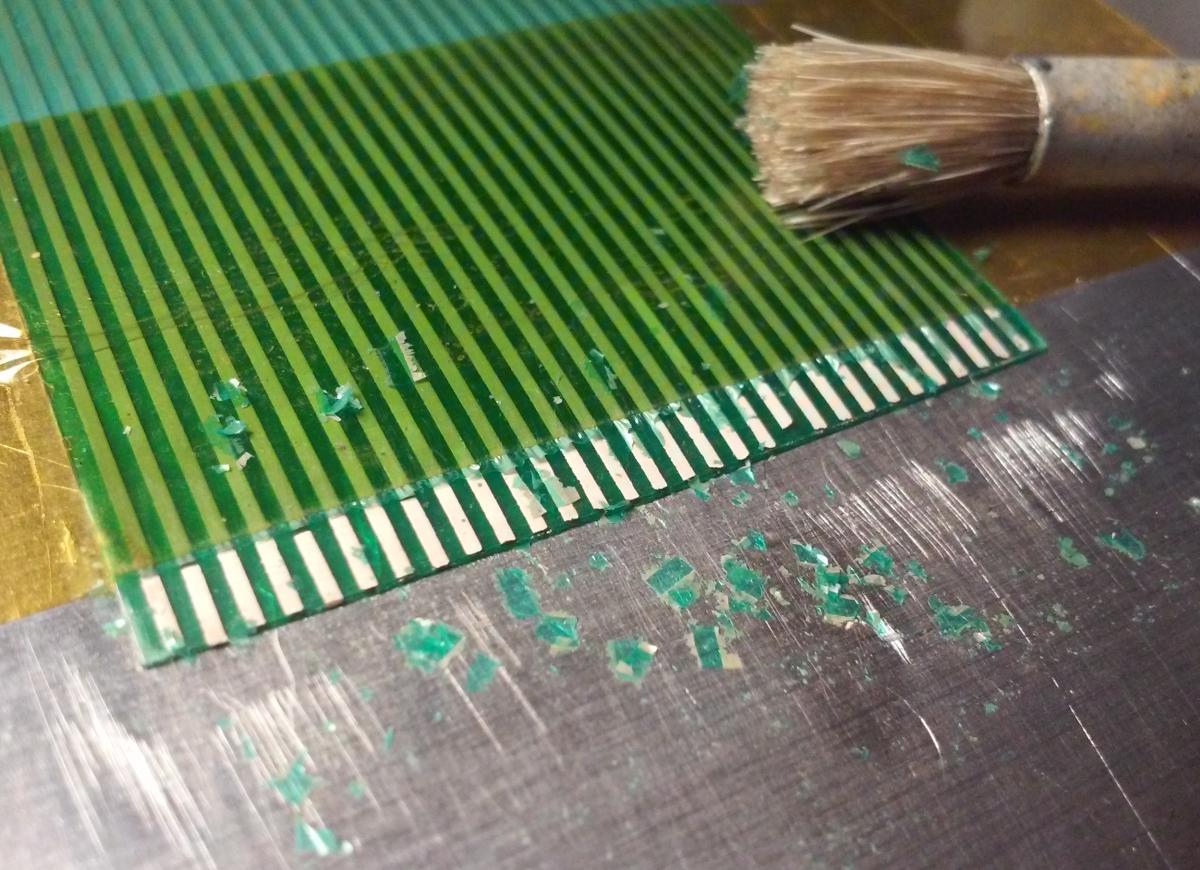
I applied the solvent and waited for a while. As I suspected, it started to soften a foil.
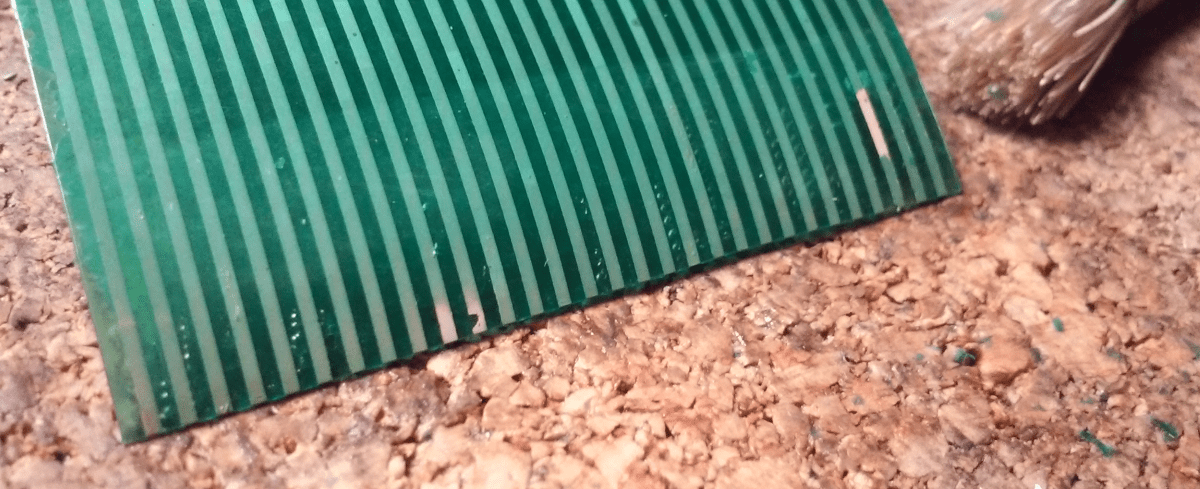
Several seconds later, I could start gently scraping off green gooey with a brush.
Since this job is kinda delicate and messy, I was really satisfied with the end effect. I’ve waited a few minutes to let the solvent dry and started to remove Kapton tape …. aaaaand then the second hack was discovered lol.
While removing Kapton tape I discovered that this thin, green piece of crap sticks to it and leaves nicely and evenly exposed silver traces.

I quickly looked in my drawer for a tape with a stronger adhesive layer and tried it on the membrane foil.

A couple of tries later …
Actual job
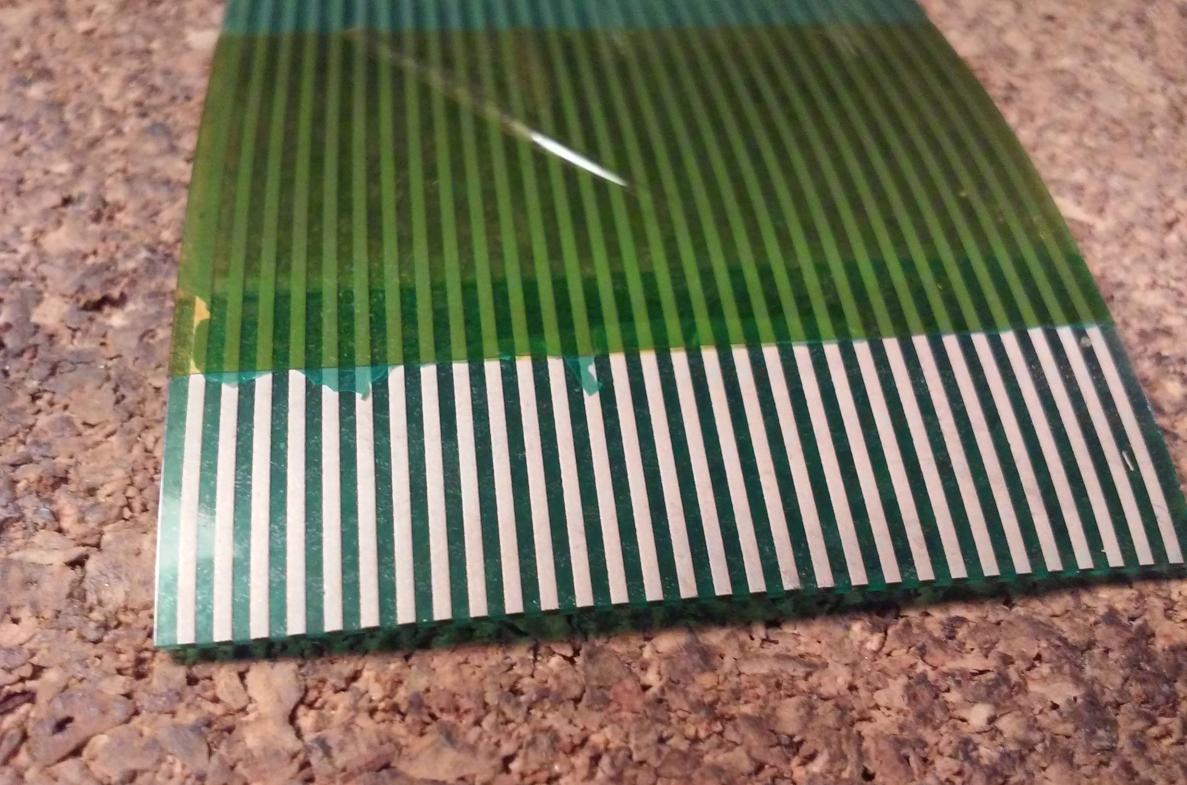
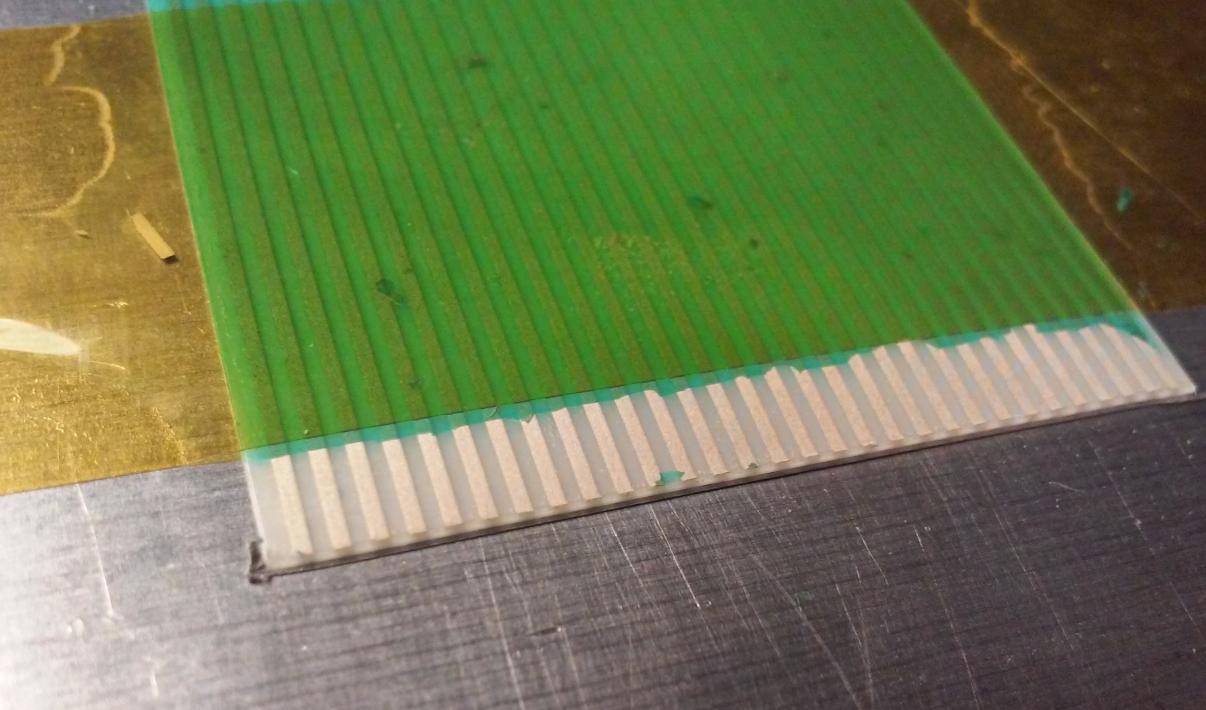
Now, after discovering these two hacks I did the same procedure with a second keyboard membrane. Below is how it looked.

Not the end
At this point, I was finally able to test keyboards.
After a quick assembly, one of the keyboards proved to be working flawlessly. Unfortunately, the other one was failing on keys “2 W S X” and “4 R F V”.
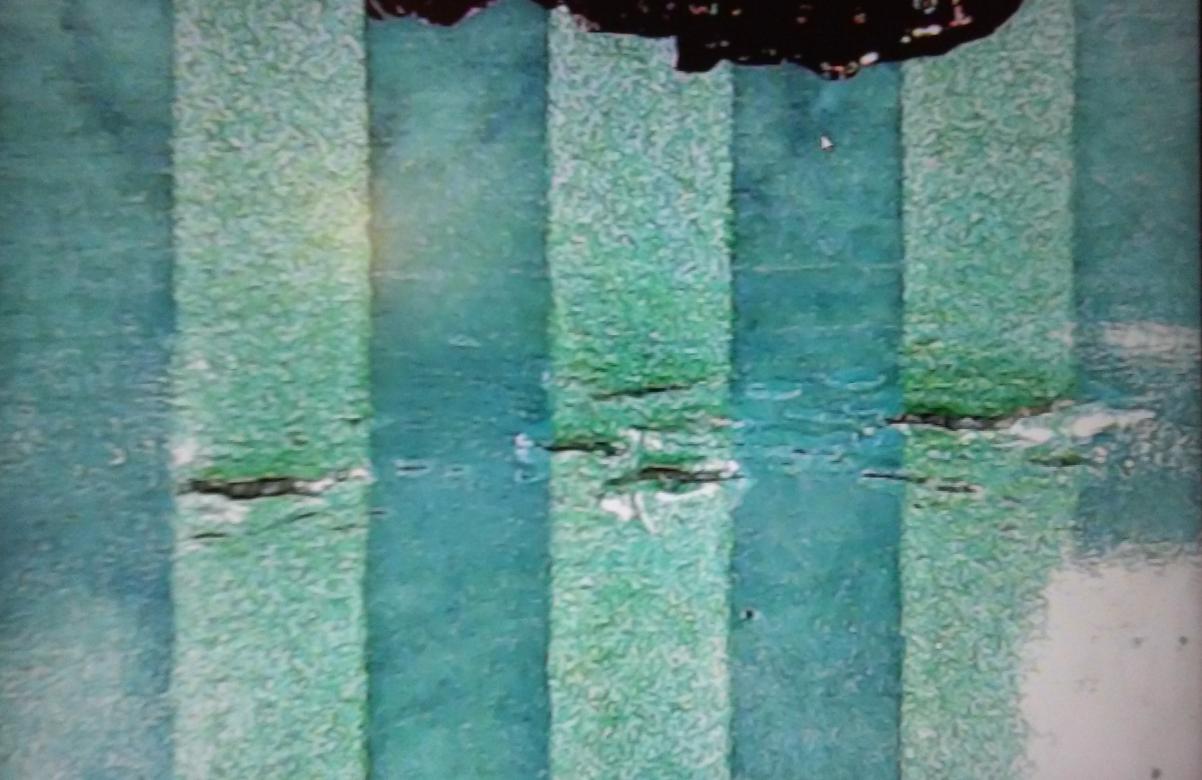
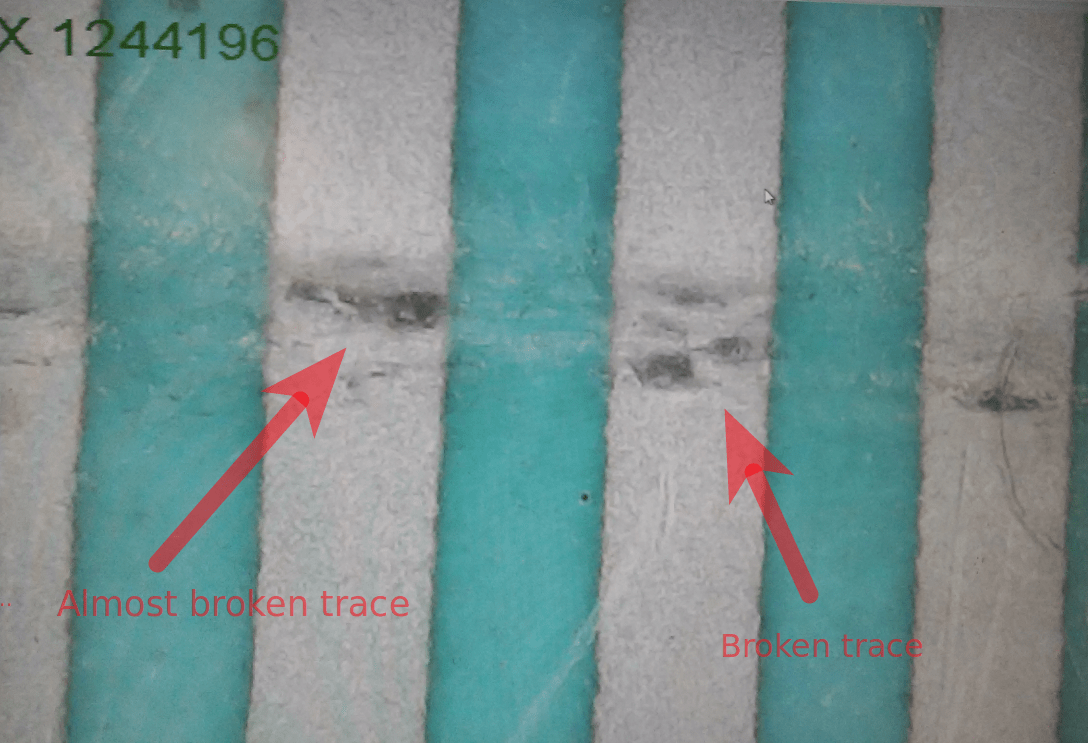
My first wild guess was that one of the traces is broken somewhere but a naked-eye inspection didn’t reveal a problem. I had to use a microscope and track the whole trace to spot it. And I’ve found it.
Someone bent a membrane too much which caused a break.
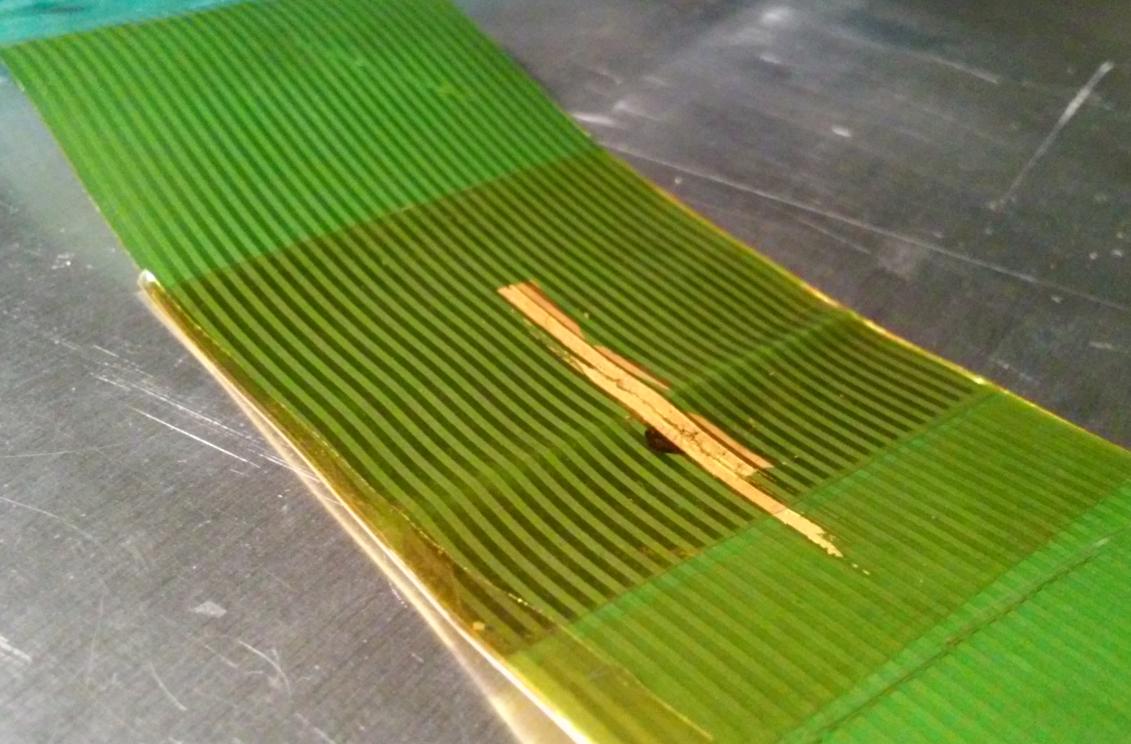
A neat plan was prepared. I only had to join broken parts of traces with special conductive silver glue that I had in a drawer. The “only” part, proved to be quite hard to achieve. I’ve covered all intact traces with tape and attempted to remove green foil with a previous “tape pull” hack.
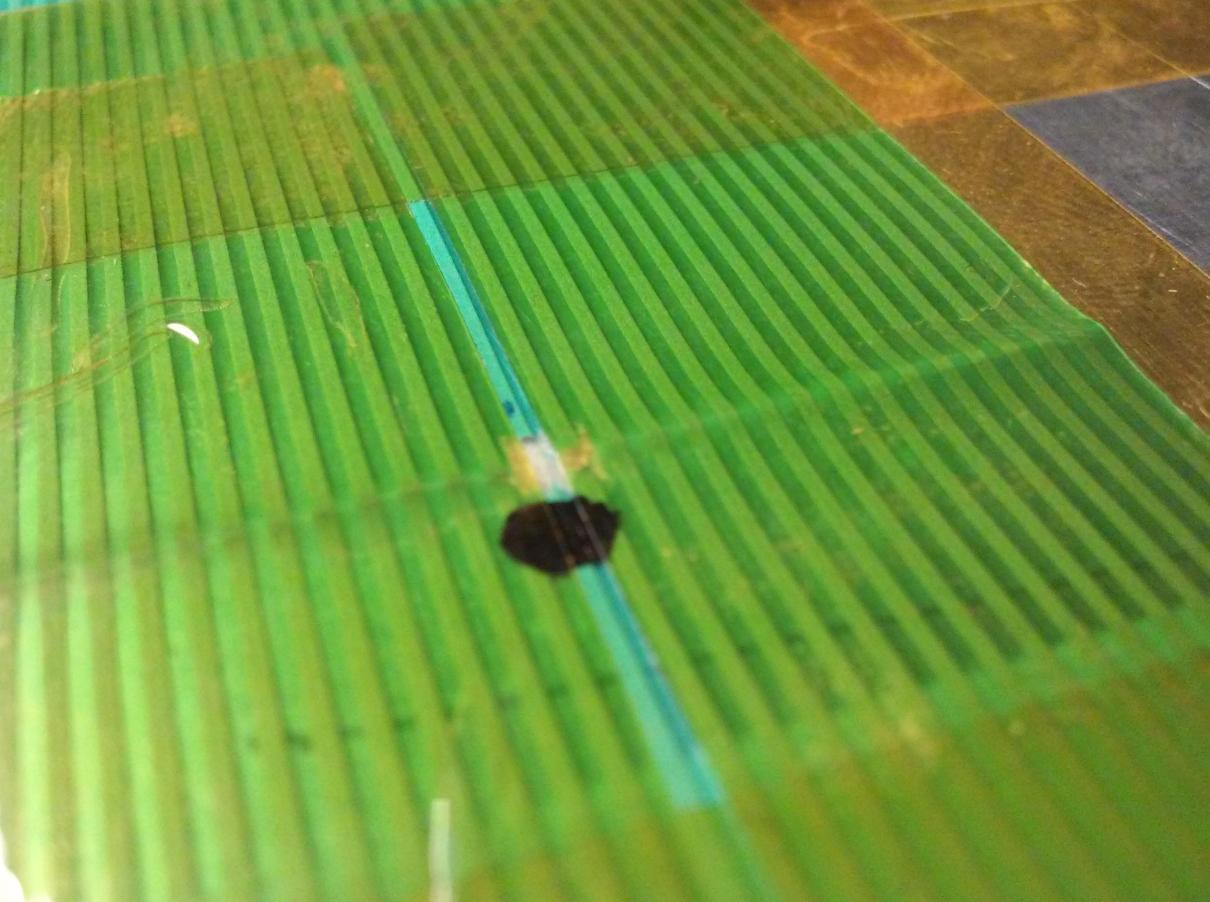
This is how it looked.
The fix

The black spot was just to mark a broken trace.
Next, I applied silver glue to a broken trace. Since silver-based glue cures itself at a certain temperature, I’ve started to heat it up with a desktop lamp – a gentle option
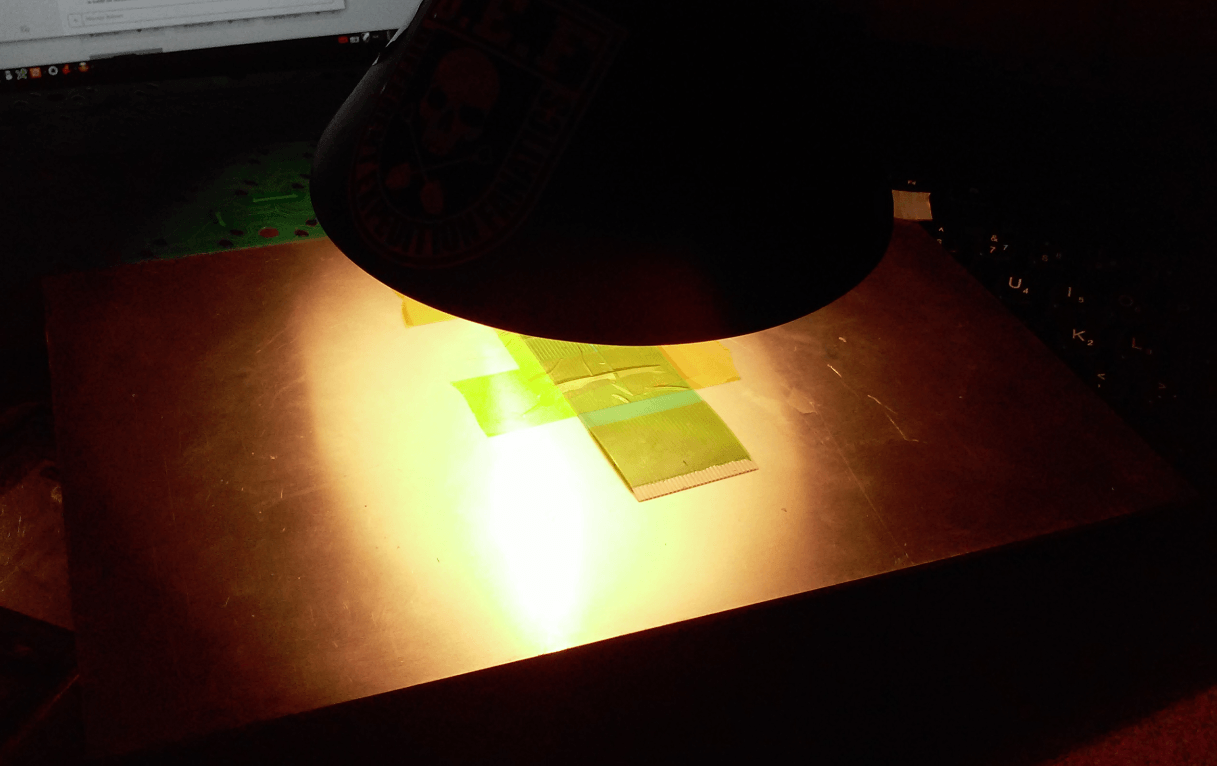
That was quite a failure 😀
It didn’t work at all, so I’ve grabbed a HotAir blower and heated it a bit stronger 😀
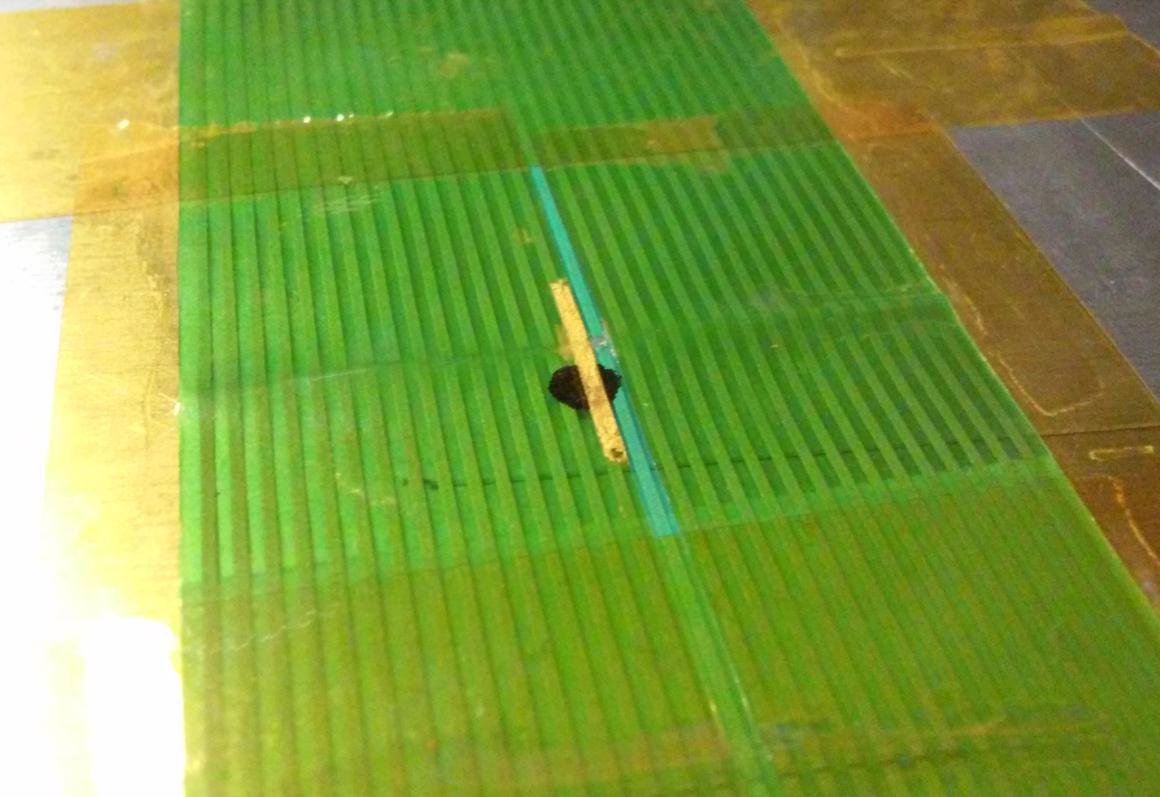
Finally, it worked and the glue cured.

Unfortunately, it appeared I wasn’t super precise and a trace was a bit wider than I would like it to be.
Anyway, at this point, I could finish a job, but since I’ve spotted a nearly broken trace just next to the first one, I’ve decided that I’ll fix that one too.
A similar procedure was launched.
Both traces are joined with silver glue.
At the end of the whole job, I figured that it would be good to add additional anti-bending protection. I’ve used a popular thick, rubbery-like door sealing tape to achieve it.

And that’s it 🙂 Two old keyboards were rescued from the Abyss 😉
Cheers 😉
OUTRO
If you want to get retro gear or hardware modules, please visit our shop
New products are being added every month.
Also, please support our work by spreading info about it.
Without your support, we simply cannot grow and we have a lot of new cool retro hardware (and more) products to come
Great job with the tape method. However, the tape method only works with green membranes and not with blue ones. What is the solution with the blue menbrane?
Good question but I don’t have an answer for it.
I just didn’t come across a worn-out blue-type membrane yet 🙁
I did the perfect version of your hack…It looked amazing, super clean, even better then the great job you did. Imagine my surprise when I installed the keyboard it back into the machine and none of the keys worked!!!
my guess it that the connector is now not making a good connection to the cable. Did you have any issues?
Hmm, weird. All membranes that I’ve fixed worked perfectly fine. No issues at all. If nothing work then maybe it is not a keyboard membrane issue?
To make it a bit easier, there are now replacement keyboard membranes available for the A500, A600 and A1200 – https://www.sellmyretro.com/search/naturalSearch?keyword=amiga+membraine
Yup, I saw it there 🙂 I also manufacture my own and sell it in the webshop section -> https://retrohax.net/product-category/amiga/
How long has your repair lasted and can you name the silver paint used? I have found all those conductive pastes and glues dry out, flake off, do not conduct well etc. Product used etc is very important.
Would like to see other methods that use conductive tape or wire- soldering from cct board point to cct board point, effectively jumping /replacing that trace with wire.
Thanks for your info
To be honest I am not sure because these were fixed for a friend of mine. So far he didn’t contact me regarding these repairs so I assume it still works 🙂
Regarding other methods like wire jumpers, I did those too but on a flex circuit of a different type. On these Amiga keyboard strips, the layers of silver are so thin that it will disappear when you touch it with soldering iron.